126
3-6
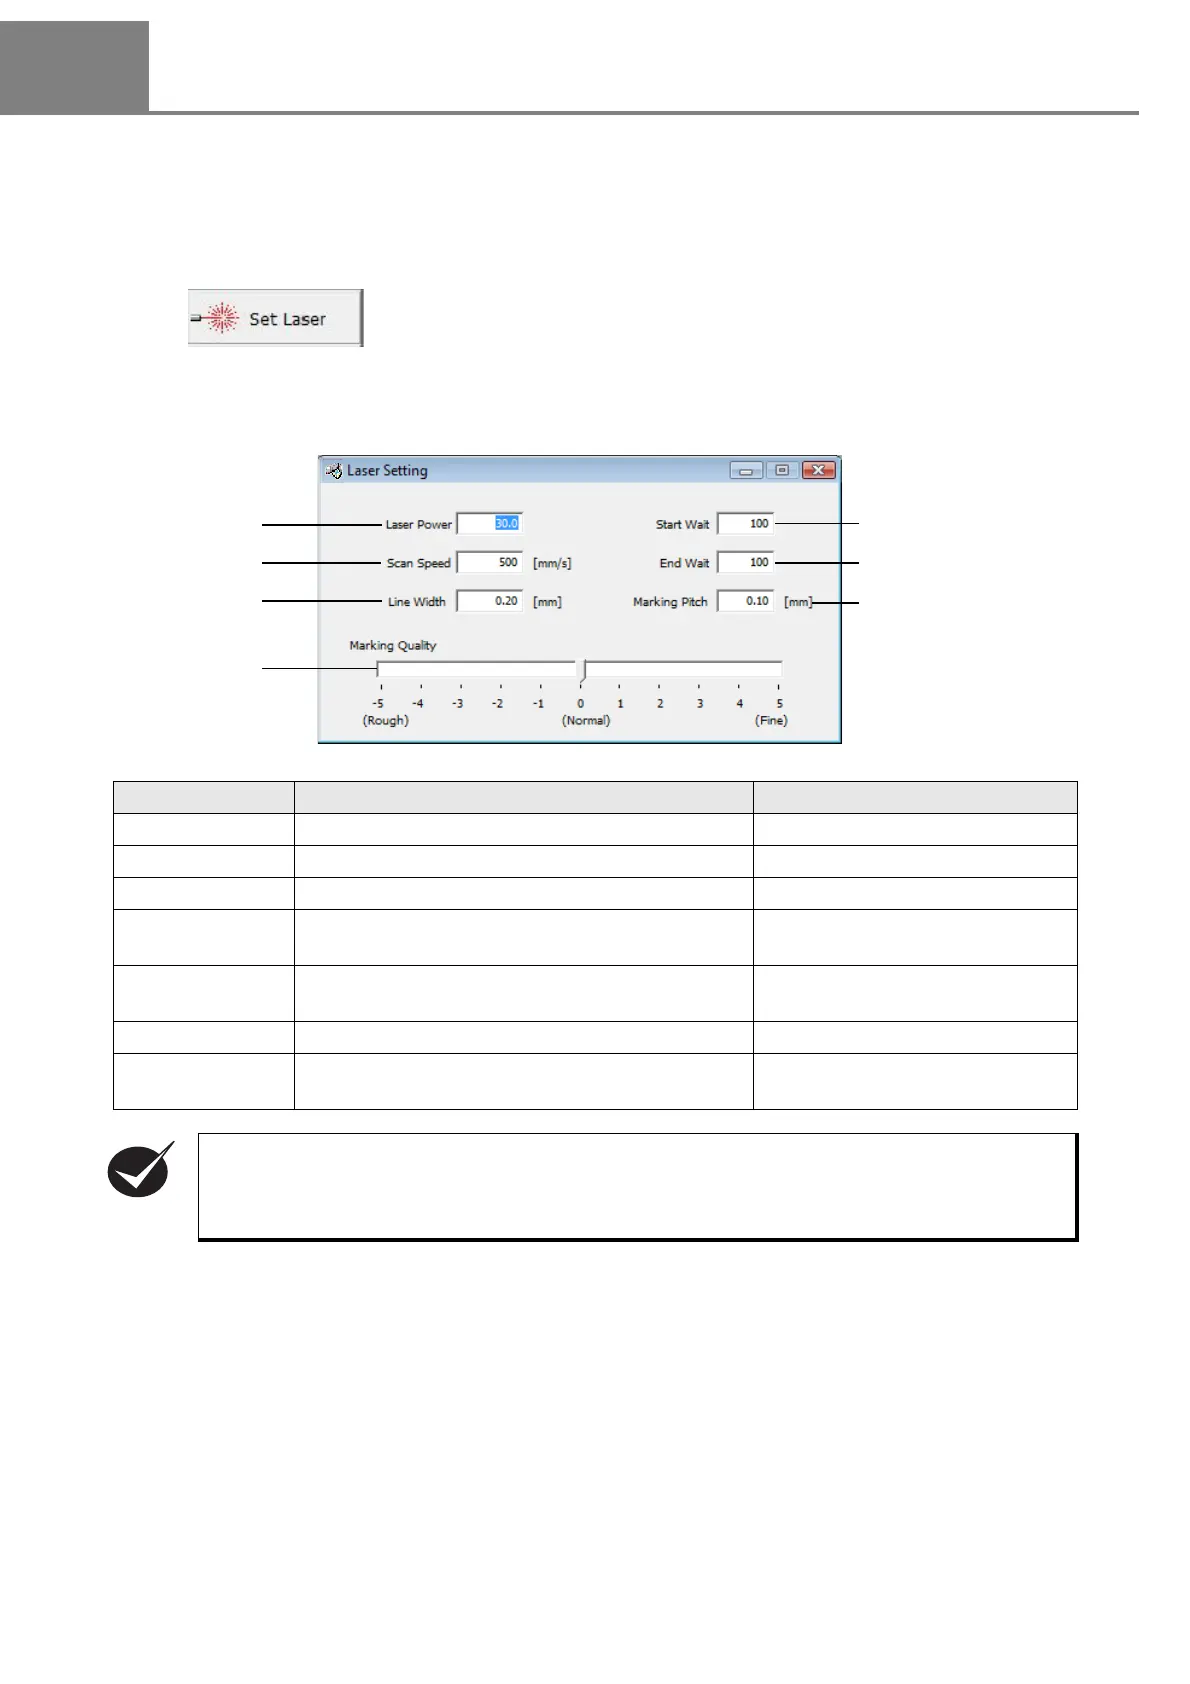
Laser Setting
3-6-1 Screen for Laser Setting
The condition of the marking laser for marking a character string or CAD file is set on this screen.
The “Laser Setting” dialog box is appeared by clicking either selecting “1” method or clicking “2” button
described above.
1 “View” - “Set Laser”
2
Click .
Item Description Setting Range
1. Laser Power Sets the average output of the marking laser. 0.5 to 100.0 (Step: 0.5)
2. Scan Speed Sets max. transfer speed of the laser spot. 1 to 2000mm/s (Step: 1mm)
3. Line Width
Sets the with of the stroke of the marked character.
0.01 to 2.00mm (Step: 0.01mm)
4. Start Wait Adjusts the timing for turning ON the laser at the
start point.
50 to 150 (Step: 1)
5. End Wait Adjusts the timing for turning OFF the laser at the
ending point.
50 to 150 (Step: 1)
6. Marking Pitch Sets the density for marking a bold character. 0.00 to 2.00mm (Step: 0.01mm)
7. Marking Quality Sets the number of segments of the stroke at a
curve part stepwise.
Rough to fine
11 steps
• Even if the scan speed is doubled, the marking time is not reduced to a half.
• If the scan speed is too high, the characters may be distorted. Check the symptom at the test
marking beforehand.