46
2-1
When Using Laser Marker for the First Time
The procedure for using the laser marker for the first time after purchasing from performing test marking the
character (sample show below) until turning off the power supply is described below.
■ Sample
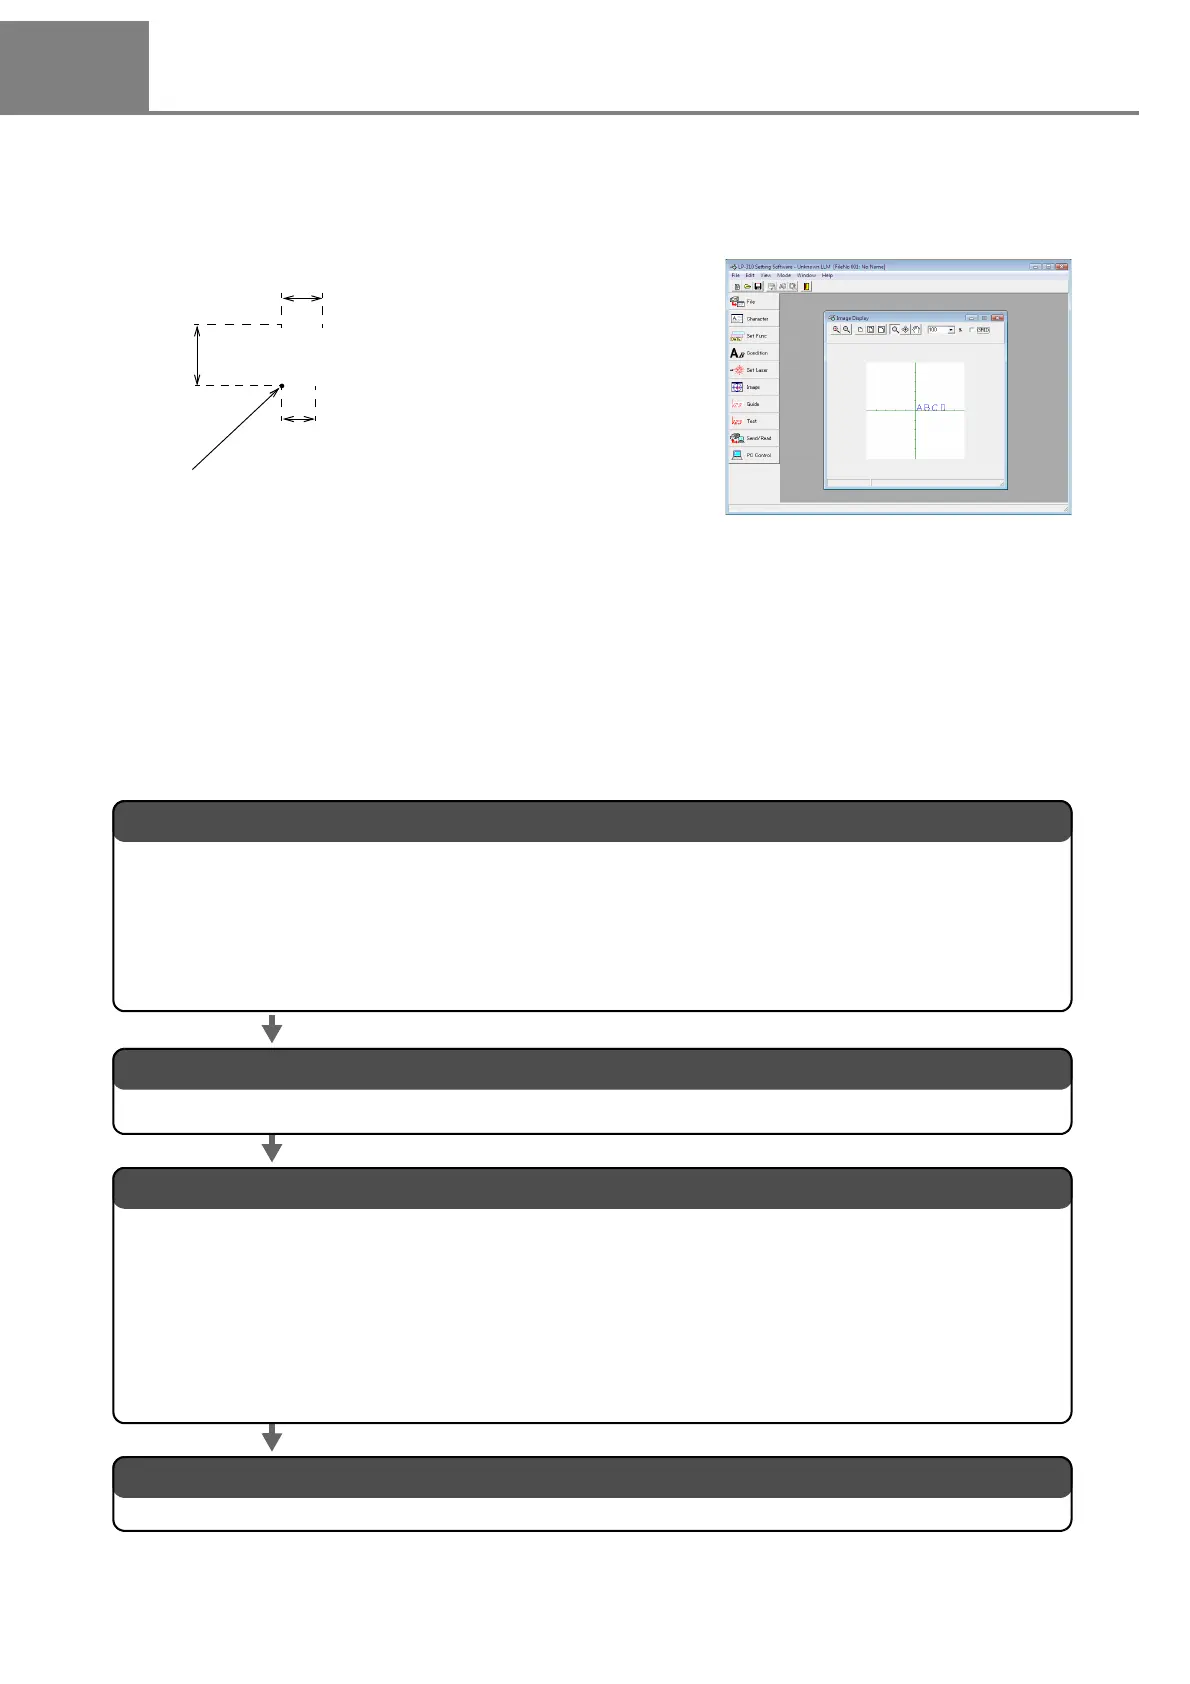
The position and size of the character to be marked are set as follows:
Start Coordinate X : -20mm, Y: 5mm Laser Power : 30
Character Height : 4mm Scanning Speed : 300
Character Width : 4mm
Character Interval : 5mm
* The actual marked character size is differed from the setting character height and character width.
Refer to “3-5-3 Character Condition” (P.115) for details.
■ Flow Chart
ABCD
Character
Height
Setting
Value
4mm
Start Coordinate
X: -20mm, Y: 5mm
Character Width
Setting Value
4mm
Interval Setting Value 5mm
1. Preparation of laser marker operation.
2. Startup of laser marker operation1.
(1) Package Check
(2) Installation of Laser Marker
(3) Installation of “LP-300 series PC Setting Software” to PC
(4) Connecting Laser Marker
The details of these procedures are described in “2-1-1 Preparation of Laser Marker Operation” (P.47).
The detail of this procedure is described in “2-1-2 Startup of Laser Marker” (P.48)
.
Turn off the power of the laser marker.
3. Procedure from Laser Marker Setting to Test Marking
(1) Set the file to be marked.
(2) Input the character to be marked.
(3) Set the marking condition.
(4) Set the laser.
(5) Perform test marking in personal control mode from the personal computer.
(6) Save setting contents.
The detail of these procedures are described in “2-1-3 Procedure from Laser Marker Setting to Test Marking” (P.49).
The detail is described in “2-1-4 Turn OFF Power of Laser Marker” (P.57).