COOLING SYSTEM 21
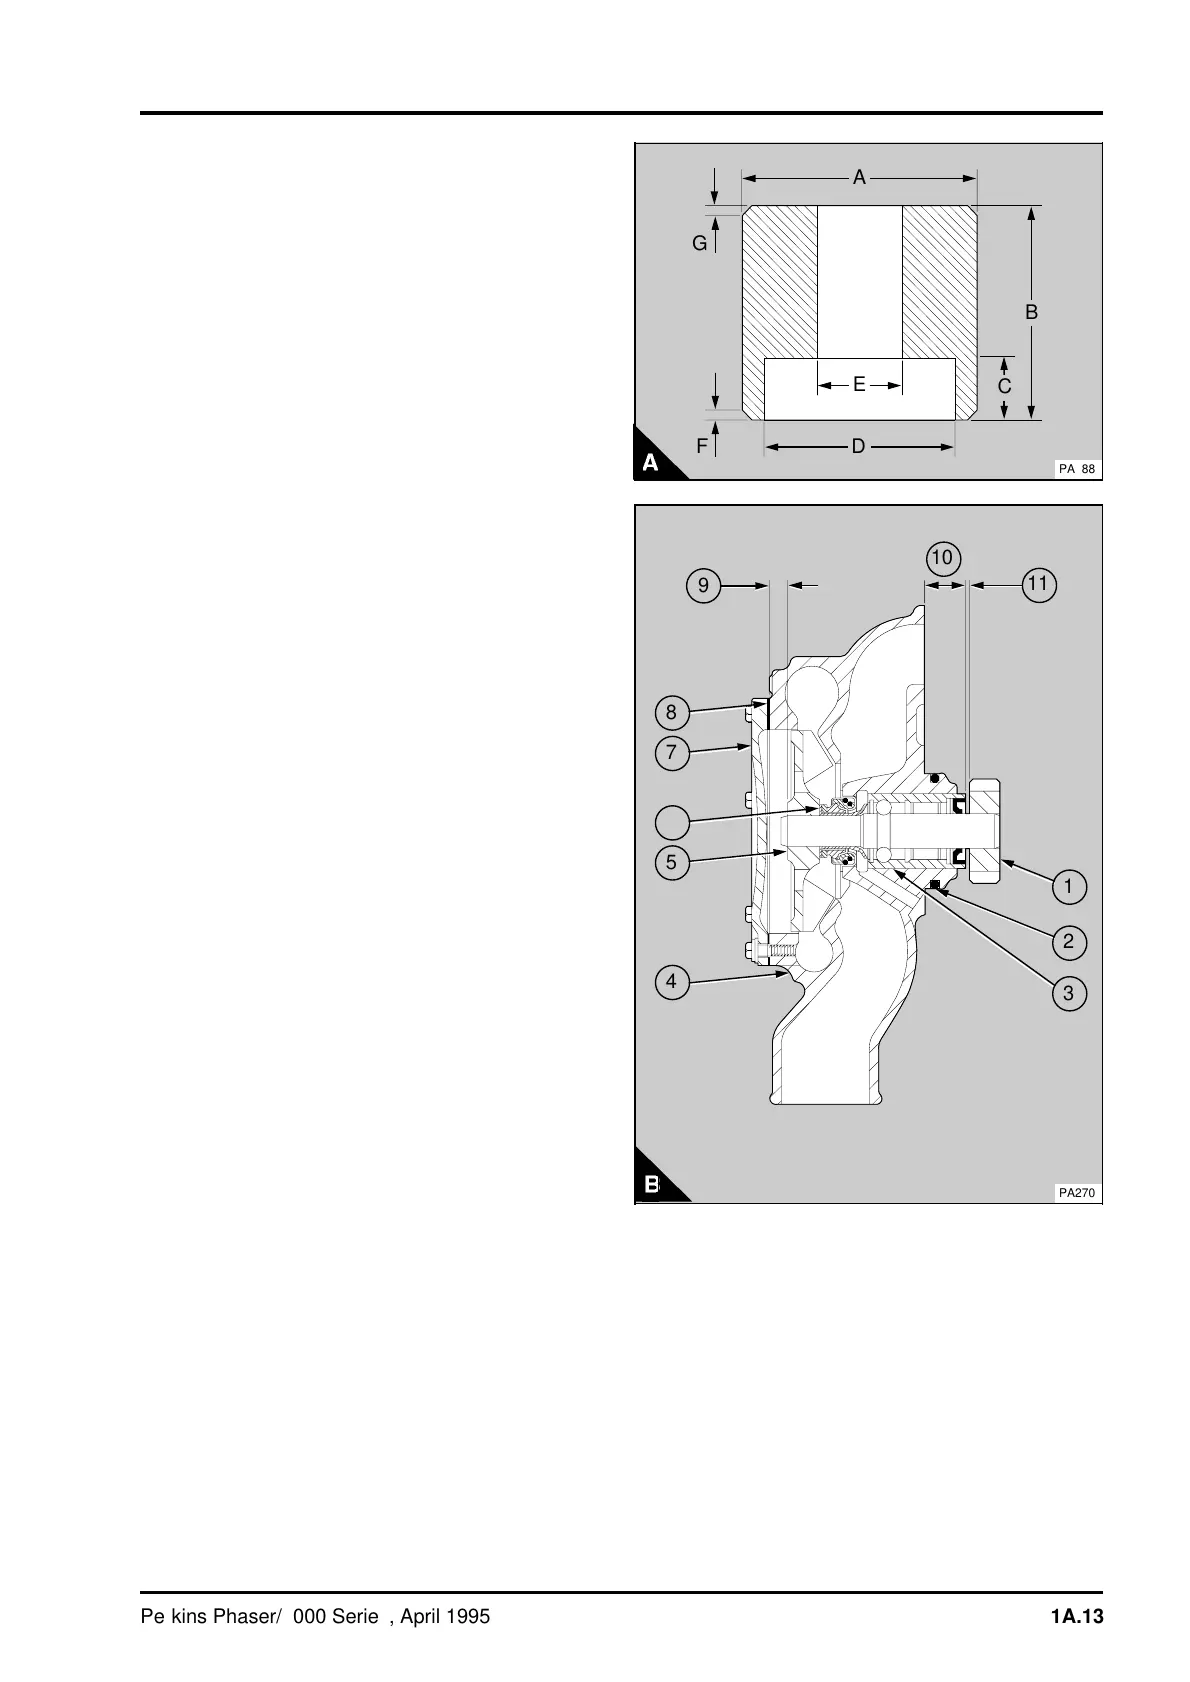
4 A tool (A) can be made to press the coolant seal
into position. The tool should be made of a suitable
material to the dimensions listed below:
A 44,0 mm (1.73 in)
B 40,0 mm (1.57 in)
C 11,6 mm (0.46 in)
D 35,8 mm (1.41 in)
E 16,1 mm (0.63 in)
F 1,00 mm (0.04 in) at 45°
G 2,00 mm (0.08 in) at 45°
The dimensions of the tool to fit the coolant seal,
will ensure that the seal is the correct length after it
is installed. It will also prevent axial distortion of the
seal when it is pressed onto the shaft.
Turn the pump over and support the drive end of
the body. Do not lubricate the coolant seal (B6). It
is important that the seal is not contaminated by oil
or grease and if it is held in the hand, it should be
held by the edge of the flange. Do not damage the
ring of green sealant applied to the body of the
coolant seal just behind the flange. Put the seal into
position on the end of the shaft. Ensure that the
ring of sealant is towards the bearing. Use the tool
to press the seal onto the shaft until the bottom of
the seal flange is in complete contact with the
pump body.
5 Hold the pump with the drive end of the shaft on
a suitable support. With the use of a suitable
distance piece and a flat bar, press the new
impeller (B5) onto the shaft until the front face of
the impeller is 7,1/7,5 mm (0.28/0.30 in) for coolant
pump part number (4131E008) and 6,7/7,0 mm
(0.26/0.28 in) for coolant pumps part number
(4131E011), (4131E014) and (4131E113) below the
front face of the pump body (B9). Remove the flat
bar and distance piece and ensure that the shaft is
free to rotate.
6 Clean the threads in the front face of the pump
body. Fit a new joint (B8) and the cover (B7). Fit
the setscrews and tighten them to 9 Nm (6 lbf ft)
0,9 kgf m. If the setscrews are new, a sealant will
have been applied to the threads by the
manufacturer. If the original setscrews are to be
used again, the threads should be cleaned and a
POWERPART Nutlock applied.
7 Fit a new "O" ring (B2) to the body of the pump.
a
D
a
A
a
a
B
a
a
C
a
F
a
a
G
a
E
PA188
a
a
a
a
a
a
11
a
a
1
a
a
2
a
a
3
a
a
4
5
a
a
6
a
a
a
7
a
a
8
a
a
9
a
a
a
a
10
PA270
Perkins Phaser/1000 Series, April 1995 21A.13