T MER REC©RD NG
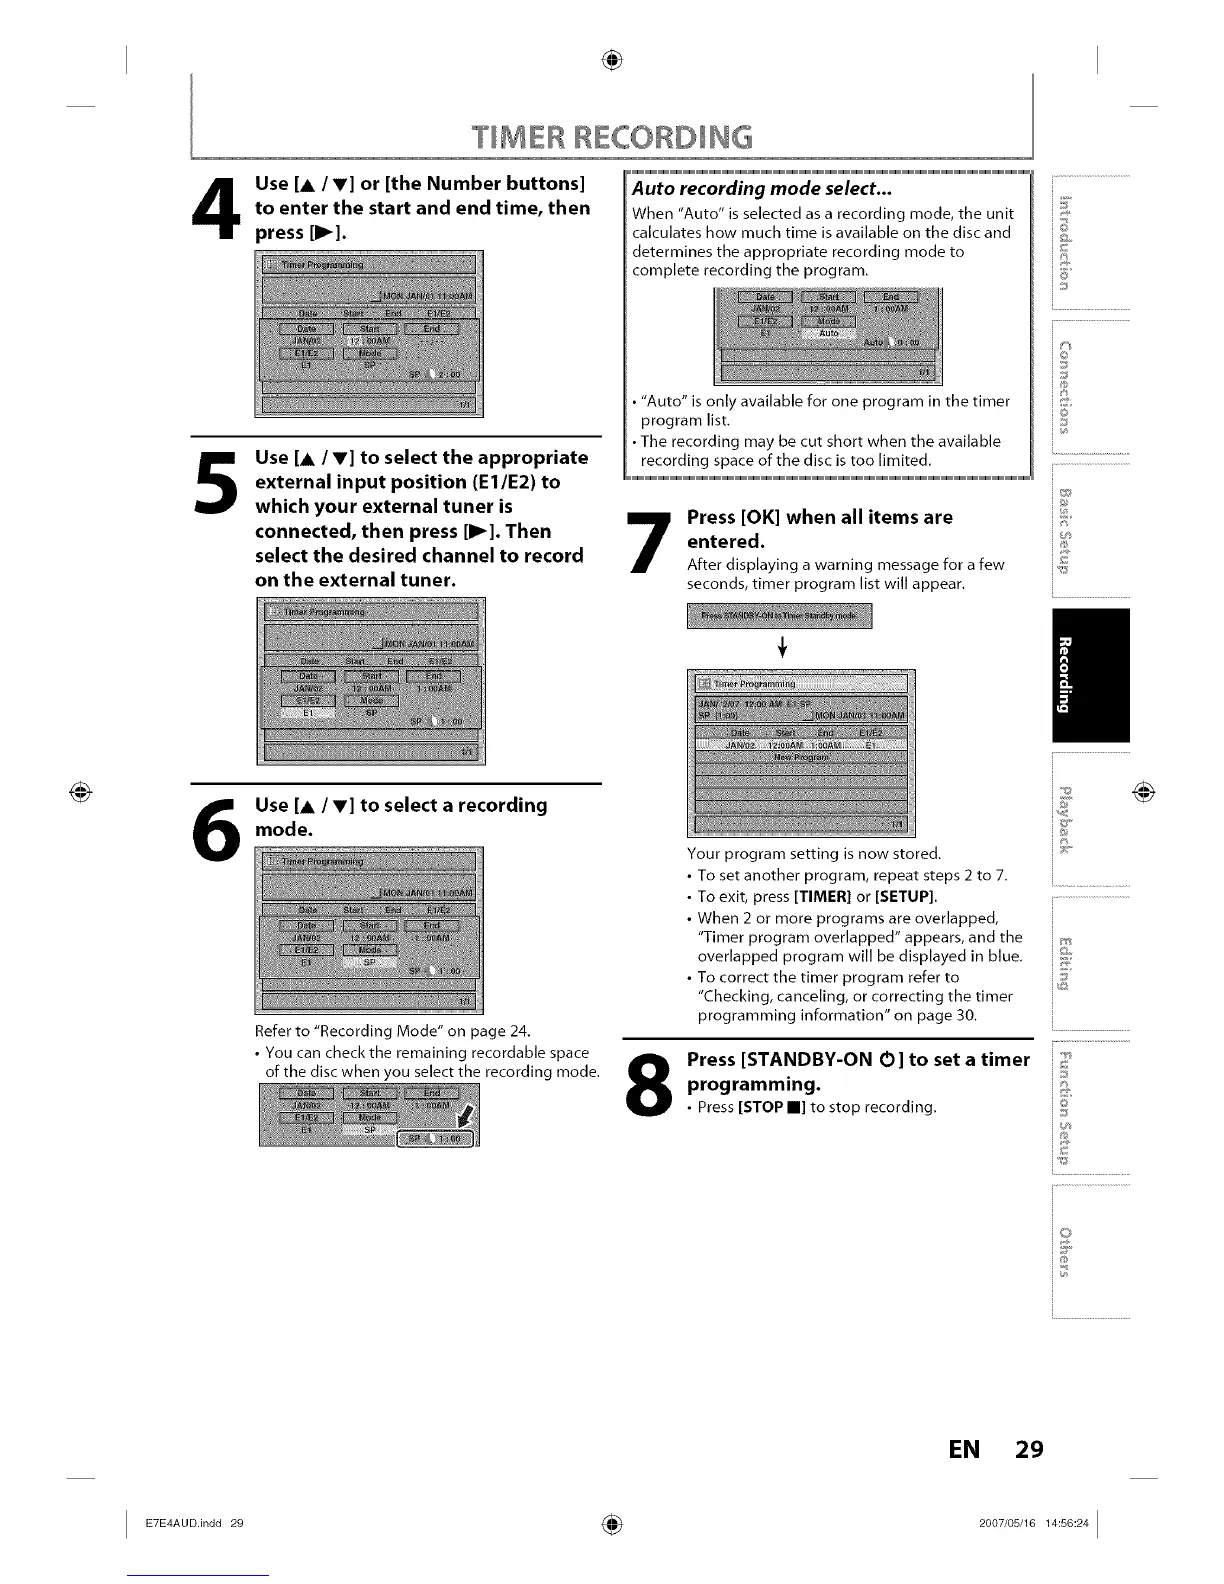
Use [A IV] or [the Number buttons]
to enter the start and end time, then
press [1_].
5
Use [& /V] to select the appropriate
external input position (El/E2) to
which your external tuner is
connected, then press [1_]. Then
select the desired channel to record
on the external tuner.
Auto recording mode select...
When "Auto" is selected as a recording mode, the unit
calculates how much time is available on the disc and
determines the appropriate recording mode to
complete recording the program.
• "Auto" is only available for one program in the timer
program list.
• The recording may be cut short when the available
recording space of the disc is too limited.
7
Press [OK] when all items are
entered.
After displaying a warning message for a few
seconds, timer program list will appear.
©
@
Use [& IV] to select a recording
mode.
Refer to "Recording Mode" on page 24.
• You can check the remaining recordable space
of the disc when you select the recording mode.
8
Your program setting is now stored.
• To set another program, repeat steps 2 to 7.
• To exit, press [TIMER] or [SETUP].
• When 2 or more programs are overlapped,
"Timer program overlapped" appears, and the
overlapped program will be displayed in blue.
• To correct the timer program refer to
"Checking, canceling, or correcting the timer
programming information" on page 30.
Press [STANDBY-ON O] to set a timer
programming.
• Press [STOP II] to stop recording.
iv
i.............................................
io
i...........................
@
EN 29