Hunter-Pro Series & Captain 8 Installation Guide
3.5 Sirens wiring
Use either DC or AC sirens. The two types cannot be connected simultaneously!
Note that activating the external siren always activates the internal one.
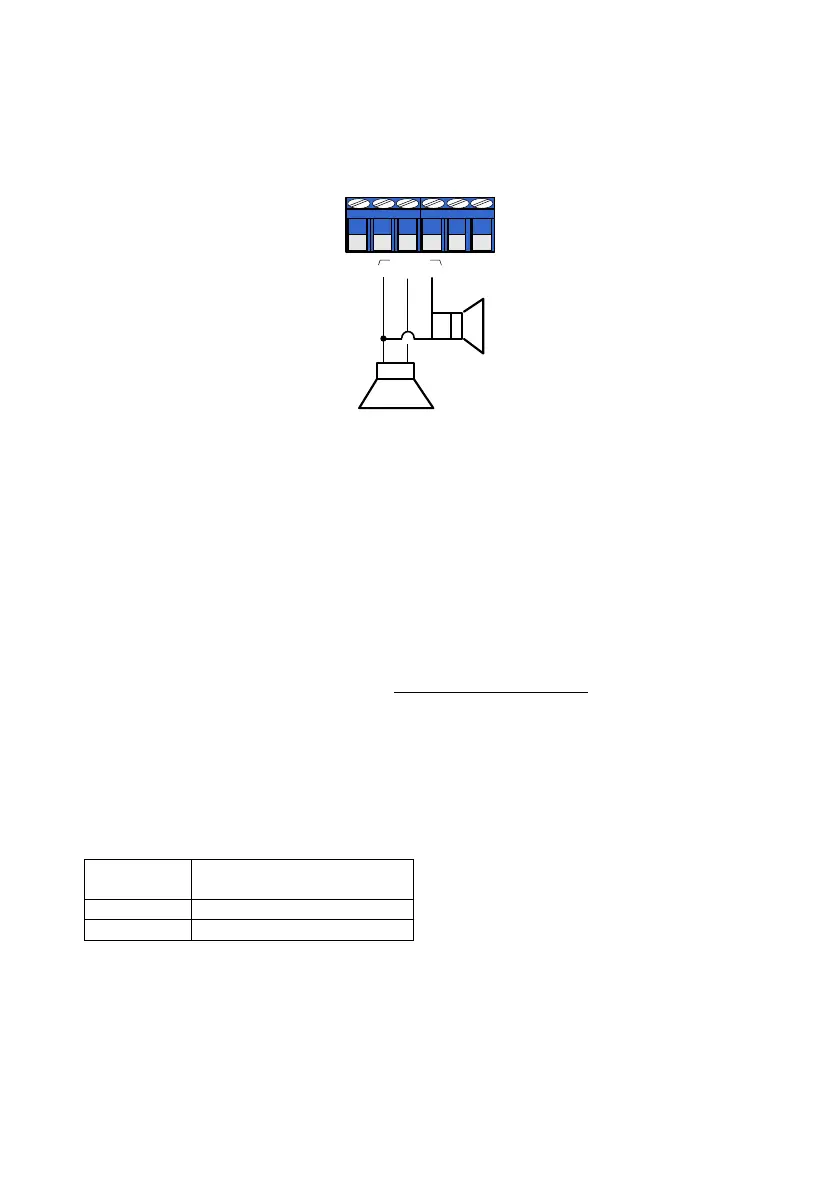
Diagram 17. Sirens wiring diagram
3.5.1 AC sirens
AC sirens are mostly horn or 8Ω speakers, driven by the control panel’s built-in oscillator. They
can sound two different tones; see section 6.4.2, on page 50.
1. Connect AC sirens between the SIREN Ext. or Int. terminals and GND (-); see the
next diagram.
2. In the “General Parameters” menu, set “D - DC Siren” to “-” (see section 6.8.1, on
page 65). This will set the siren as AC.
3.5.2 DC Sirens
DC sirens can be bell or any other high-current device with internal oscillator. The control
panel supplies 1.1A for activation only, and only in the SIREN terminals.
1. Connect DC sirens between the SIREN Ext. or Int. terminals and GND (-); see the
next diagram.
2. In the “General Parameters” menu, set “D - DC Siren” to “+” (see section 6.8.1, on
page 65). This will set the siren as DC.
To supervise DC sirens and eliminate noises, install 1kΩ transistor between the siren's
internal terminals.
The following table describes the sirens installation and programming options:
Parameter ‘D’ in “General
Parameters” menu (#5)
3.6 Relay
Relays can be activated when the alarm is set off, or any other event occurs, or when the
Relay code is entered (refer to the Hunter-Pro Series User guide) via one of the keypads or via
the phone.
To program the relay trip time, refer to section 6.7.2, on page 62.
KEY
-
Int
C
SIRENS
Ext
N
.
O
AC
siren

 Loading...