PIPER AIRCRAFT, INC.
PA-28-161, WARRIOR III
MAINTENANCE MANUAL
PAGE 7
Nov 30/06
5C13
74-10-00
(5) Inspect coil for visible radial cracks. Replace coil if cracks evident. Inspect coil for primary and
secondary circuit resistance and continuity, as follows: primary coil - .50 to 1.2 ohms;
secondary coil - 13,000 to 20,500 ohms. Replace, if required.
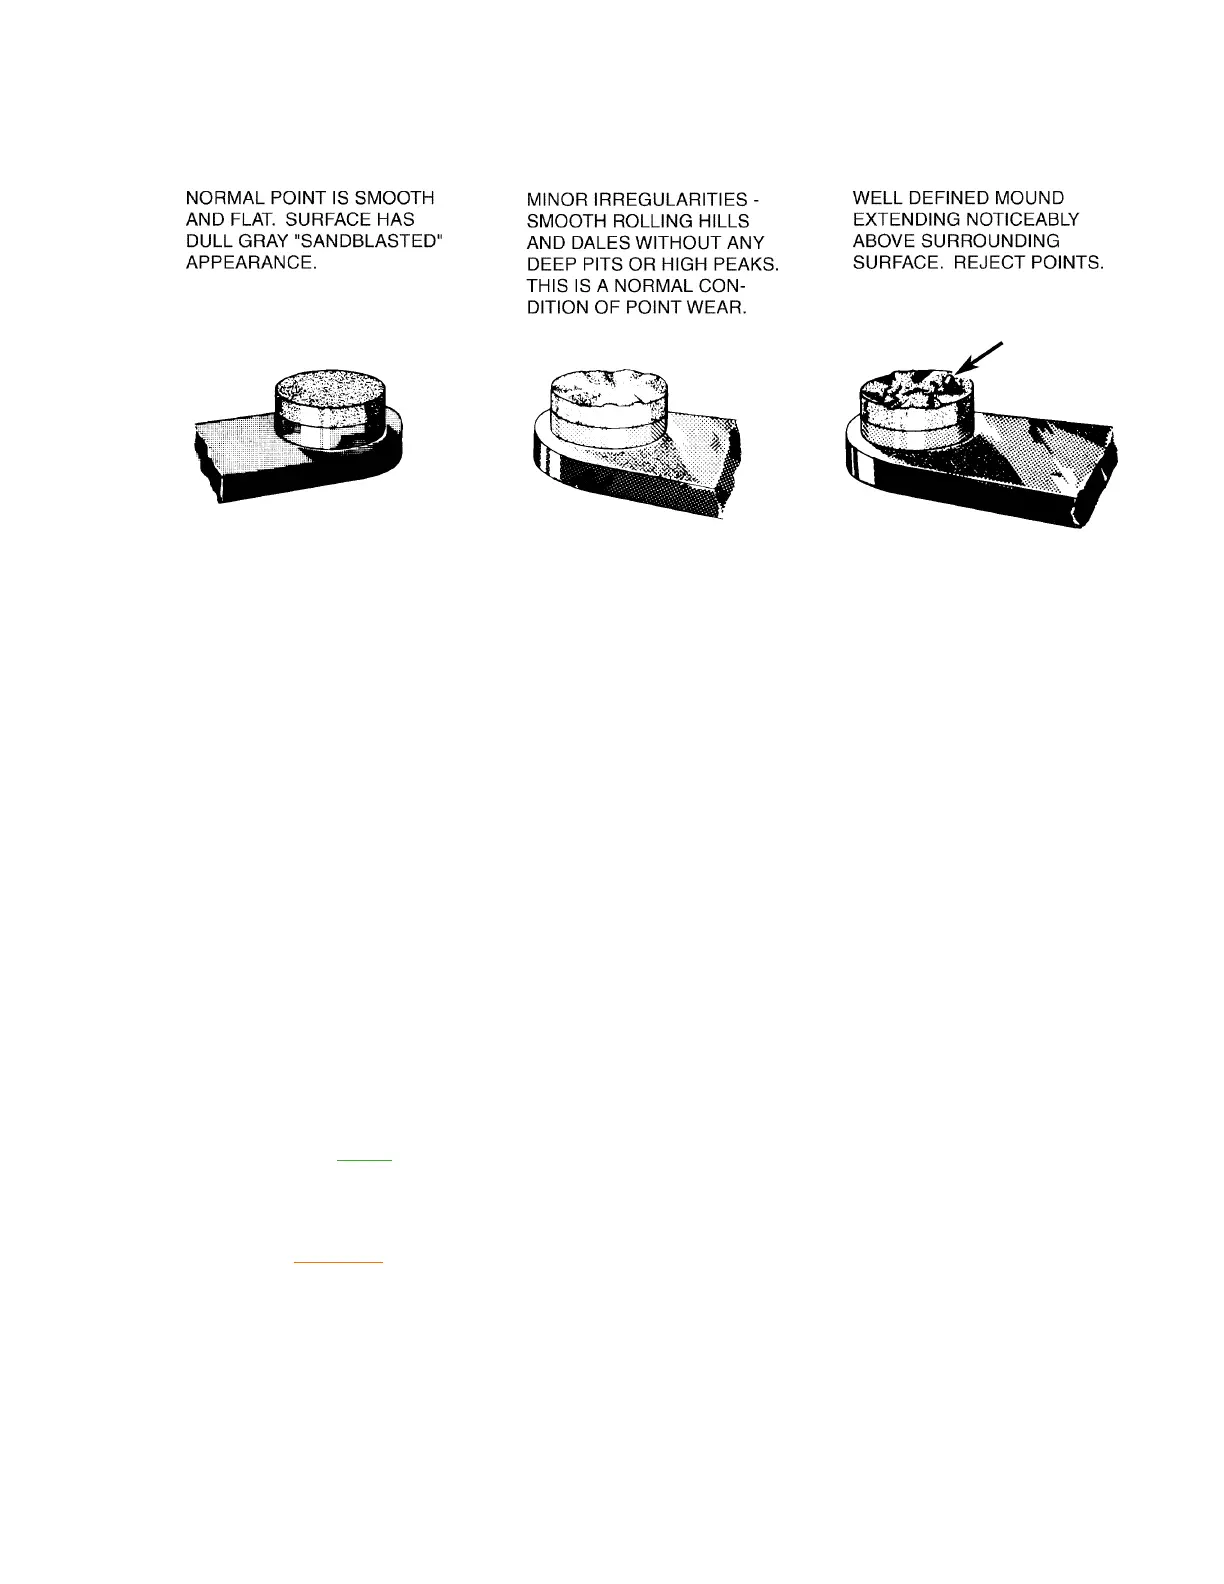
(6) Inspect primary contact points for signs of pitting and discoloration. (See Figure 6.) If points are
not discolored and have a white, frosty surface around the edges, points are functioning
properly and can be reused. If points are blue (indicating excessive arcing) or pitted, they
should be discarded. Replace primary contact point assembly, condenser and cam.
(7) Clean and inspect condenser.
(a) If the external surfaces of the condenser are dirty, clean with light soapy water. Rinse
thoroughly with clear water and pat dry before reinstalling into the magneto housing.
(b) Using a magnifying lens, examine the glass bead end seals of the capacitor for broken
glass or for glass separation from the retaining steel rings. Replace, if required.
(c) Inspect the condenser for signs of corrosion. Replace, if required.
(d) Inspect the condenser P-lead stud for twisting or "pulled" condition. Replace, if required.
(e) Test the electrical properties of the condenser using appropriate calibrated test
equipment. Test for capacitance value with condenser charged to 400 volts DC. Service
limit: .35 microfarad + 10 percent. Test for resistance, measured between condenser lead
wire and condenser shell. Resistance should be greater than 10 megohms.
NOTE: No field repairs of any type to the condenser are approved.
(f) Install condenser per paragraph E (12), below.
(8) Clean and Inspect Distributor Block
CAUTION: DO NOT PUT CLEANER IN EITHER BRONZE OILITE BUSHING. THESE
BUSHINGS ARE IMPREGNATED AT THE FACTORY AND CLEANER WILL
DRAW THE LUBRICANT OUT OF THE BUSHING.
(a) Disassemble and clean the distributor block bearing bar. Use standard non-filming non-
conductive cleaner. Clean distributor gear with soapy water and rinse with clean water.
(b) Clean all surfaces free of dirt, oil, carbon dust and other contaminants using a cotton
swab or "Q-Tip".
Contact Points
Figure 6