RealPresence Collaboration Server (RMX) 1500/1800/2000/4000 Getting Started Guide
Polycom®, Inc. 52
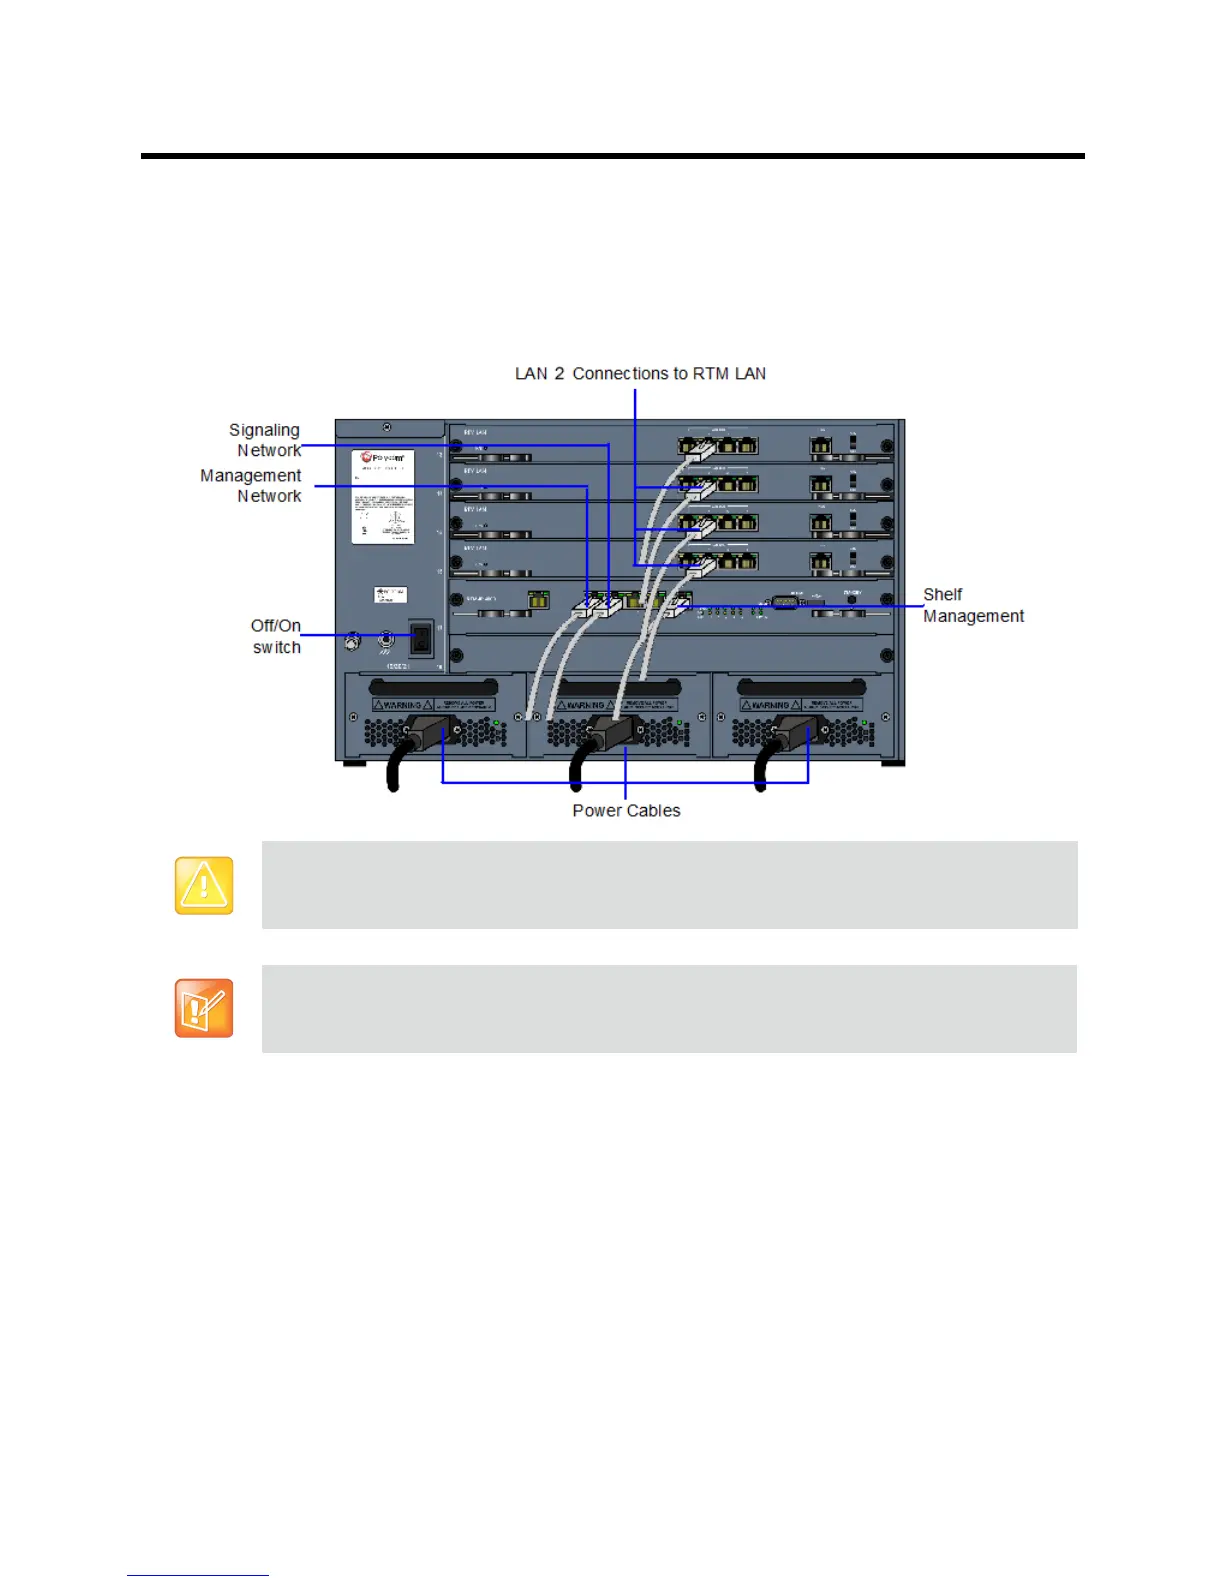
Connect the LAN cable to LAN 1.
When LAN redundancy is enabled, LAN 1 is used for both management, media and signaling
network connection.Connect the media and signaling cable to LAN 2 port. By default this port is
used for signaling, but when LAN redundancy is enabled, LAN 2 is the backup of LAN 1 port.
Collaboration Server Rear Panel (RMX 4000) View with AC Power and Communication Cables
Installing the RealPresence Collaboration Server 1800
The following procedures have to be performed to install the RealPresence Collaboration Server 1800 in
your site:
● Unpacking the Collaboration Server
● Installing the Collaboration Server in a rack or as a standalone system
● Connecting the Collaboration Server to the power source
Connecting the network (LAN and IP) cables to the Collaboration Server
● Modifying the Factory Default Management Network Settings on the USB Memory Stick
Attention:
Two people are required to lift the MCU out of the box and when installing it in a rack.
Write down the serial number of the Collaboration Server (RMX), located on a sticker on the back of
the unit. It will be needed for product registration later in the process.