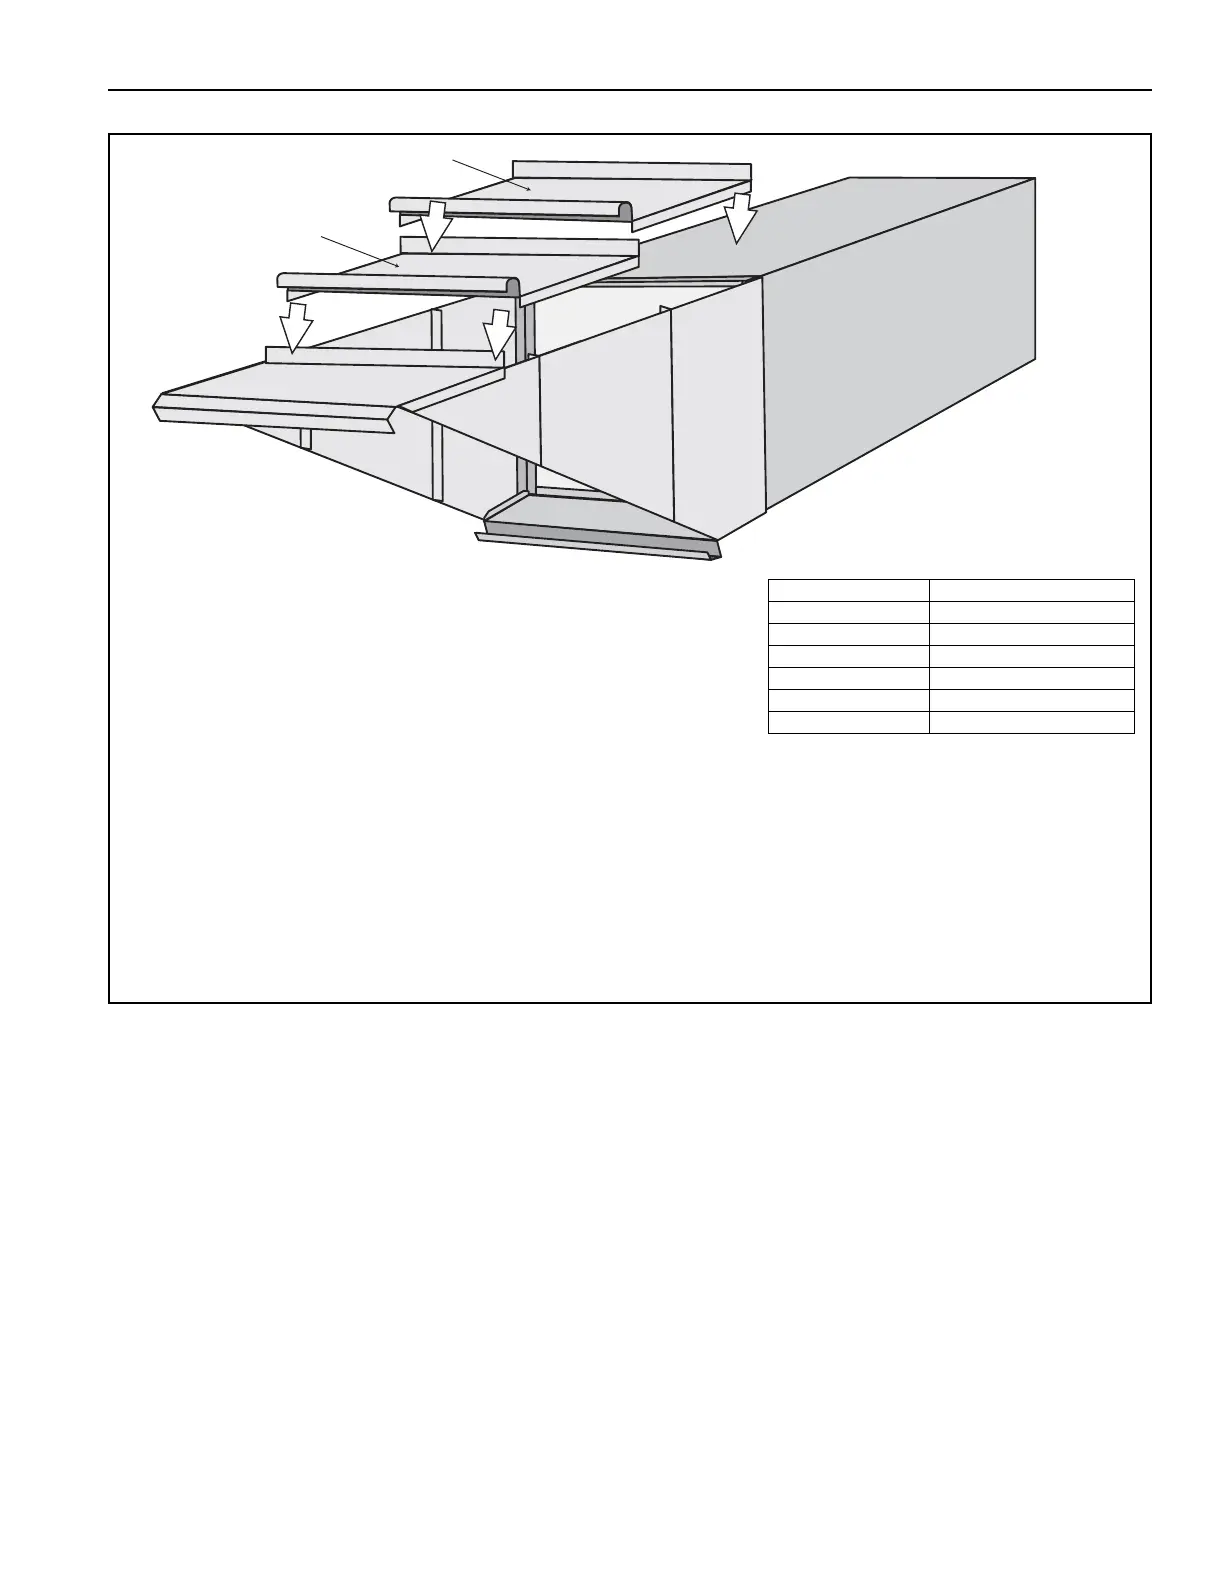
Attach top middle panel with five TEK self-tapping screws on
each side and with six 5/16-18 x 1 bolts, 5/16 washers and 5/16
flange nuts at the J-bend joint.
For Model 2020: Attach top back panel with five TEK self-
tapping screws on each side, seven TEK self-tapping screws to
the top mounting flange and with six 5/16-18 x 1 bolts, 5/16
washers and 5/16 flange nuts at the J-bend joint.
For Model 2030: Attach top back panel with five TEK self-
tapping screws on each side, nine TEK self-tapping screws to
the top mounting flange and with six 5/16-18 x 1 bolts, 5/16
washers and 5/16 flange nuts at the J-bend joint.
NOTE: Ensure that the side tabs of the roof panels are to the
outside of the side panels and that the J-bends interlock the
panel with the roof panel in front of it.
Description Part Number
Top Middle Panel #2 13205076 / 13305076
Top Back Panel #1 13205075 / 13305075
TEK Screw 13404
5/16"-18 x 1 Bolt 20507
5/16" Flat Washer 95211600
5/16" Nut Flange 20509