V L F > H F R E C E I V E R S
f
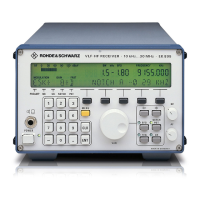
R & S E K 8 9 5 / R & S E K 8 9 6
User Manual
f
Replacement of Modules
4.3.8 Power Supply
Removal
1. Make preparations acc. to 4.3.1.
2. Without options:
Pull off socket on RF cable W1 (see Fig.
4.14) connected to plug X73 (IF!/!AF pro>
cessor).
With option 'Preselector FK!890H1':
Pull off socket on RF cable W1 (see Fig.
4.15) connected to plug X81 (option 'Pre>
selector FK!890H1).
With option 'Digital Selection R&S FK 896
or R&S FK 896D':
Pull off socket on RF cable W1 (see Fig.
4.16) connected to plug on RF cable W101.
With option 'IF Processor R&S GM 893':
Pull off socket on RF cable W22 (see Fig.
4.15) connected to plug X95 (option 'IF Pro>
cessor R&S GM 893').
3. Pull off socket on RF cable W8 connected to
plug X72 (IF / AF processor).
4. Pull off socket on RF cable W4 connected to
plug X41 (synthesizer).
5. Pull off socket on signal line connected to
plug X79 (IF / AF processor).
6. For R&S EK 896: undo connector X23 (see
Fig. 4.13).
7. Remove cable clamps, as necessary.
8. For R&S EK 895:
Undo and remove four screws (2, Fig. 4.10)
on the rear panel and two screws (see Fig.
4.6) fixing the power supply.
For R&S EK 896:
Undo and remove six screws (2, Fig. 4.11)
on the rear panel and two screws (see Fig.
4.6) fixing the power supply.
9. Pull power supply carefully out to the rear
until plug X60 becomes accessible.
10. Pull off female connector strip.
11. Pull power supply completely out and
remove.
Installation
Installation is to be carried out in the reverse
order of removal.
Fig. 4.6 Location of Screws
6164.0717.02_01
> 4.29 >
 Loading...