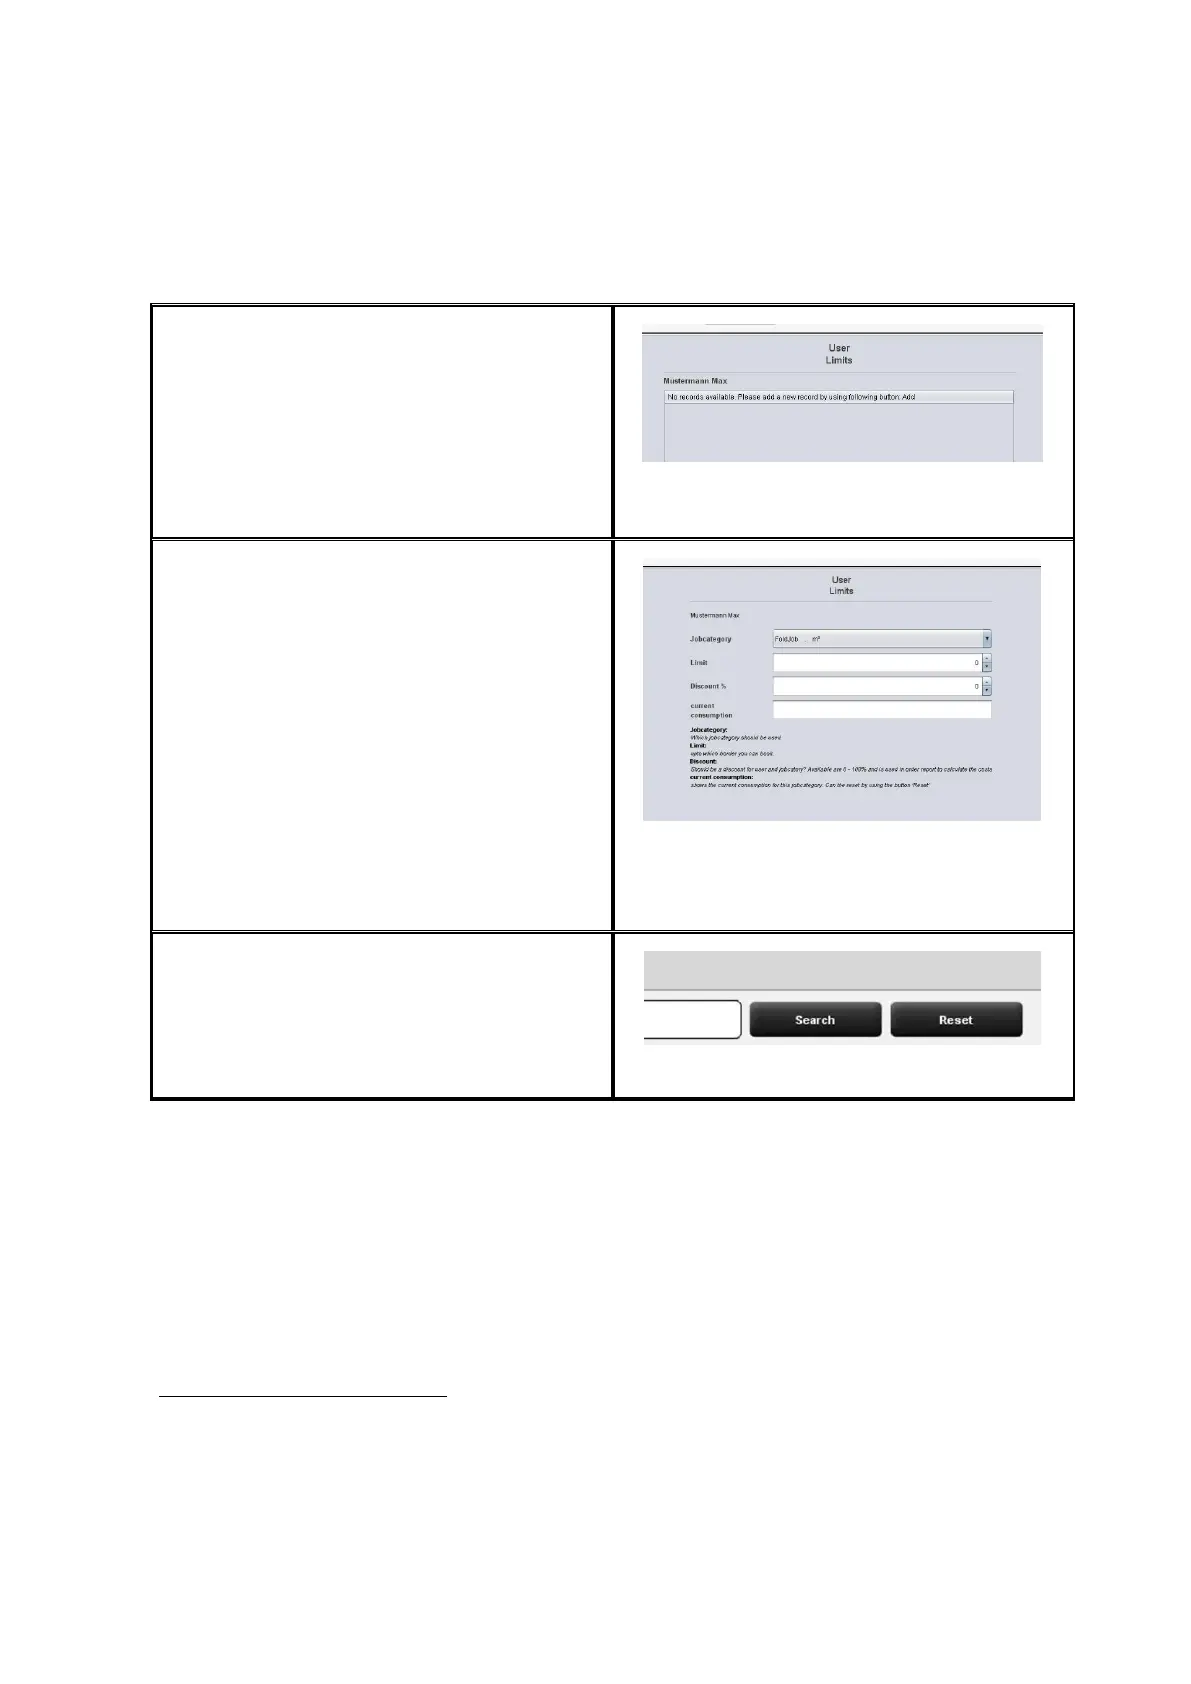
7.4.3 User Limits
First, the list
5
of users currently available in
the system appears.
By double-click on an entry another list
opens in which the job category limits
currently allocated are indicated.
Figure 7.14: Limits - List of currently allocated job
categories
On this level, you can change existing job
category limits or create new ones.
By clicking Add and/or double-click on an
existing entry, the menu for setting limits
and discounts opens.
In order to create a new limit
6
, select an
existing job category from the list.
In the field Limit the upper limit is defined
for this job category. Please pay attention to
the scale!
In the field Discount a discount in % can be
granted to the selected job category and
the allocated user.
Figure 7.15: Job categories - Define limit
The field Current consumption gives
information about the current situation and
can be reset by means of the Reset button.
Figure 7.16: Reset current consumption
After having made all settings, the changes have to be accepted by the Save button.
This operation can be repeated for all existing job categories. A job category which is not
allocated may result in a refusal of ScanManager to execute the job (see Figure 7.17).
5
The entries in this list correspond to the entries in the administration menu. However,
they cannot be deleted or edited. For this purpose, you have to move to the
corresponding administration menu.
6
In the list all available job categories are indicated in alphabetical order. Three
designations are displayed: Name of job category, color mode for job category, and
scale of job category currently used. The scale is decisive for determining the limit.