SEEDMASTER 2023
83
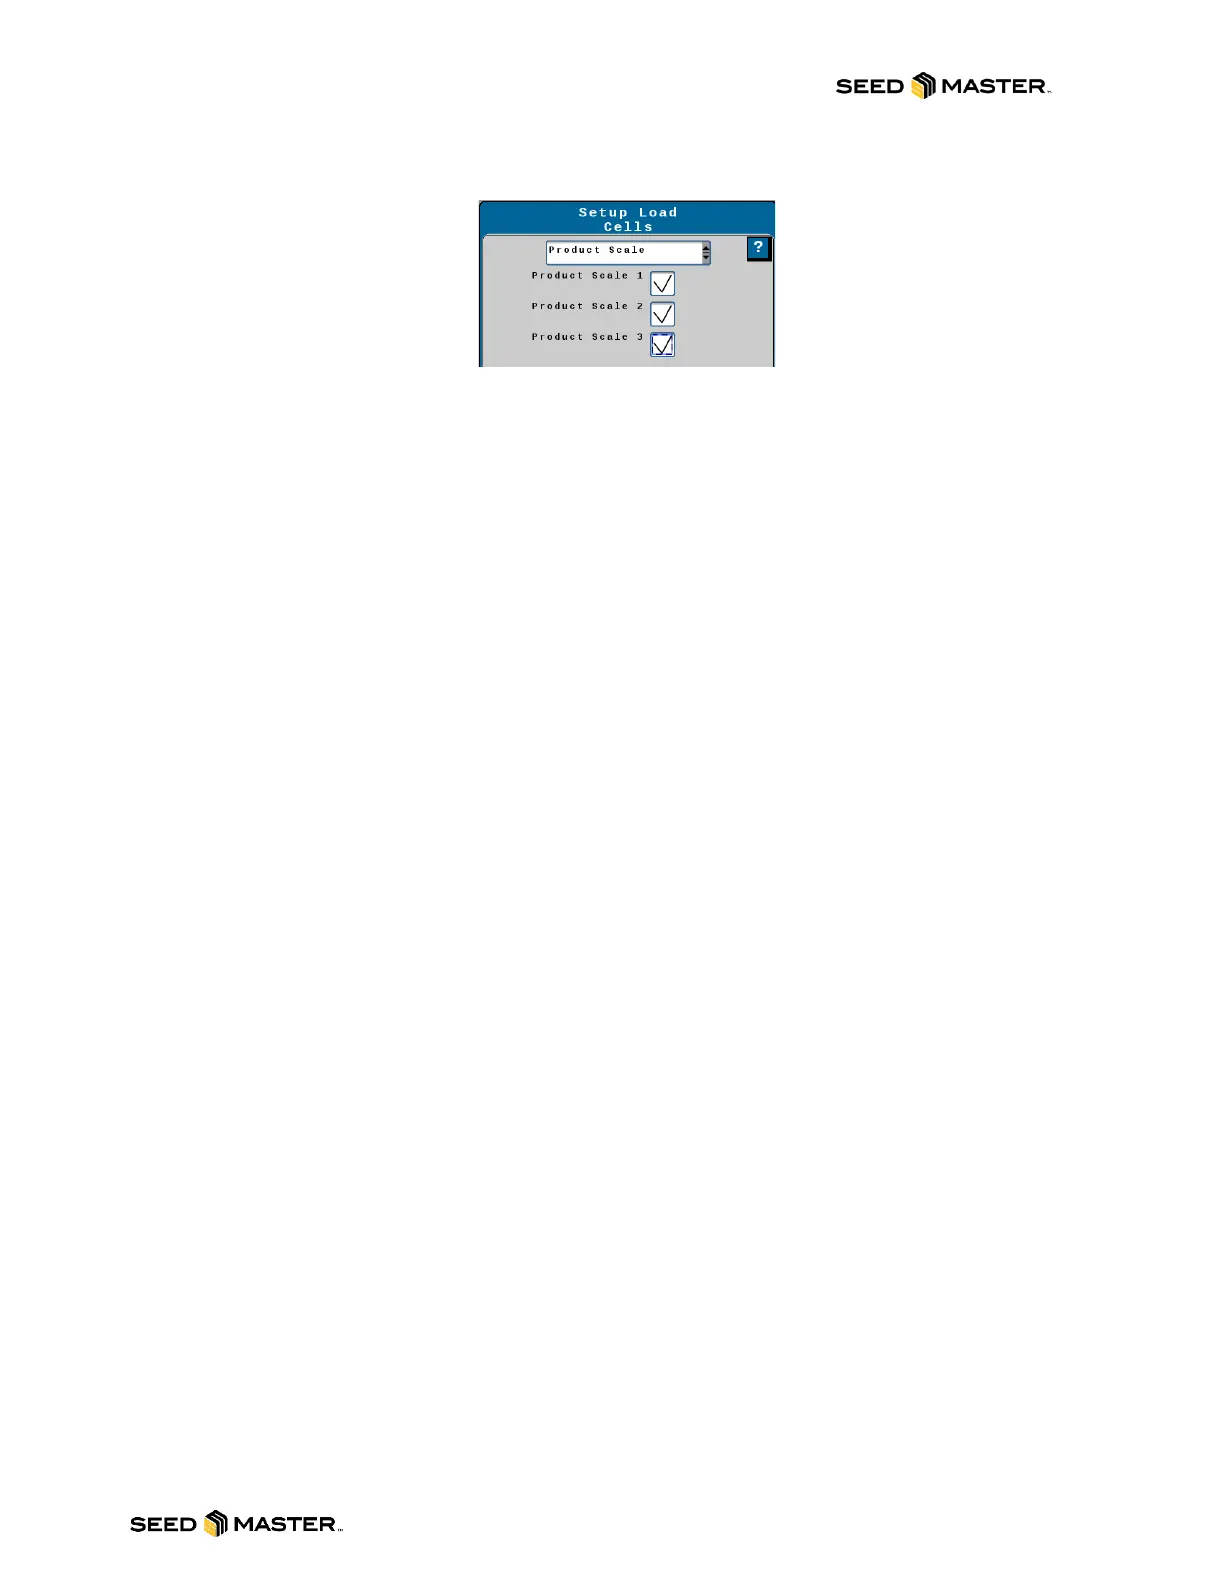
25. Touch the drop-down box for the Load Cells Setup and then select Product Scale. Place a
check mark beside each Product Scale. After all checks are entered, touch next.
26. If your scale calibration numbers are known, you can enter them here. If they are not, touch
next.
27. There are NO pressure sensors installed. Leave each pressure sensor defaulted to None and
then touch next.
28. There are NO height switches installed. Leave the box defaulted to None and touch next.
29. Enter 2 into the Fan RPM 1 / RPM 2 Calibration Box. RPM 1 Low and High Limits will remain at
0. Touch next.
30. RPM 1 / RPM 2 sensor Assignments will be displayed. There should be a check mark defaulted
for each product. Review and ensure that each product has a check mark. Touch next.
31. You will now setup the product control for each product. The 6 configuration pages will have the
same settings entered for each product. Touch next after every page.
a. SETUP CONTROL VALVE PAGE
i. Control Type = PWM CLOSE
ii. Valve Response Rate = 50
iii. Control Deadband = 2
iv. Valve Delay = 0
v. Enable PWM Smart Control = YES checkmark
b. SETUP PWM PAGE
i. Coil Frequency = 65
ii. PWM High Limit = 90
iii. PWM Low Limit = 25
iv. PWM Startup = 0.0
c. SETUP Rate Sensor PAGE
i. Calibration Weight = 2.000 (CALIBRATION REQUIRED)
ii. Pulses / Revolution = 60.00
d. SETUP Tank / Bin PAGE
i. Tank Capacity = 0
ii. Low Tank Level = 0
iii. Low Bin Level Sensor = NO checkmark
e. SETUP Rates PAGE
i. Preset Rate Values: Rate 1 = 150, Rate 2 = 0, Rate 3 = 0
ii. Rate Bump = 5
iii. Rate Selection = Rate Bump or Rx
iv. Display Smoothing = YES checkmark
v. Decimal Shift = 1
f. SETUP Alarms PAGE
i. Off Rate Alarm = 30 with checkmark
ii. Shaft Sensor Alarm = NO checkmark
The setup for the first product is complete. Repeat the settings above for each product until the setup
wizard gets to the setup summary page. Please review the setup summary page then touch next.