1OBJECT : ST-PNT AUX DIST
ANGLE
2REGST NO. 00(0~15) CNTR-PNT
3AUX. X COORD 000.0~511.0
4AUX. Y COORD 000.0~479.0
1OBJECT: When AUX (auxiliary) is selected
DIST-BETW-X, DIST -BETW-Y, NO may also be
displayed here.
1OBJECT : ST-PNT AUX DIST
ANGLE
2REGST NO.
00(0~15) DIST-BETW-2PT
3DISTANCE 000.0~702.0 PIXEL
1OBJECT: When DIST (distance) is selected
2PT-ANGL(HORI) (2 point horizontal),
2PT-ANGL(VERT) (2 point vertical) or NO (disabled)
may also be displayed here.
1OBJECT : ST-PNT AUX DIST
ANGLE
2REGST NO. 00(0~15) 3PT-ANGL
3ANGLE -180.0~+180.0゜
1OBJECT: When ANGLE is selected
Continued from the previous page: GRAY&EDGE, GRAV.
Return to the [TYPE00-MEAS1 to 3] and select item 8 NUMERIC CAL COND
(numeric calculation condition).
[EVALUATION COND]
(TYPE00-MEAS.1-DST&ANGL MEAS)
1OBJECT : ST-PNT AUX DIST
ANGLE
2REGST
NO. 00(0~15) GRAY-SEARCH
3X START PNT COORD
000.0~511.0 X=285.0 OK NO
4Y START PNT COORD
000.0~479.0 Y=250.0 OK NO
5DEGREE OF MATCH -
10000~+10000 +09800
OK
NO
6MAKE A TEST RUN (SET KEY)
7UPPER MENU
[TEST RESULT] [
OUT]
Use the up and down keys to
select NO, Y0 to 7, or C000
to C127.
Alternatively, EDGE DETECT (tip
of the edge) or GRAVITY (label
center of gravity) may also be
displayed here.
- Check your selection by testing the upper and lower limits for the evaluation that you have set.
This can be done using item 6 MAKE A TEST RUN.
- For more information about evaluation conditions see section 9-2 [3] Evaluation conditions .
Continued on the following page
PERIMRTER (center of a circle), C-GRAV
(center of gravity), LEG (lines on two points),
INTRSCT-PT (crosspint over two lines) or NO
(disabled) may also be displayed here.
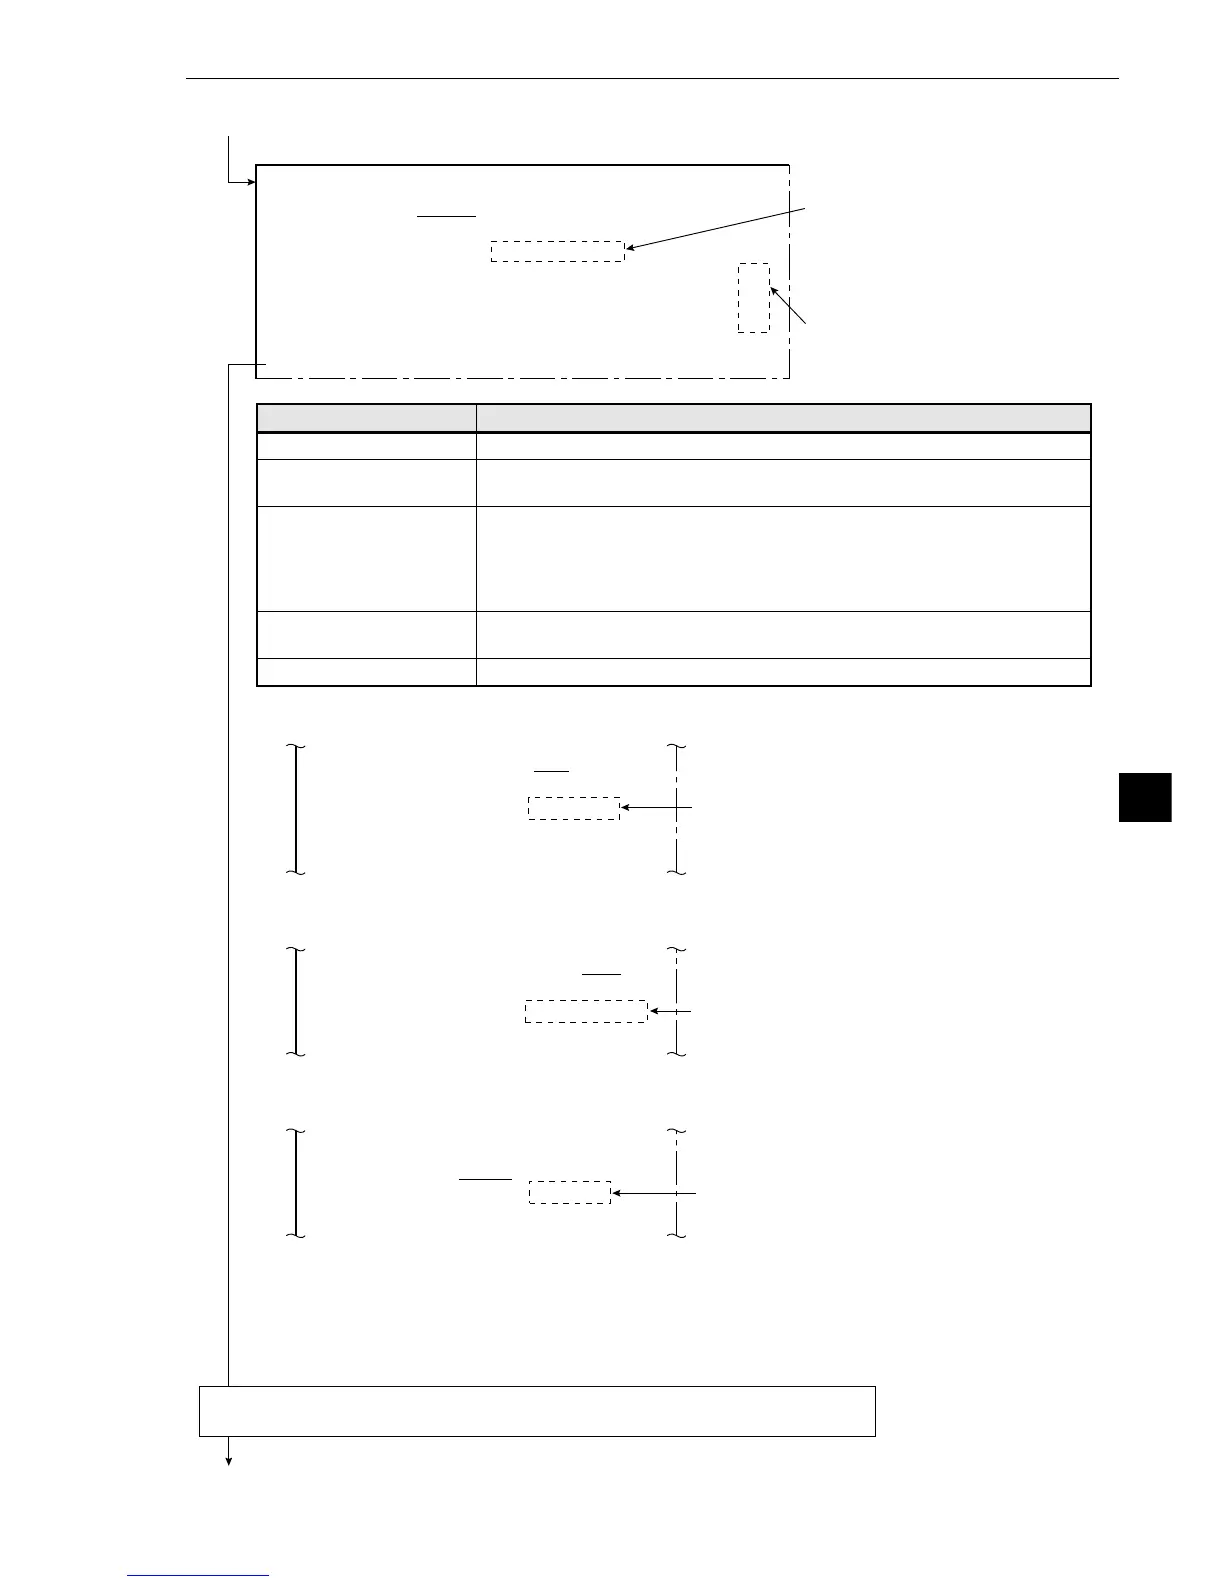
Evaluation conditions
1OBJECT
2REGST NO.
(registration number)
3
4
5
6MAKE A TEST RUN
7UPPER MENU
Setting details
Select the object for evaluation.
Set this at any number from 0 to 15.
Enter the ranges that will produce an OK decision.
The titles of items 3 to 5 will change, according to the settings in item
1. The example above shows the display when 1OBJECT: ST-PNT
(starting point) has been selected. See below for the displays when
other object settings are selected.
Pressing the SET key will test the evaluation condition, display the test
results.
This will return you to the [TYPE00-MEAS1 to 3] menu.