5
Press [Enter].
The cursor blinks at the input position.
6
Press [2] and [Enter]. (To replace the
left plunger seal, press [1] and [Enter].)
[PUMP] on the display is highlighted and
after a while stops being highlighted. The
right plunger is now at the backmost
position.
In the conditions, remove the right pump head.
Before attaching the right pump head, perform steps 2 to 6 as well.
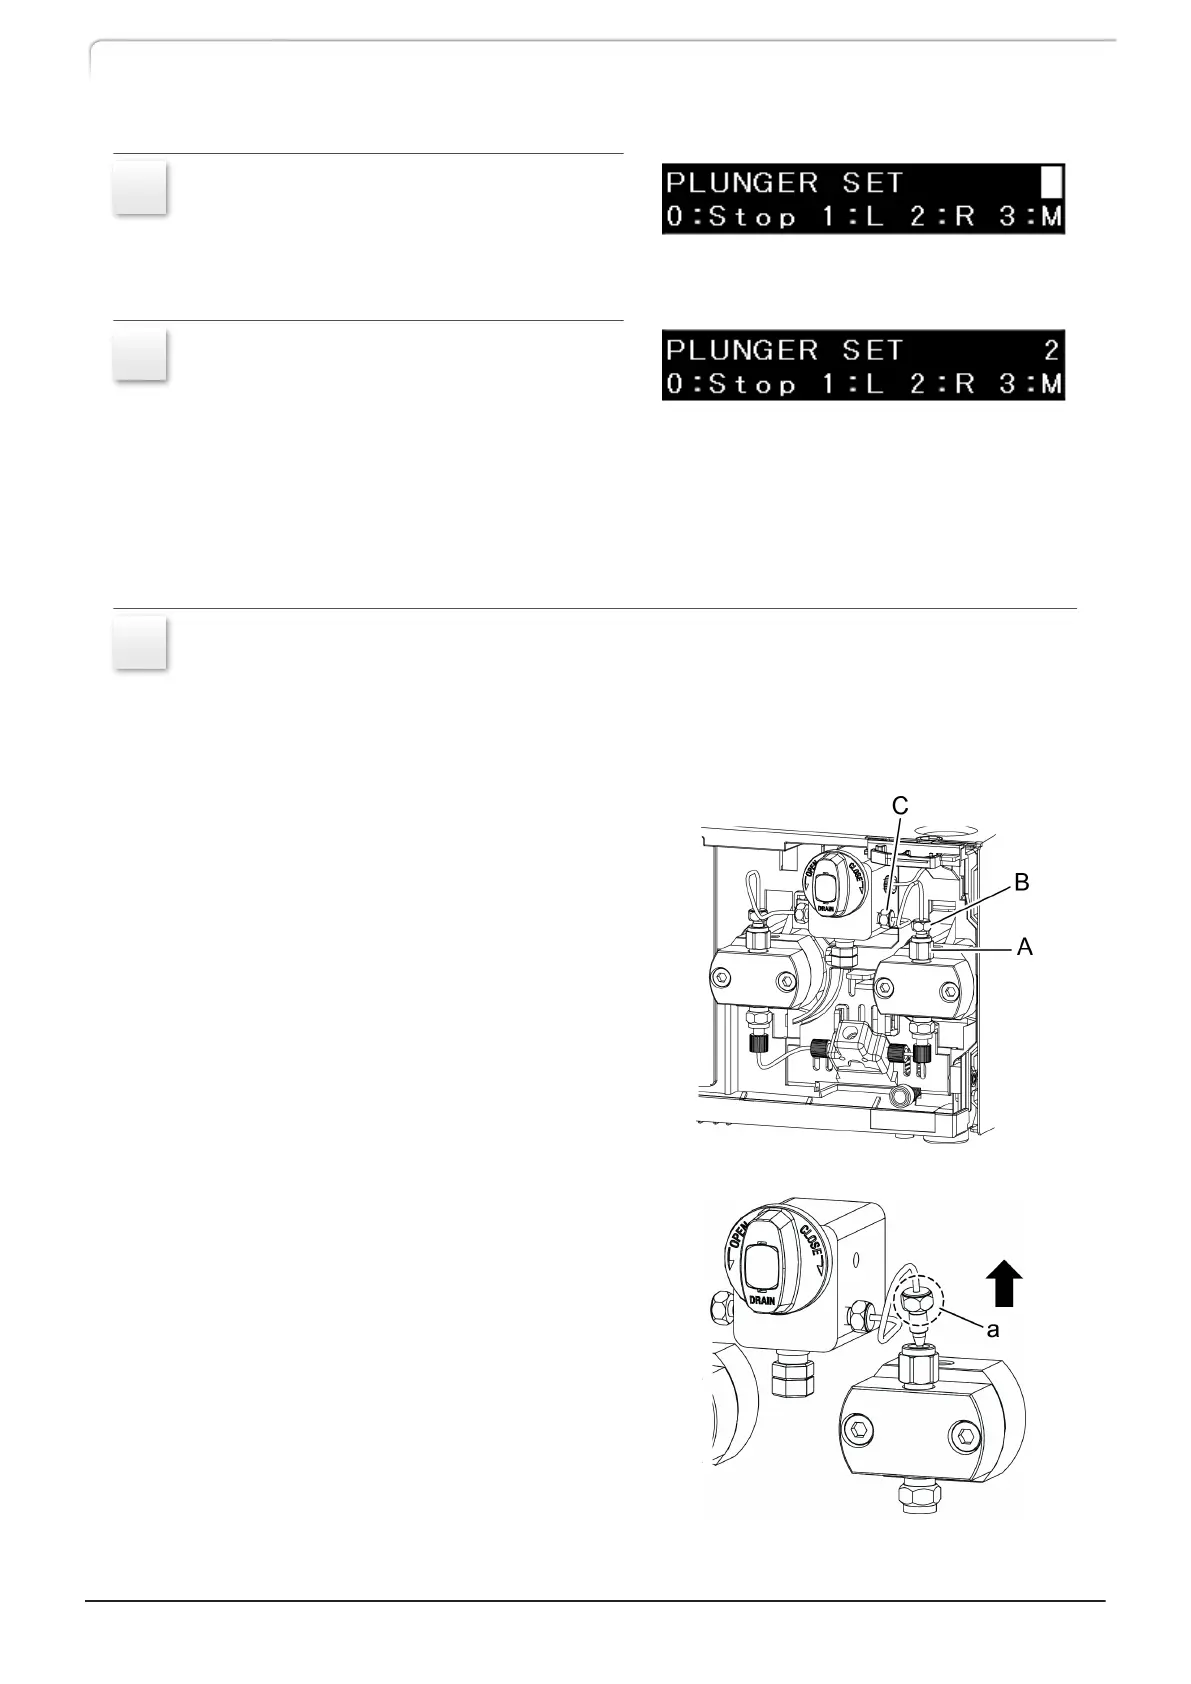
7
Follow the instructions below to remove the tube (SUS pipe R) connecting the
check valve OUT and the pressure sensor.
(LC-40D X3 CL)
1
While holding the check valve
OUT (A) with a 10-mm wrench,
loosen the check valve OUT side
male nut (B) of the SUS pipe R
with an 8-mm wrench.
2 Loosen the pressure sensor side
male nut (C) of the SUS pipe R
with an 8-mm wrench.
3
Hold the check valve OUT side
male nut ("a" in the figure) of
the SUS pipe R and then slightly
lift and pull out the SUS pipe R.
86
LC-40D X3 CL LC-40D XR CL
4 Maintenance
 Loading...