45
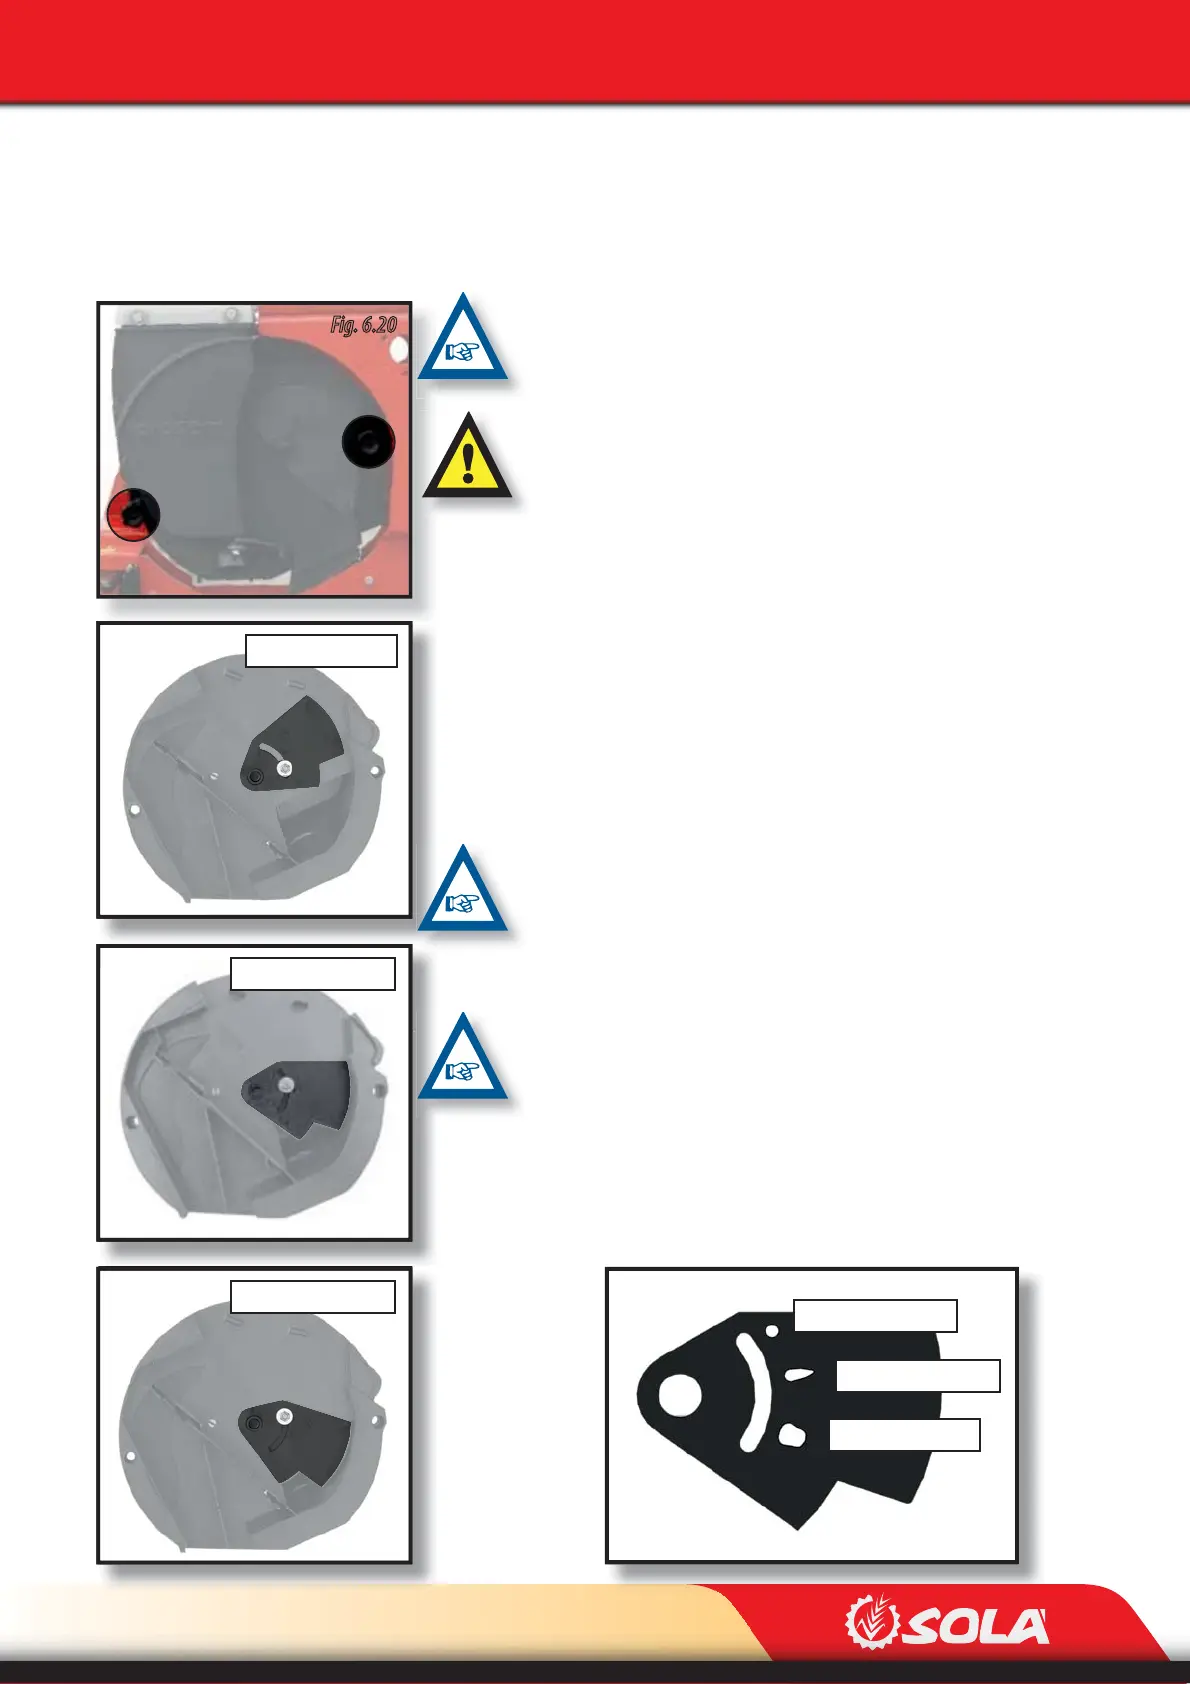
Fig. 6.20
ADJUSTMENTS
Fig. 6.24
Semillas pequeñas
Semillas normales
Semillas grandes
Fig. 6.21
Fig. 6.23
Fig. 6.22
Semillas grandes
Semillas normales
Semillas pequeñas
Fig. 6.21
Big seeds
Fig. 6.23
Small seeds
Fig. 6.22
Regular seeds
Fig. 6.24
Small seeds
Regular seeds
Big seeds
6.3.3 SEED’S INLET TO THE METERING BOX
The seed level inside the metering box is controlled using the seed entering gate place in the
lid of the metering box.
IMPORTANT: THE SEED LEVEL INSIDE THE METERING BOX HAS
TO BE THE CORRECT ONE FOR EACH TYPE OF SEED. IF THE LE-
VEL IS TOO HIGH OR TOO LOW, THE PLANTING DISTANCE IN
THE SAME ROW WILL HAVE PRECISION MISTAKES.
CAUTION: THE ADJUSTMENT SHOULD BE PERFORMED BEFO-
RE FILLING THE SEED HOPPER.
To adjust the opening of the seed entering gate, follow these steps:
1. Remove the metering box’s lid by loosening the 2 securing knobs (Fig.
6.20).
2. In the inner part of the metering box’s lid, turn the gate in the appro-
priate direction to open or close the seed ow. Place the gate in the
correct position depending on the seed type:
A- Big seeds (Fig. 6.21), for example corn, soya, chickpeas.
B- Regular size seeds (Fig. 6.22), for example sunower.
C- Small seeds (Fig. 6.23), for example sugar beet, tomato.
TO ADJUST CORRECTLY THE SEED LEVEL INSIDE THE METERING
BOX, THERE ARE MARKS IN THE GATE CORRESPONDING TO THE
SEED SIZE, ARRANGED FROM BIG TO SMALL SIZE (FIG. 6.24). TO AD-
JUST THE GATE, THE MARK IN THE LID (WHICH DEPENDS ON THE
SEED’S SIZE) HAS TO BE ALIGNED WITH THE SCREW’S SIZE (BIG FIG
6.21; REGULAR FIG. 6.22 OR SMALL FIG. 6.23).
WHEN USING PILLED SEEDS, FOR EXAMPLE SUGAR BEET, THE
TURNING MOVEMENT OF THE SEED DISC ABOVE THE SEED
COULD BREAK IT. FOR THIS REASON, IT IS RECOMMENDED TO
HAVE THE SMALLEST NUMBER OF SEEDS IN CONTACT WITH THE
DISC. FOR THIS PURPOSE, ADJUST THE GATE’S POSITION FOR
SMALL SEEDS (FIG. 6.23).