51
Copyright 2017 SolarCity Corporation. All rights reserved.
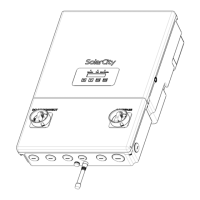
Chapter 1 - Welcome
4.3.1 - Installing the Inverter Mounting Bracket
To install the Inverter Mounting Bracket on the wall (see
Figure 3-6
):
1. See
“Inverter Mounting Bracket” on page 22
for Inverter Mounting Bracket dimensions
and select a location that meets all of the requirements contained in that section and in
“Selecting a Location” on page 48
to selecting a location.
2. Secure the Inverter Mounting Bracket to the wall using at least 3 screws and anchors, in
accordance with
“Inverter Mounting Bracket” on page 22
. You can use the Inverter
Mounting Bracket as a template for marking the locations of any holes that require pre-
drilled pilot holes.
3. After marking the screw hole locations, drill the pilot holes as appropriate for the screws/
anchors being used. The diameter of the pilot holes must be appropriate to the type(s)
screws and/or anchors being used, in accordance with the instructions supplied with
those screws/anchors, building codes, and best practices.
4. Align the Inverter Mounting Bracket over the pilot holes and then install the mounting
hardware until it is 3/16” distant from the wall. Once all screws are in place, tighten them
to the recommended torque for that screw type.
SHOCK HAZARD: THE WALL AT THE INSTALLATION LOCATION MAY
CONTAIN HIDDEN ELECTRIC WIRES THAT COULD BE DAMAGED WHEN
MOUNTING THE INVERTER AND CAUSE DEATH OR SERIOUS INJURY FROM
ELECTROCUTION. VERIFY THAT NO ELECTRIC WIRES ARE LOCATED
BEHIND THE INSTALLATION POINTS.
CAUTION: VERIFY THAT BOTH THE SHEAR AND PULL-OUT STRENGTH OF
ALL SCREWS AND ANCHORS USED TO INSTALL THE INVERTER MOUNTING
BRACKET ARE SUFFICIENT TO BEAR THE WEIGHT OF THE SOLARCITY H6
INVERTER.
Note: Stainless steel screws are recommended, especially for outdoor
locations.