11.7.2 Test lung Neo with tube adapter
Remove surface dirt with a disposable cloth/paper towel
No particular requirements
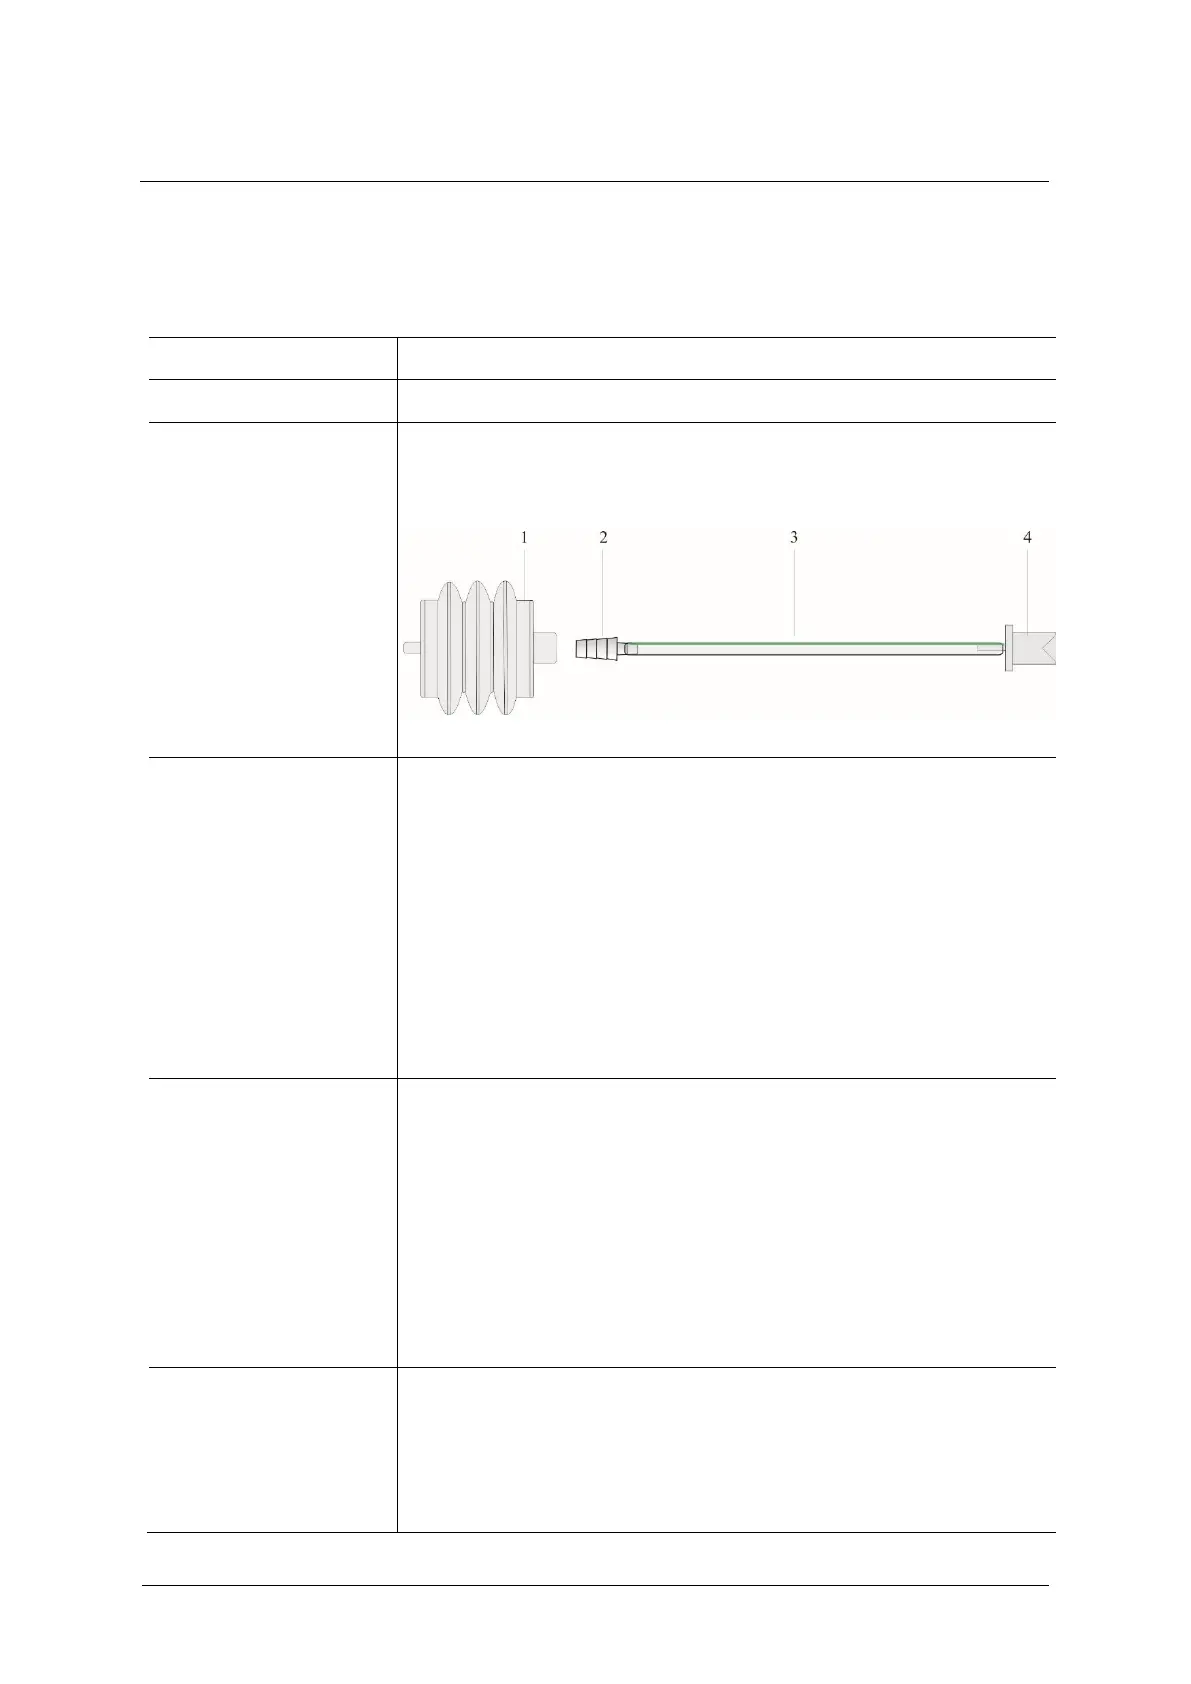
1. Remove the connection tube (3) from the test lung (1) together with
the tube adapter (4) and tube sleeve (2).
2. Remove the tube adapter and tube sleeve from the silicone tube.
Fig. 114: Test lung with tube adapter
1. Connect the silicone tube to the injector rail of the cleaning and
disinfection equipment.
2. Position the test lung to ensure that the cavity will be fully rinsed and
that no spots are missed. Excess water must be able to run off freely.
3. Place the tube sleeve in a small parts container.
4. Load the automated disinfection equipment according to the
manufacturer’s instructions for use and start the program for
anesthesia materials.
5. Dry the disinfected parts (in a drying cabinet if necessary), unless
this happens inside the automated disinfection equipment.
Cleaning: manual
Disinfection
Drying
1. Immerse the individual parts in ready-to-use disinfectant solution.
All of the parts must be fully covered by the disinfectant.
2. Move the parts around in the solution several times until all air
bubbles have been removed.
3. After the dwell time, the disinfectant must be completely rinsed off
using cold water (at least drinking water quality).
4. Dry the parts thoroughly.
5. After completion, check the parts for visible external residual
contamination or disinfectant. If necessary, repeat the manual
cleaning and disinfection process.
1. Check for residual water and carefully purge with sterile compressed
air if necessary.
2. Connect the tube adapter and tube sleeve to the silicone tube.
3. Connect the connection tube to the test lung together with the tube
adapter and tube sleeve