The information contained in this document is confidential, and only for the information of the intended recipient and may not be published or redistributed without the prior written consent of Summa NV.
Summa nv Tel +32 59 27 00 11 Fax +32 59 27 00 63 Email support@summa.com Website www.summa.com Page 30 of 76
machine should feed some media to prepare the media to cut the next panel. The next panel
should then be cut. The machine may however stop cutting after the first panel was done as
the machine will only start cutting the next panel after all data was received. In case the job
was not sent completely, or incorrectly terminated, then the machine stops cutting after the
first panel. In this case, check the following:
• Some data may be missing due to communication issues, see “Communication issues”.
• The software (RIP) used to drive the machine may be outdated, update the software.
• The job may be incorrectly terminated (probably missing the “end” or “deselect” command to
indicate the end of the job) by the software (RIP) used to drive the machine, check the
configuration of the software.
To have the job finished completely, de-activate paneling.
4.20 Roll-up does not work
Depending on configuration the roll-up has to wind the media after the job has been
finished, or when a panel has been cut. The roll-up also has to wind the media when media is
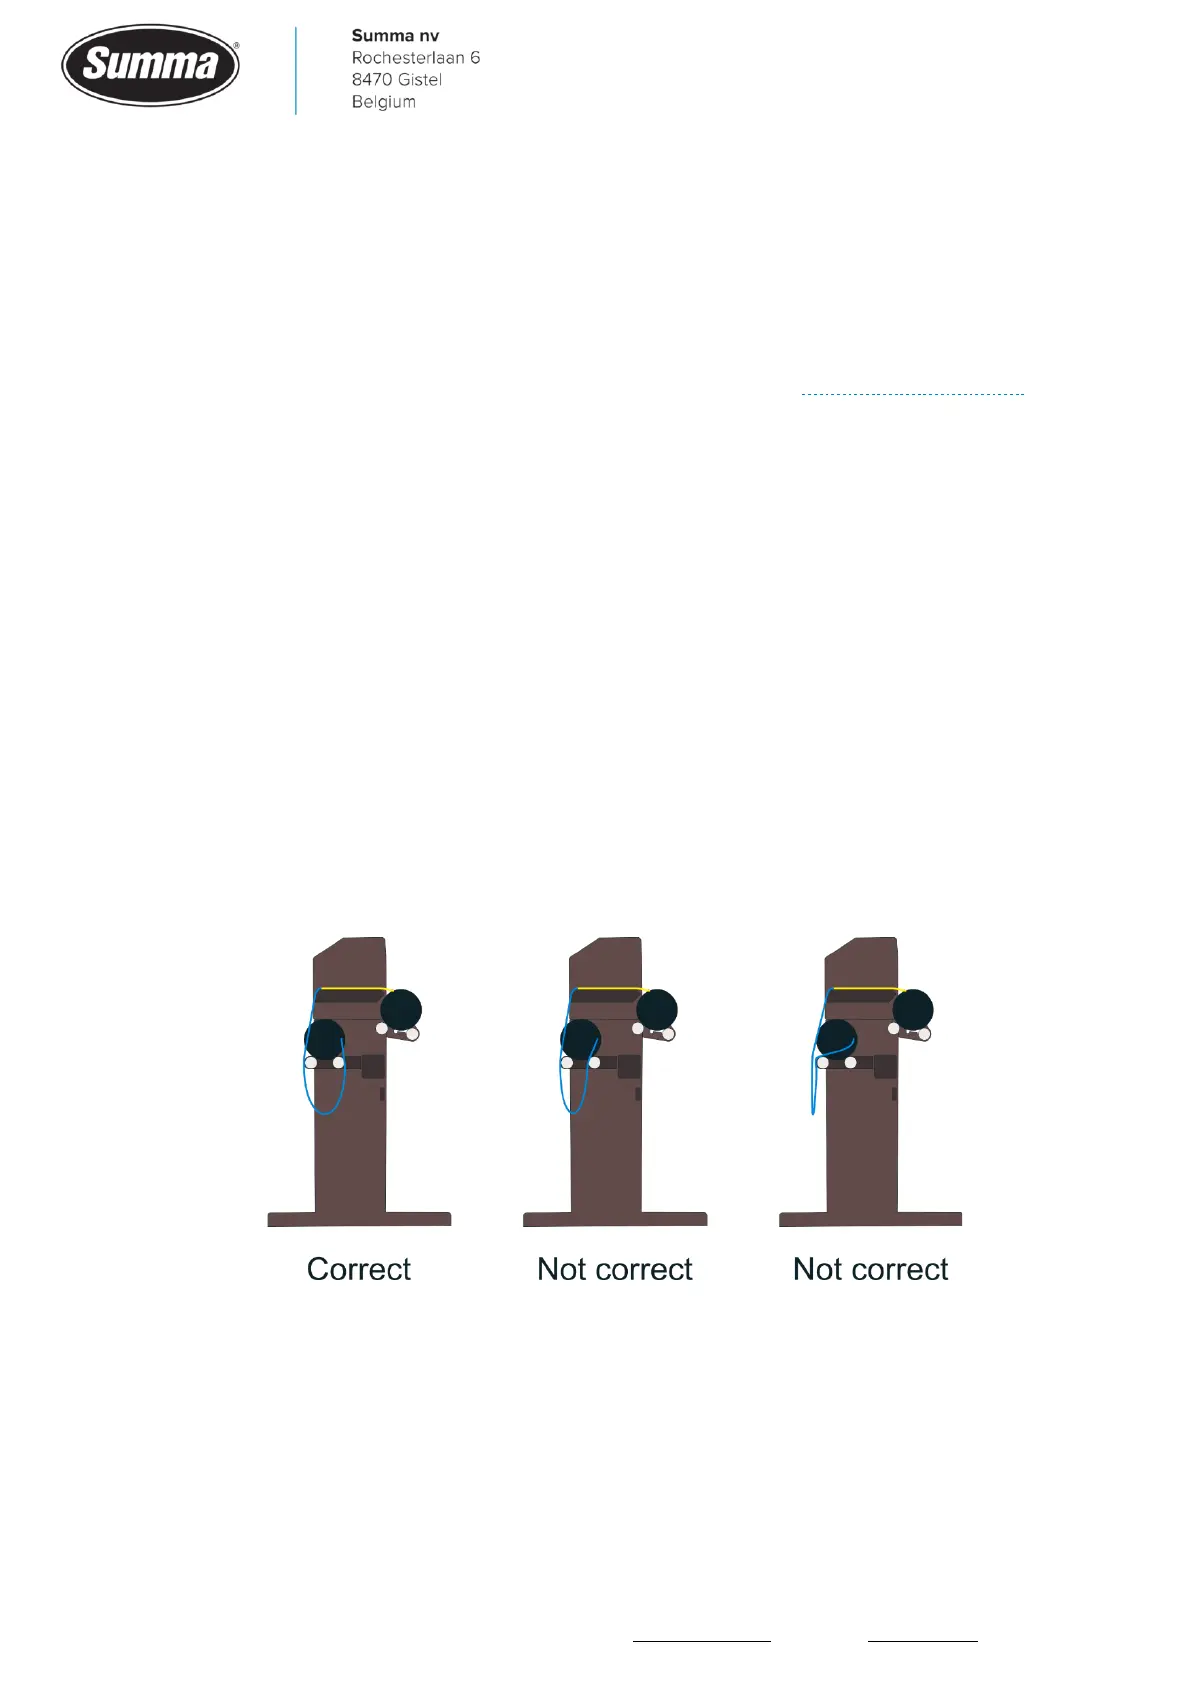
fed forward, or has to unwind when the media is fed backwards. The size of the loop of the
media is controlled by an ultrasonic sensor.
In case the roll-up does not work as expected, check the following:
• The path of the media has to be correct, as illustrated below:
• The roll-up has to be enabled: start the machine in service mode, click [SERVICE MODE] –
[SERVICE] – [Roll-up system?] and click on [Yes].
• The roll-up has to be set active: click [Settings] – [More] – [General] – [Roll-up] and set to
“On” or “AUTO-panels”.
• Paneling may have to be activated. For cut only jobs, click [Settings] – [Advanced] –
[Paneling]. For print & cut jobs, click [Settings] – [More] – [OPOS] – [OPOS Paneling].