6-14 Sun Blade 150 Service Manual • June 2002
3. If necessary to provide clearance, remove any long PCI cards from the riser board
connectors.
See Section 8.4.1, “Removing a PCI Card” on page 8-10.
4. Move the peripheral assembly aside to provide clearance:
a. Open the cable routing clip below the peripheral assembly.
This will release the tension from the smart card and diskette drive cables. You do
not have to disconnect the cables.
b. Using a No. 2 Phillips screwdriver, loosen (but do not remove) the three screws
securing the peripheral assembly to the chassis (see
FIGURE 7-1).
c. Slide the peripheral assembly back and lift it from the chassis.
Do not remove any of the cables attached to the peripheral assembly.
d. Set the peripheral assembly on an antistatic mat.
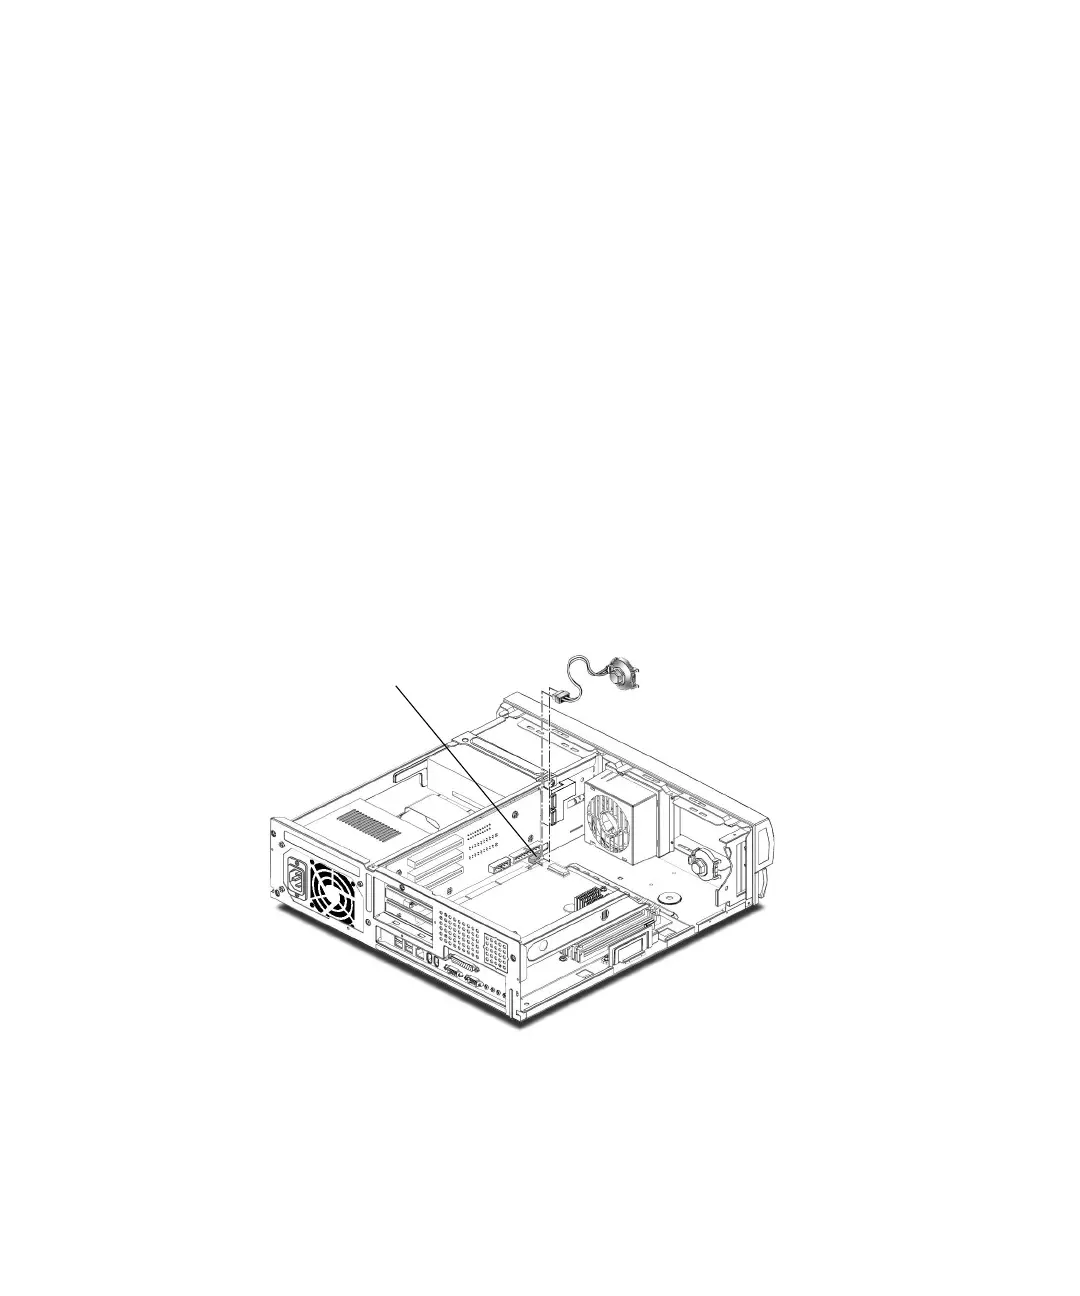
5. Disconnect the speaker cable from connector J12 on the riser board.
6. Press the speaker retaining tab on the chassis front panel.
7. Remove the speaker assembly from the chassis.
FIGURE 6-9 Removing and Replacing the Speaker Assembly
J12 connector