Chapter 8 Removing and Replacing the Motherboard and Related Components 8-9
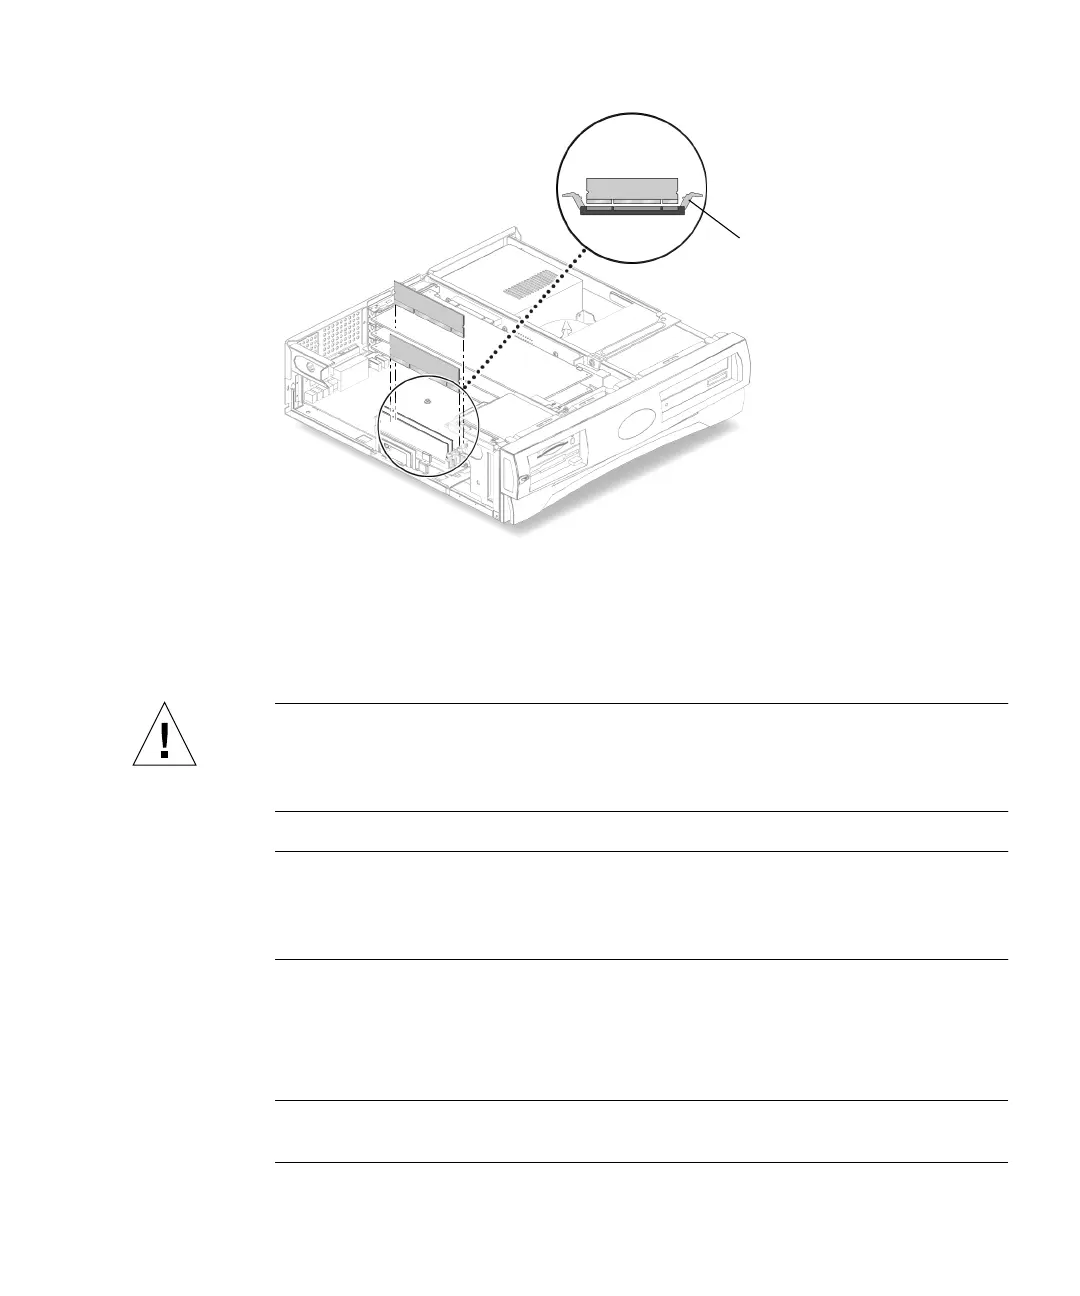
FIGURE 8-5 Removing and Replacing a DIMM
8.3.2 Replacing a DIMM
Caution – Do not remove any DIMM from the antistatic container until you are
ready to install it on the motherboard. Handle DIMMs only by their edges. Do not
touch DIMM components or metal parts. Always wear an antistatic wrist strap when
handling DIMMs.
Note – Always remove and replace DIMMs in order, beginning with the DIMM
closest to the edge of the motherboard (
FIGURE 8-4). The system will not function
properly with only three installed DIMMS. You must install either one DIMM, two
DIMMs, or four DIMMs.
1. Remove the DIMM from the antistatic container.
2. Position the DIMM in the connector, ensuring that the notches on the bottom of
the DIMM are aligned with the connector alignment keys (
FIGURE 8-5).
Note – DIMM alignment notches and connectors are keyed to ensure proper DIMM
orientation.
Ejection lever