6-2 Sun Blade 150 Service Manual • June 2002
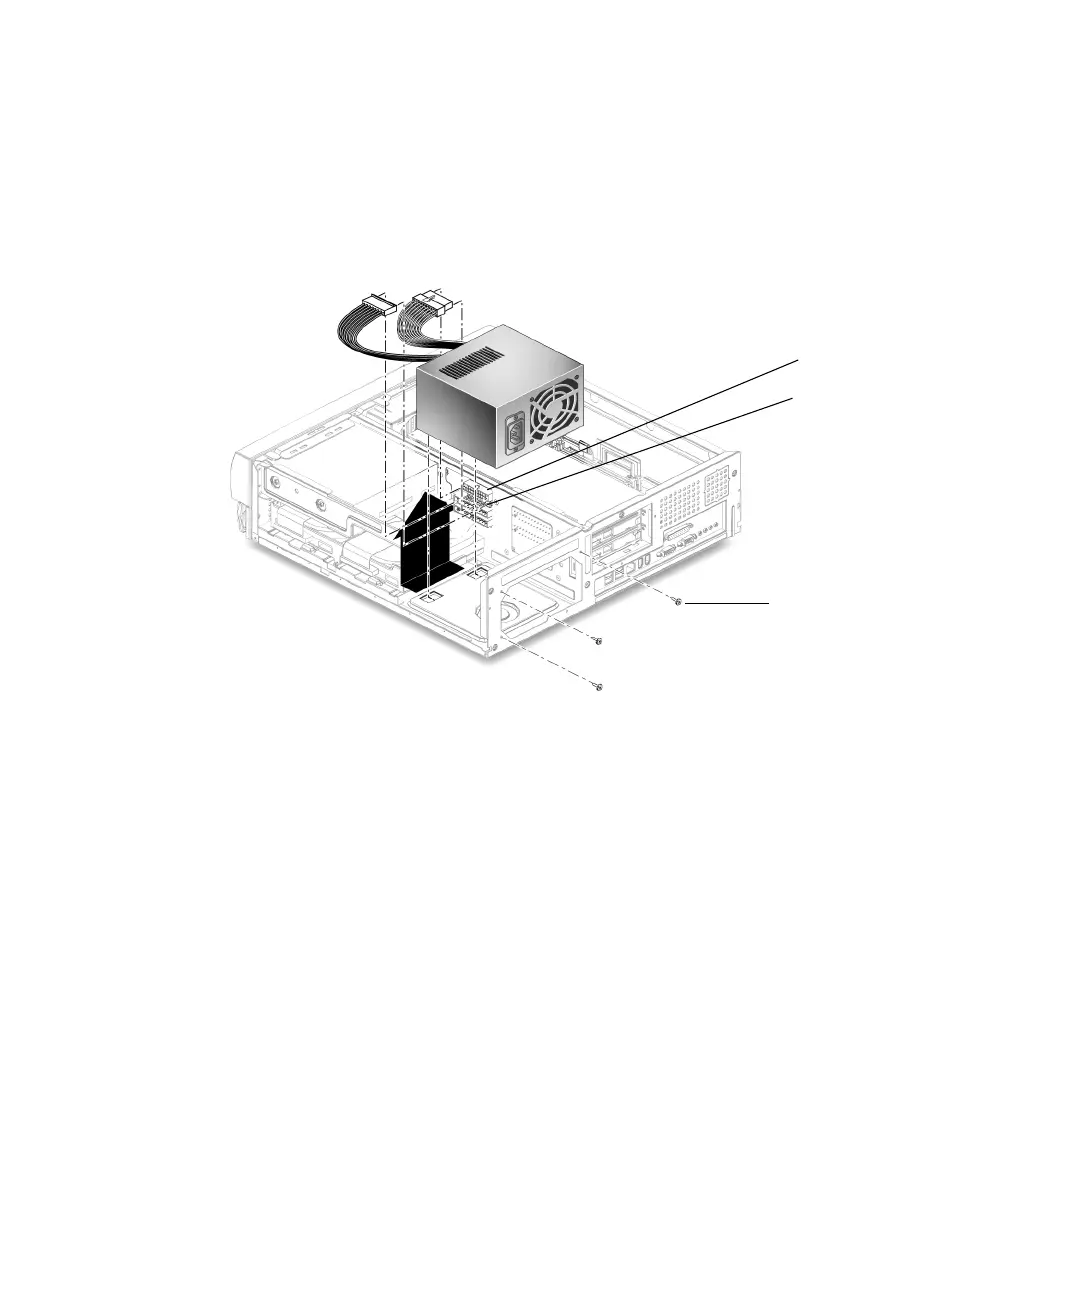
4. Using a No. 2 Phillips screwdriver, remove the three screws securing the power
supply to the back panel.
5. Push the power supply toward the chassis front to disengage the power supply
from the chassis mounting hooks on the bottom of the chassis.
6. Lift the power supply from the chassis.
FIGURE 6-1 Removing and Replacing the Power Supply
6.1.2 Replacing the Power Supply
1. Position the power supply into the chassis, tilting it slightly toward the back of
the chassis (
FIGURE 6-1).
2. Push the power supply toward the chassis rear to engage the mounting hooks.
3. Using a No. 2 Phillips screwdriver, replace the three screws securing the power
supply to the back panel.
4. Connect the power cable connector to the riser board connector J501.
5. Connect the power cable connector from riser board connector J505.
6. Detach the wrist strap, replace the system cover, and power on the system as
described in Chapter 9.
screws (3)
J501
J505