Chapter 6 Removing and Replacing Major Subassemblies 6-5
6.2.3 Removing the Diskette Drive Power Cable
Assembly
1. Power off the system, remove the system cover, and attach an antistatic wrist strap
as described in Chapter 5.
Caution – Use proper ESD grounding techniques when handling components. Wear
an antistatic wrist strap and use an antistatic mat. Store ESD-sensitive components in
antistatic bags before placing them on any surface.
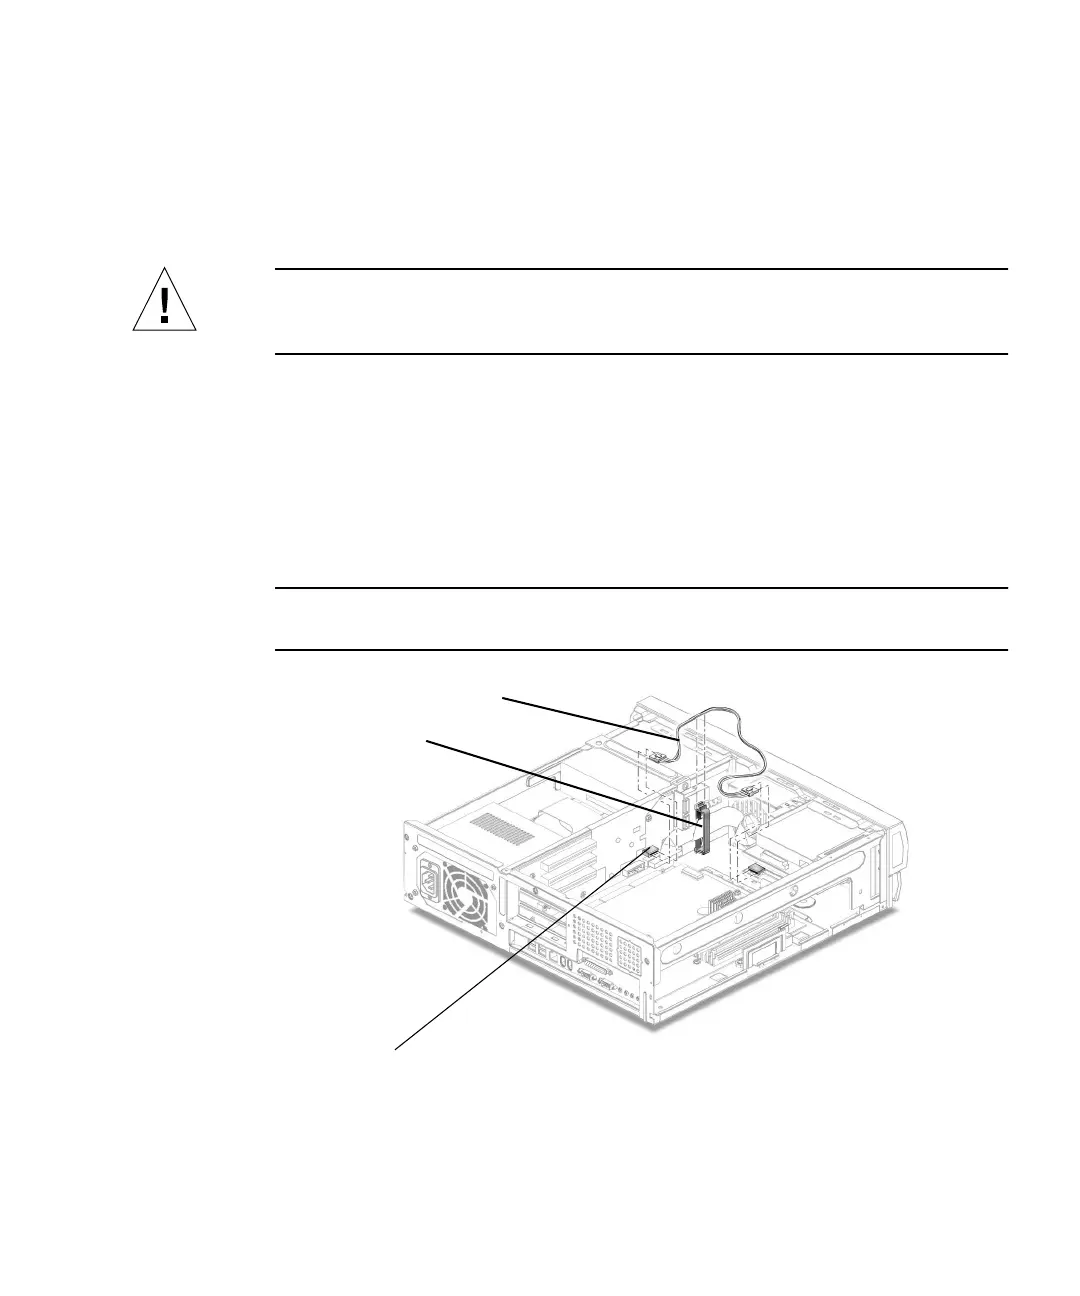
2. Remove the diskette drive power cable assembly connectors from the following
(
FIGURE 6-3):
■ Diskette drive
■ Riser board (J10)
3. Open the two cable routing clips (
FIGURE 6-3).
4. Remove the diskette drive power cable assembly from the chassis.
Note – You can move the fan assembly for easier access to the cables. See
Section 6.4.1, “Removing the Fan Assembly” on page 6-15.
FIGURE 6-3 Removing and Replacing the Diskette Drive Power Cable Assembly
Diskette drive power cable
Cable routing clip
J10 connector