Chapter 6 Removing and Replacing Major Subassemblies 6-7
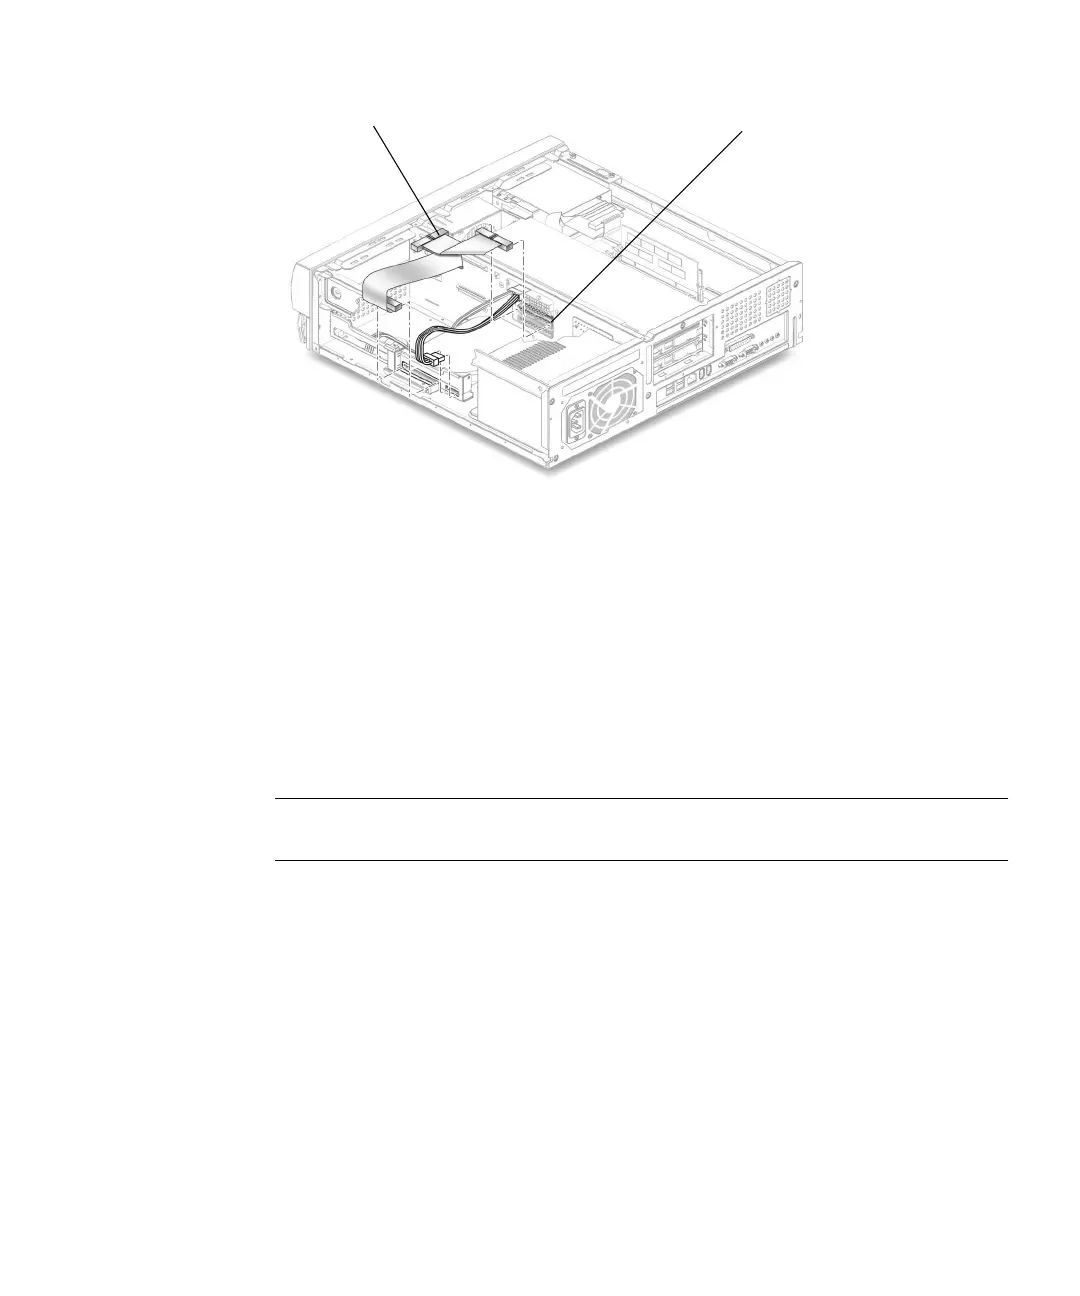
FIGURE 6-4 Removing and Replacing the Primary IDE Cable Assembly
6.2.6 Replacing the Primary IDE Cable Assembly
1. Position the primary IDE cable assembly into the chassis (FIGURE 6-4).
2. Connect the primary IDE cable assembly connectors to the following:
■ Primary hard drive
■ CD-ROM or DVD-ROM drive
■ Riser board (J504 is also labeled IDE1)
Note – Ensure that the cable assembly connectors are properly oriented by aligning
the connector keys.
3. Detach the wrist strap, replace the system cover, and power on the system as
described in Chapter 9.
6.2.7 Removing the Secondary IDE Cable Assembly
The secondary IDE cable assembly connects the optional secondary hard drive to the
system.
1. Power off the system, remove the system cover, and attach an antistatic wrist strap
as described in “Preparing for Component Removal and Replacement” on
page 5-1.
IDE 1 (J504)
CD-DVD-ROM connector