Chapter 5 Troubleshooting
Replacing Cards
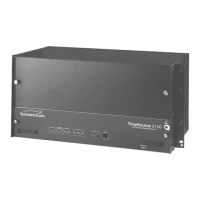
170 TimeSource 3100 User’s Guide 097-72020-01 Revision K – December 2005
Replacing Cards
To replace the plug-in card, perform the following teps F, and refer to Figure 5-2.
1. Put on an ESD wrist strap.
2. Plug the ESD wrist strap into the ESD jack on the front panel of the shelf.
On the Faulty Card
3. Loosen the two retaining screws that secure the plug-in card in the shelf.
4. Pull out on the two latching levers to disconnect the card from the shelf
connectors.
5. Pull the card completely out of the shelf.
On the Replacement Card
6. Pull out the latching levers at each end of the front panel of the card so that the
levers are pointing directly out from the front panel of the card.
7. Insert the new card into the tracks at each side of the shelf, and slide the card
into the shelf until the latching levers begin to move in.
8. Push the latching levers flat against the front panel of the card to complete the
card insertion.
9. Tighten the knurled screw above each latching lever to secure the card in the
shelf.
10.Unplug, and remove, the grounding wrist strap.
11.Reconfigure the system per application requirements.
 Loading...