Chapter 3 Installing the TimeSource 3100
Making Cable Connections
70 TimeSource 3100 User’s Guide 097-72020-01 Revision K – December 2005
Making Ethernet Connections
Connect the Ethernet cable from the network to the 10base-T Ethernet connector
labeled E-NET. See Table 3-8 for the connector location, and Table 3-4 for the
connector pinouts.
Note: Pins not listed are reserved for future use.
Connecting to Communication Port 1
To provide an RS-232 link for TL1 command access to the TimeSource 3100,
connect to port 1 at the female 25-pin D connector labeled COM 1. See Figure 3-8
for the location of the connector. See Table 3-5 for the connector pinouts.
Note: Pins not listed are reserved for future use.
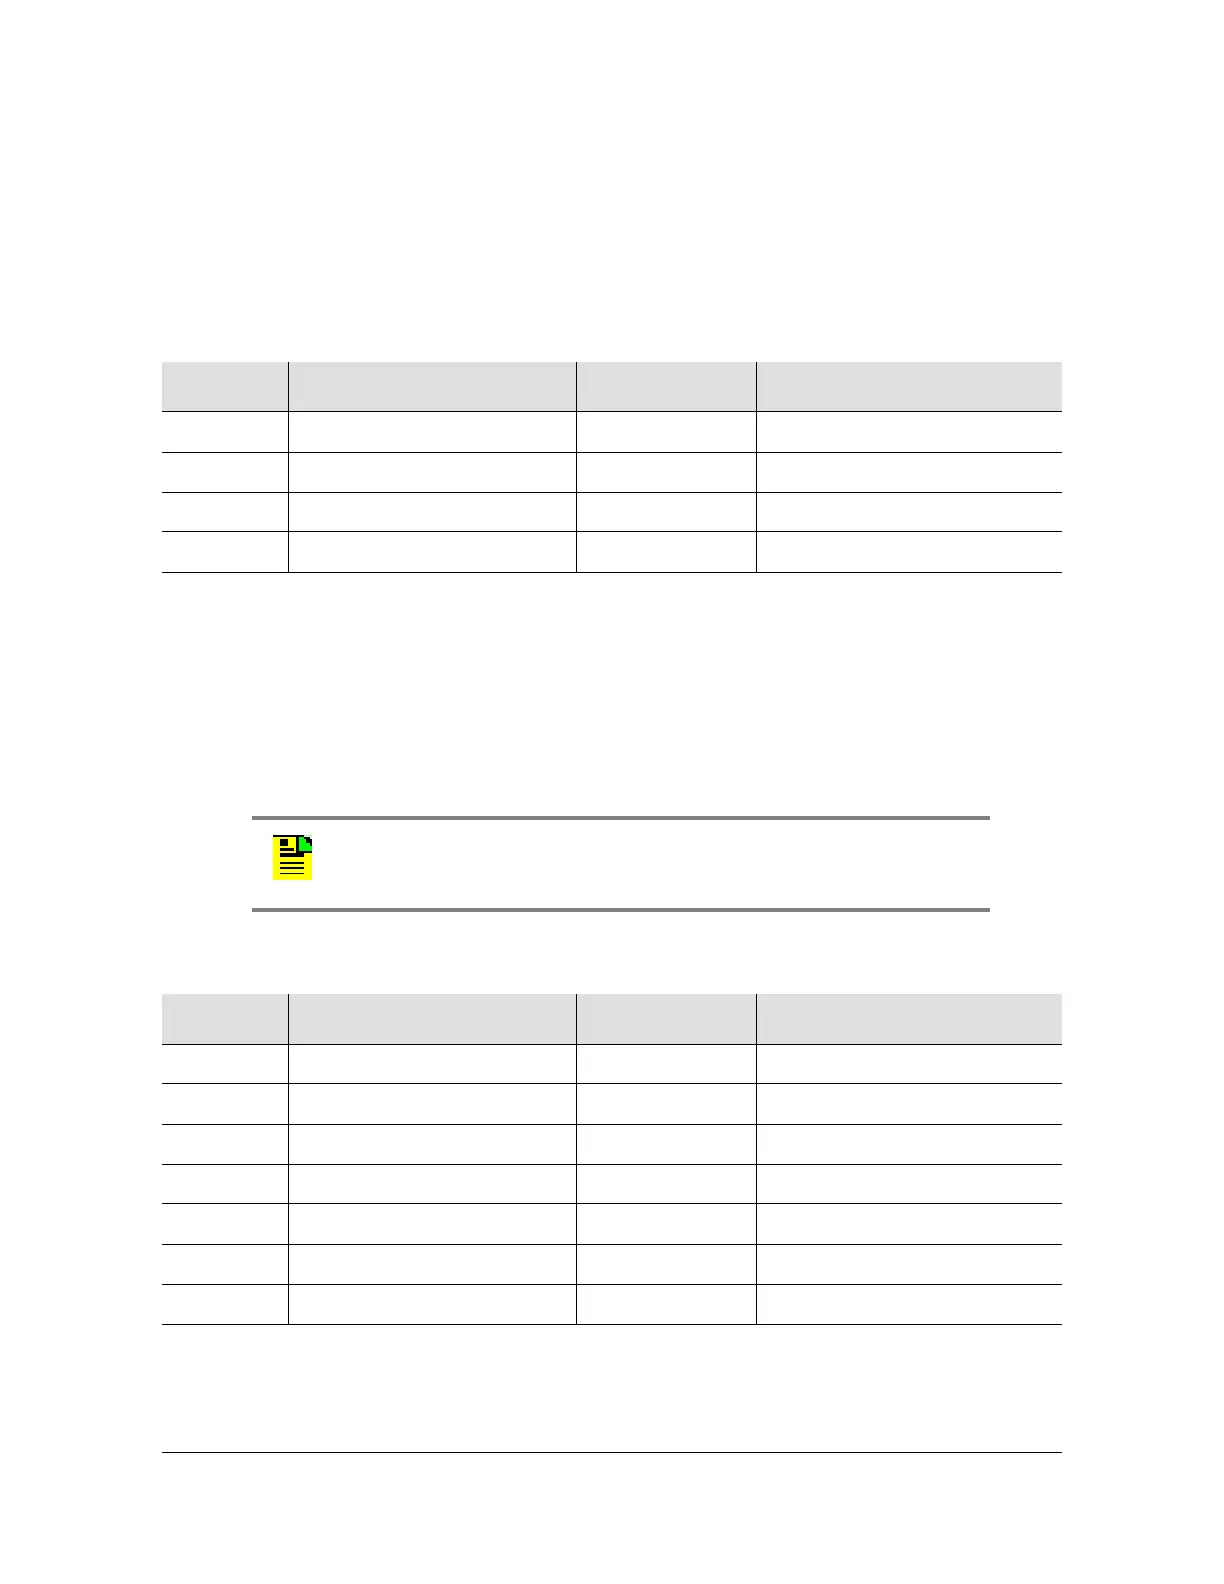
Table 3-4. Ethernet RJ-45 Connector Pinout
Pin Signal Abbreviation Direction
1 Transmit data + TXD + From TimeSource 3100
2 Transmit data – TXD – From TimeSource 3100
3 Receive data + RXD + To TimeSource 3100
6 Receive data – RXD – To TimeSource 3100
Note: The COM 1 connector transmits data on pin 2 and receives
data on pin 3. Be sure the other equipment receives data from the
transmitting pin, and transmits data to the receiving pin.
Table 3-5. COM 1 Connector Pinout
Pin Signal Abbreviation Direction
2 Transmit data TXD From TimeSource 3100
3 Receive data RXD To TimeSource 3100
4 Request to send RTS From TimeSource 3100
5 Clear to send CTS To TimeSource 3100
6 Data set ready DSR To TimeSource 3100
7 Signal ground GND —
20 Data terminal ready DTR From TimeSource 3100
 Loading...