8-20 4252490-Rev A
CUTTING UNITS
8
Figure 8-9
6. Install spacer (10), washer (11), lock washer (13),
and screw (12).
Figure 8-10
7. Install counterweight (16), two screws (14), and two
lock washers (15).
8. Adjust bedknife-to-reel clearance. (See
“Bedknife-to-Reel Clearance Adjustment” on
page 8-17.)
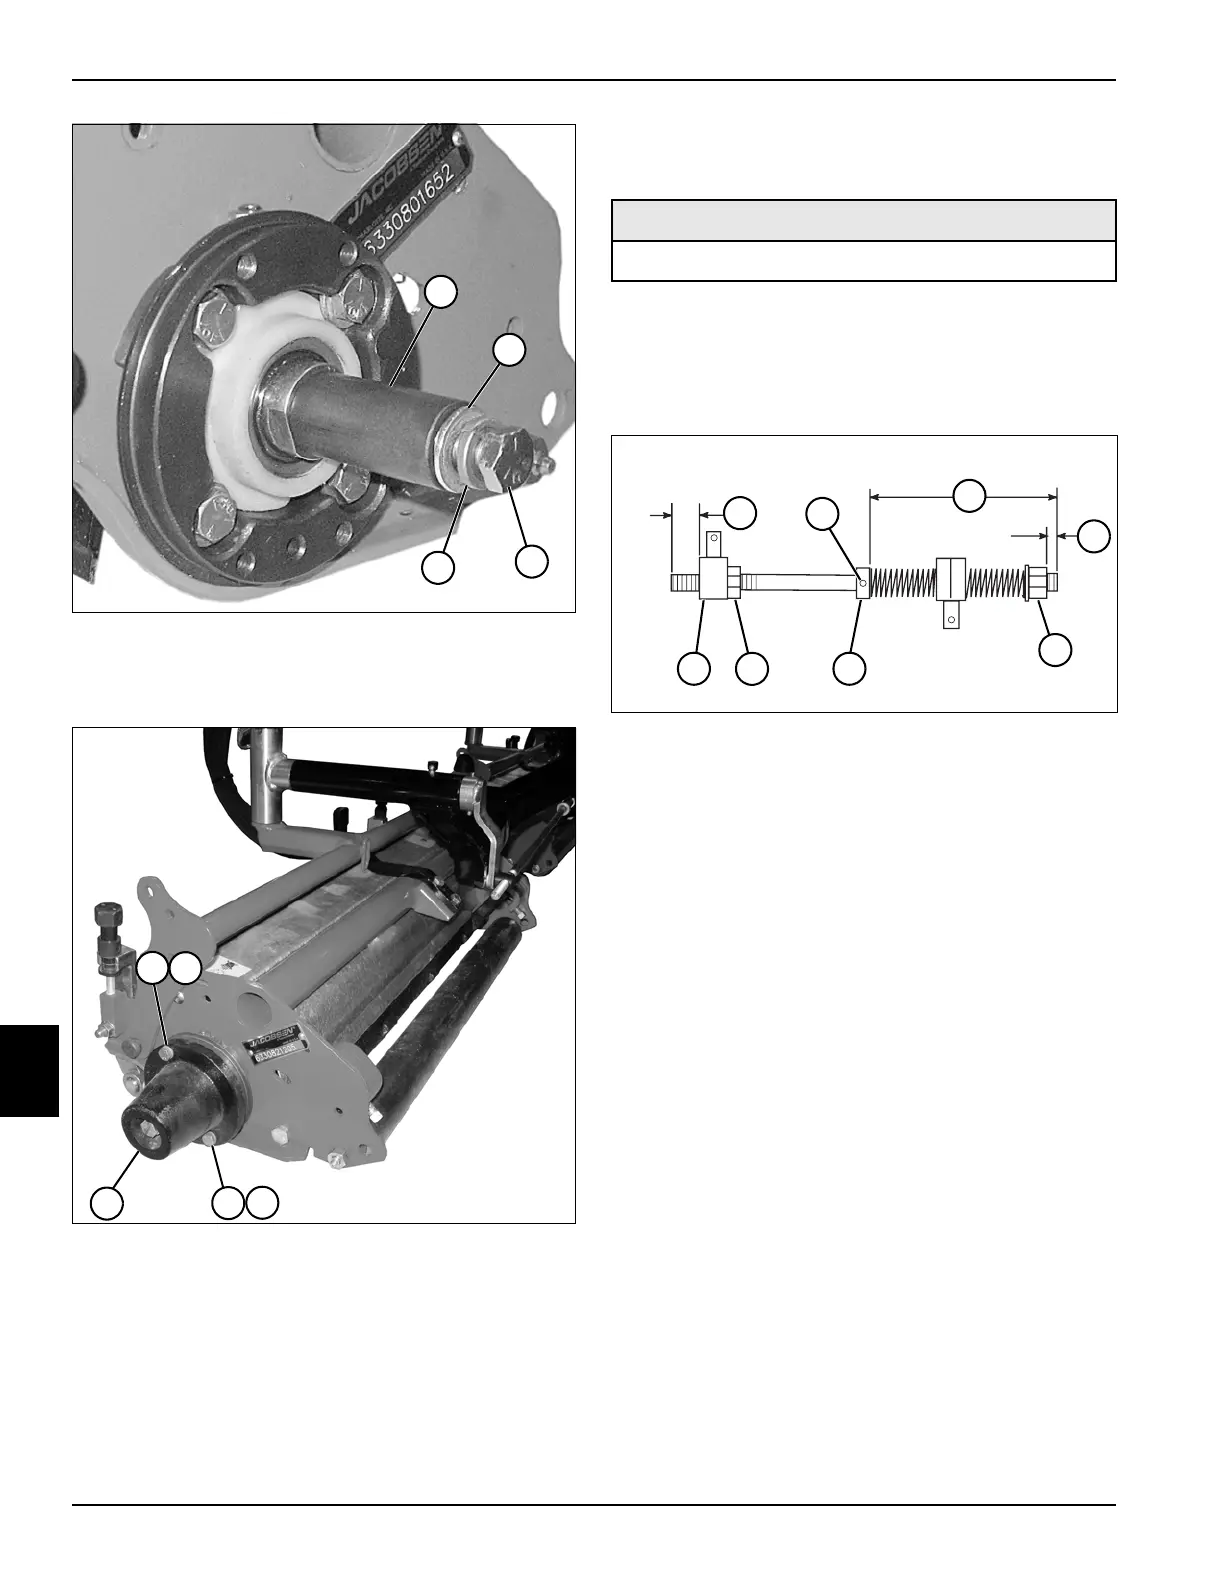
Reel Leveling Rod Pre-Adjustment
See Figure 8-11.
1. Park the mower safely. (See “Park Mower Safely” on
page 1-6.)
2. Remove reel leveling rod. (See “Reel Leveling Rod”
on page 8-23.)
Figure 8-11
3. Measure distance (1) between end of leveling rod
and face of rod connecting pin. The measurement
should be 1.5 in. (38.1 mm). If the measurement
does not meet specifications, adjust as follows:
a. Loosen nut (7).
b. Turn rod connecting pin (8) as needed to obtain
proper distance (1).
c. Tighten nut (7).
4. Measure distance (3) between end of leveling rod
and face of collar. The measurement should be
4.606 in. (117 mm). If the measurement does not
meet specifications, adjust as follows:
a. Loosen the set screw (2) on collar (6).
b. Slide collar (6) as needed to obtain proper
distance (3).
5. Apply Loctite
®
242 (Blue) to the threads of the set
screw (2).
6. Tighten the set screw (2) on collar (6).
7. Measure distance (4) between end of leveling rod
and face of nut. The measurement should be 0.094
in. (2.4 mm). If the measurement does not meet
specifications, turn nut (5) as needed to obtain
proper distance (4).
8. Install reel leveling rod. (See “Reel Leveling Rod” on
page 8-23.)
9. Level cutting unit as necessary. (See “Cutting Unit
Leveling Adjustment” on page 8-21.)
TN2653
10
12
11
13
TN3749
14
15
14
16
15
Required Materials
Loctite
®
242 (Blue)
TN3813
4
1
3
8
7
2
5
6

 Loading...


