5-14 Videojet DataFlex 6530 Service Manual - Rev AA
CLARiTY Operating System
5.4.1 Password Protection Set-up
Set-up of password protection for CLARiTY is done using the CLARiTY Configuration Manager.
Run CLARiTY Configuration Manager on the PC and upload the printer parameters.
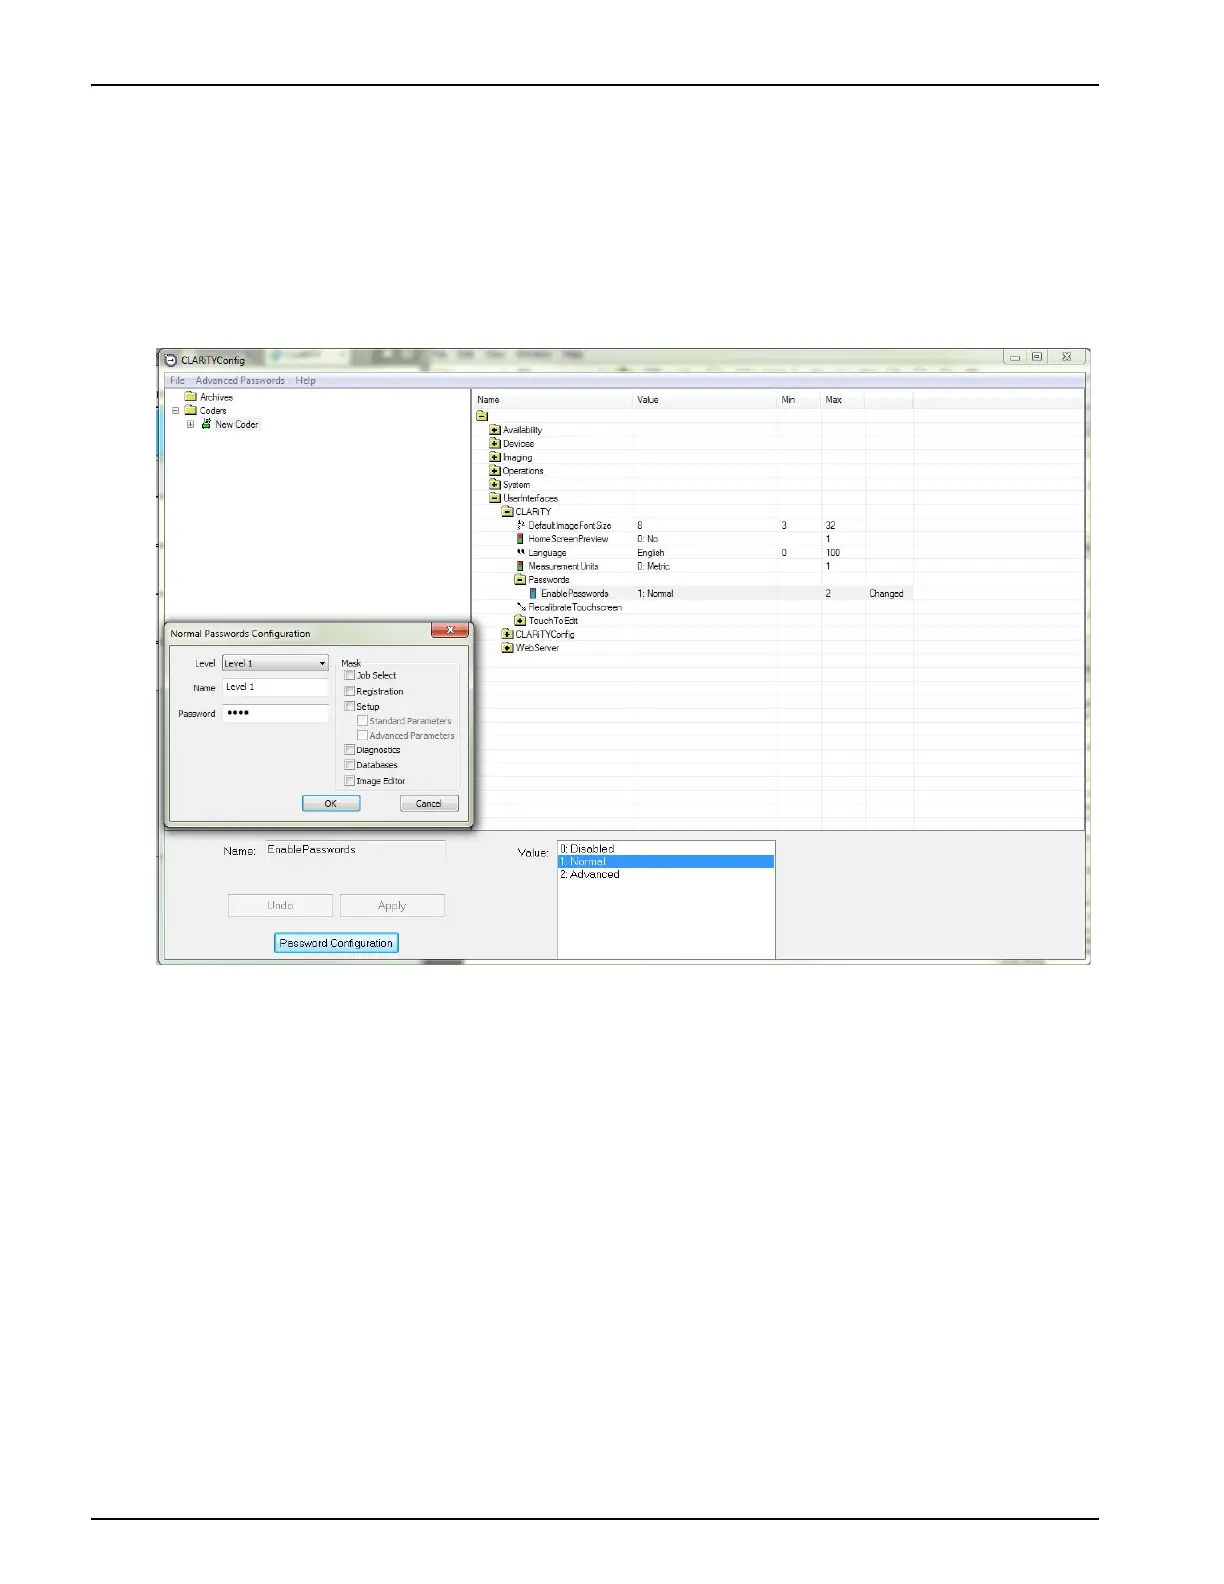
The menu tree to reach password protection set-up is shown in the CLARiTY screen in
Figure 5-8.
In addition to the global enable/disable of passwords there are three parameters for each of the
three user levels available:
• Mask: This enables/disables user access to each of the 5 CLARiTY functions - Job
selection, Image registration, Set-up, Diagnostics and Databases. Use the tick boxes
at the bottom of the above CLARiTY Configuration Manager screen to select the
required options and CLARiTY Configuration Manager generates the appropriate
mask number.
• Name: A name that may be optionally given to each user level as a reminder of the
user group during set-up of password protection.
• Password: The password required for each user access level.
For each level, select each of these parameters in turn as shown and set them as required. When
each parameter has been set, select 'Apply'. Users can select to download passwords along with
parameters by selecting the 'Update Passwords on Download' option on the right-click menu on a
coder. Finally right-click on the 'New Coder' icon and select 'Download' to change the set-up of
the printer. Alternatively, users can update passwords immediately by using the 'Update
Passwords' option on the same menu. Password protection is now be enabled.
Figure 5-8: Password Set - up