Videojet DataFlex 6530 Service Manual - Rev AA E-9
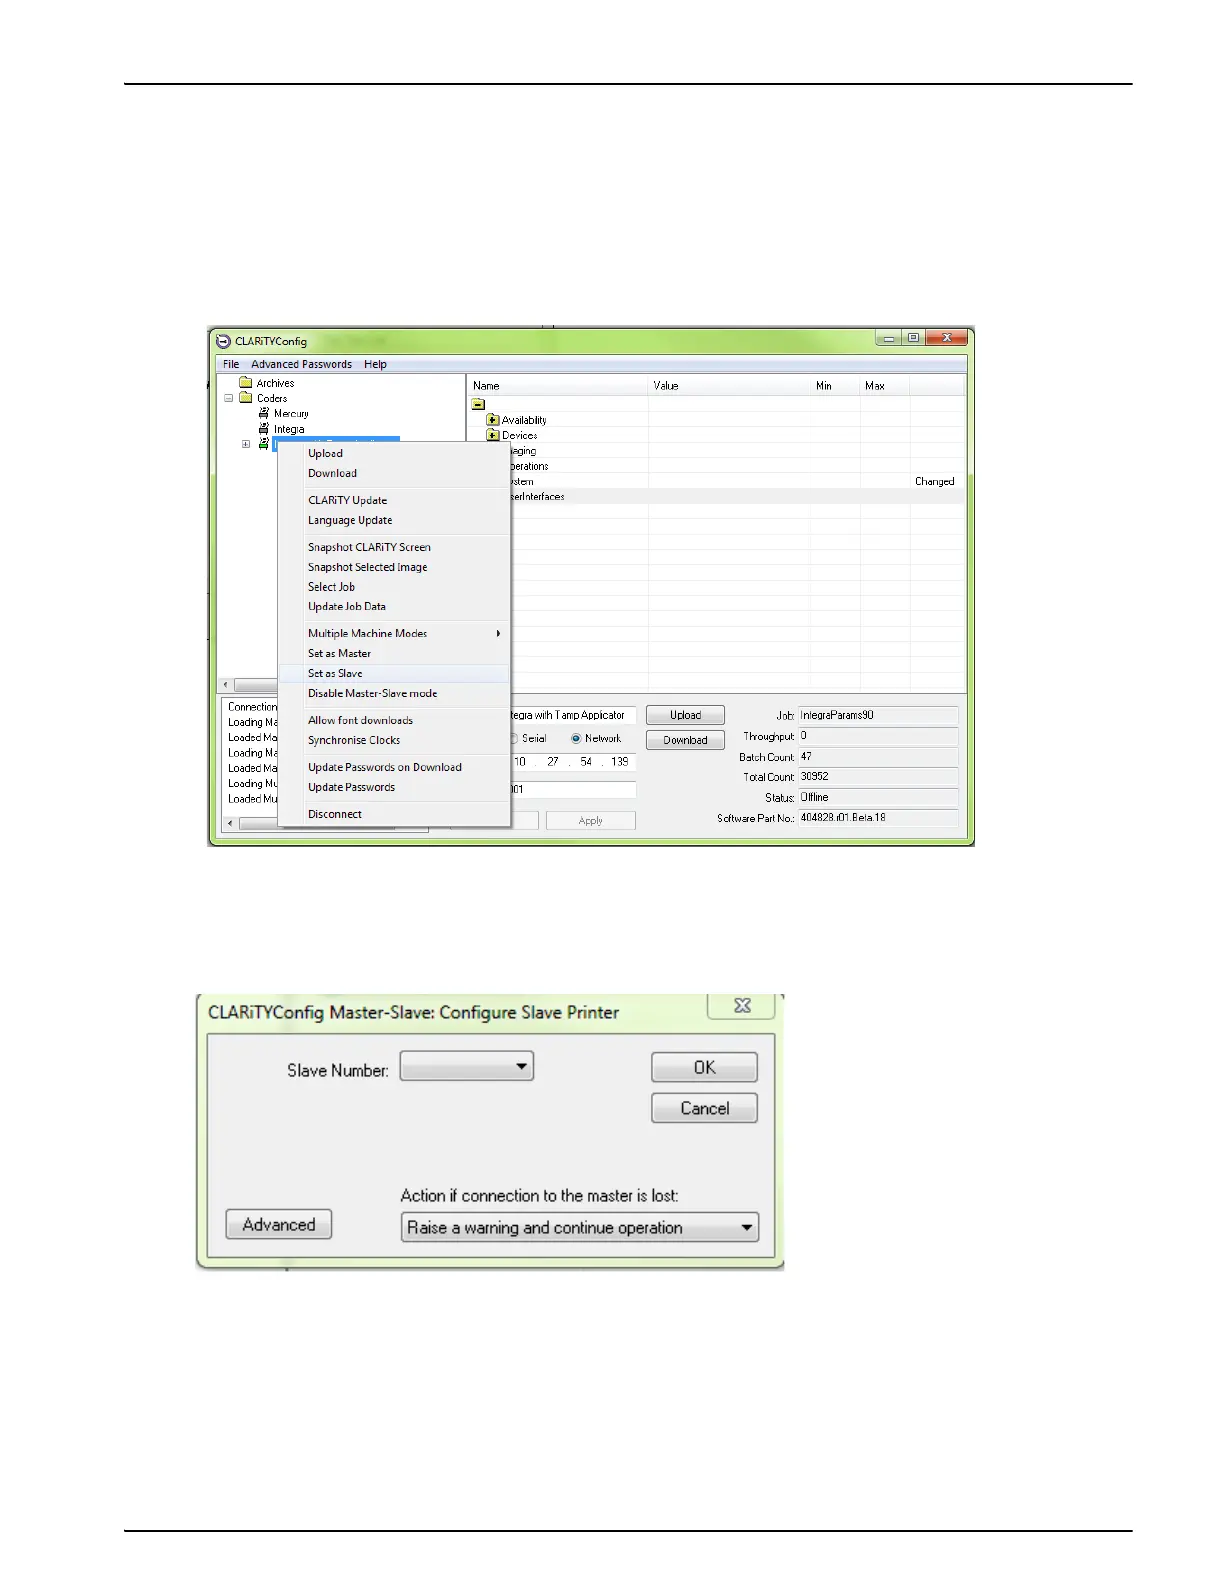
E.1.8.5 Configuring the Slave Printers
To configure the slave printer, proceed as follows:
1. Establish communications between CLARiTY Configuration Manager and the first Slave
printer (“Connecting the CLARiTY Configuration Manager to the Printer” on page 4-8).
2. Right click on the New Printer icon when the icon turns 'green' and select Set as Slave', from
the list as shown in Figure E-8.
If the printer has not been assigned an IP address or configured in advanced mode previously,
a configure slave printer dialog box appears (Figure E-9).
Figure E-8: CLARiTY Config - Slave Setup
Figure E-9: Configure Slave Printer Dialog Box