Maintenance2722−1/A1
Winterthur Gas & Diesel Ltd.
4/ 4
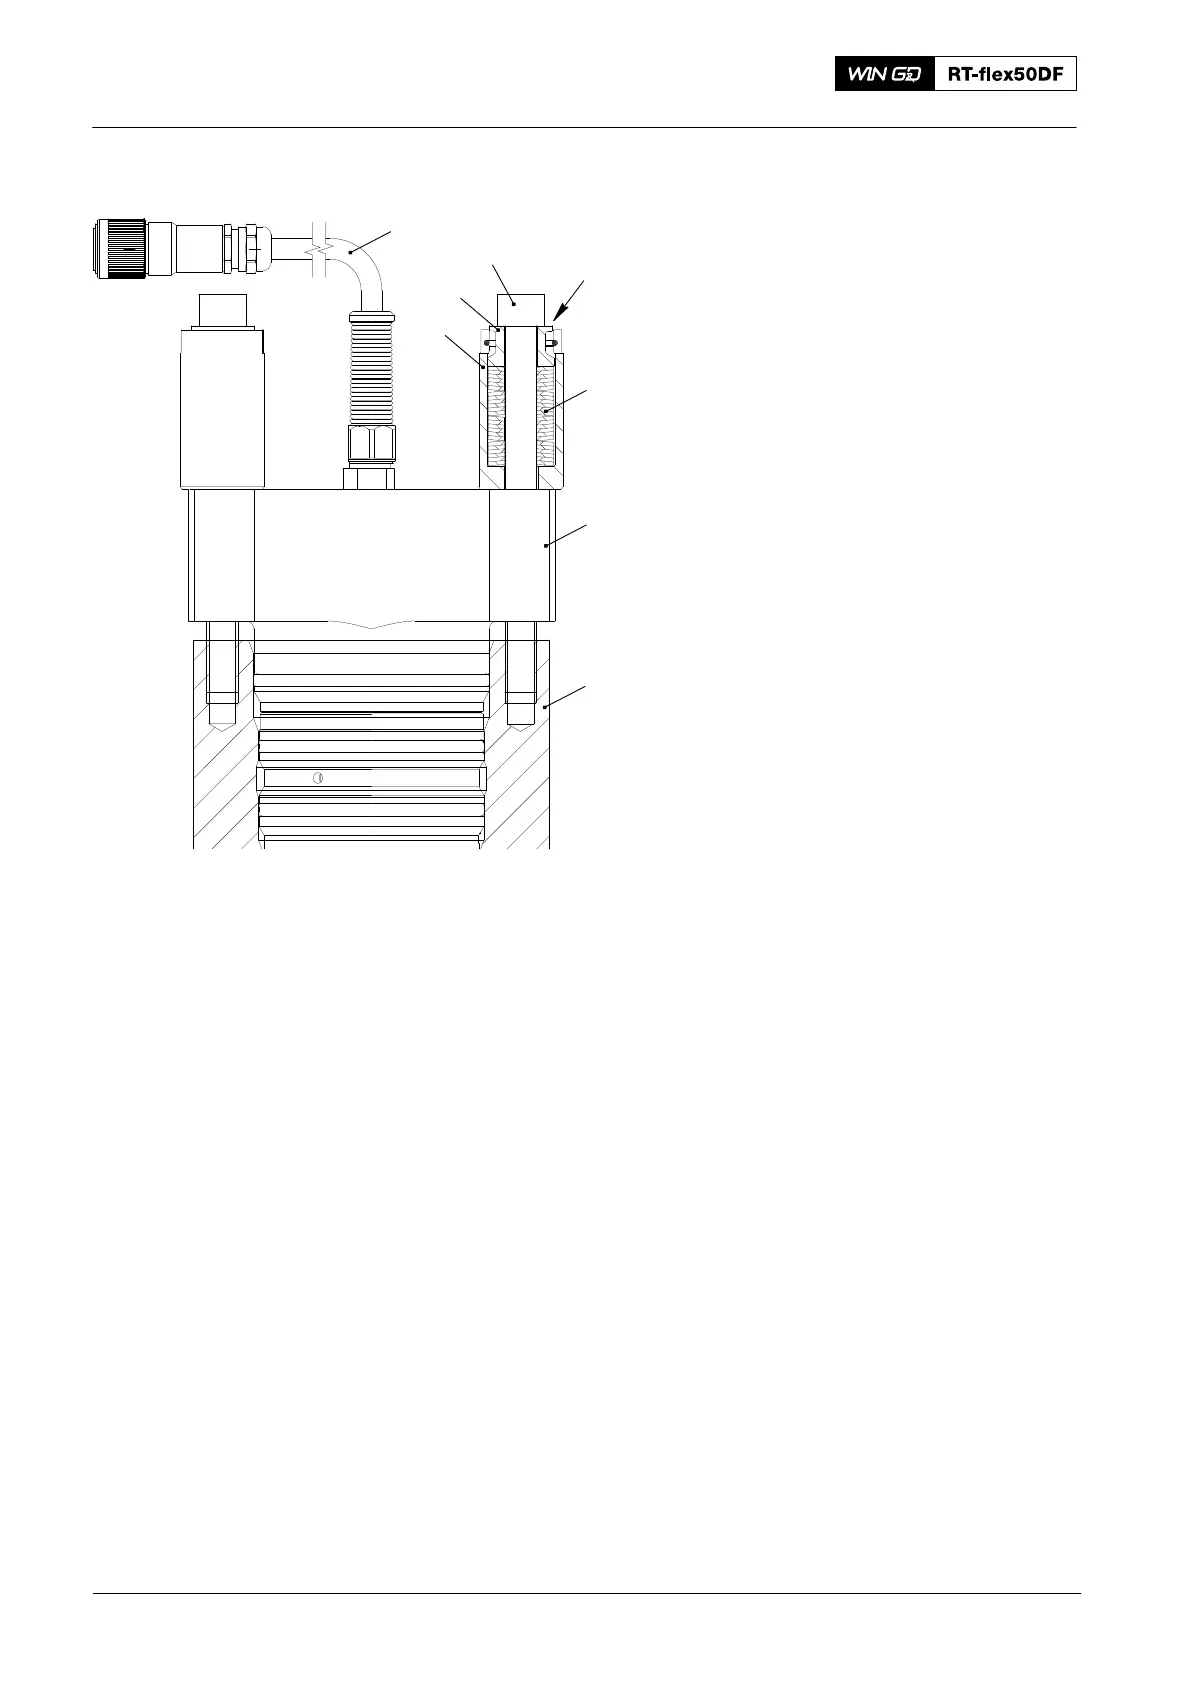
7) If the spring cage (5, Fig. 4) was
disassembled, make sure that the 24
cup springs (2) are installed as shown.
8) Apply Never-Seez NSBT8 to the
threads and the seating surface of the
screws (3).
9) Tighten equally the screws (3) until the
spring guide (6) is flush with the spring
cage (5).
10) Connect the cable (1) that you removed
before to the terminal box (95.41 to
95.47).
11) Install the HP fuel pipe, refer to 8733−1
paragraph 4.
2016
Injection Valve: Removal and Installation
WCH02401
Fig. 4
1
7
6
5
3
4
2
Flush