Maintenance2751−1/A1
Winterthur Gas & Diesel Ltd.
2/ 8
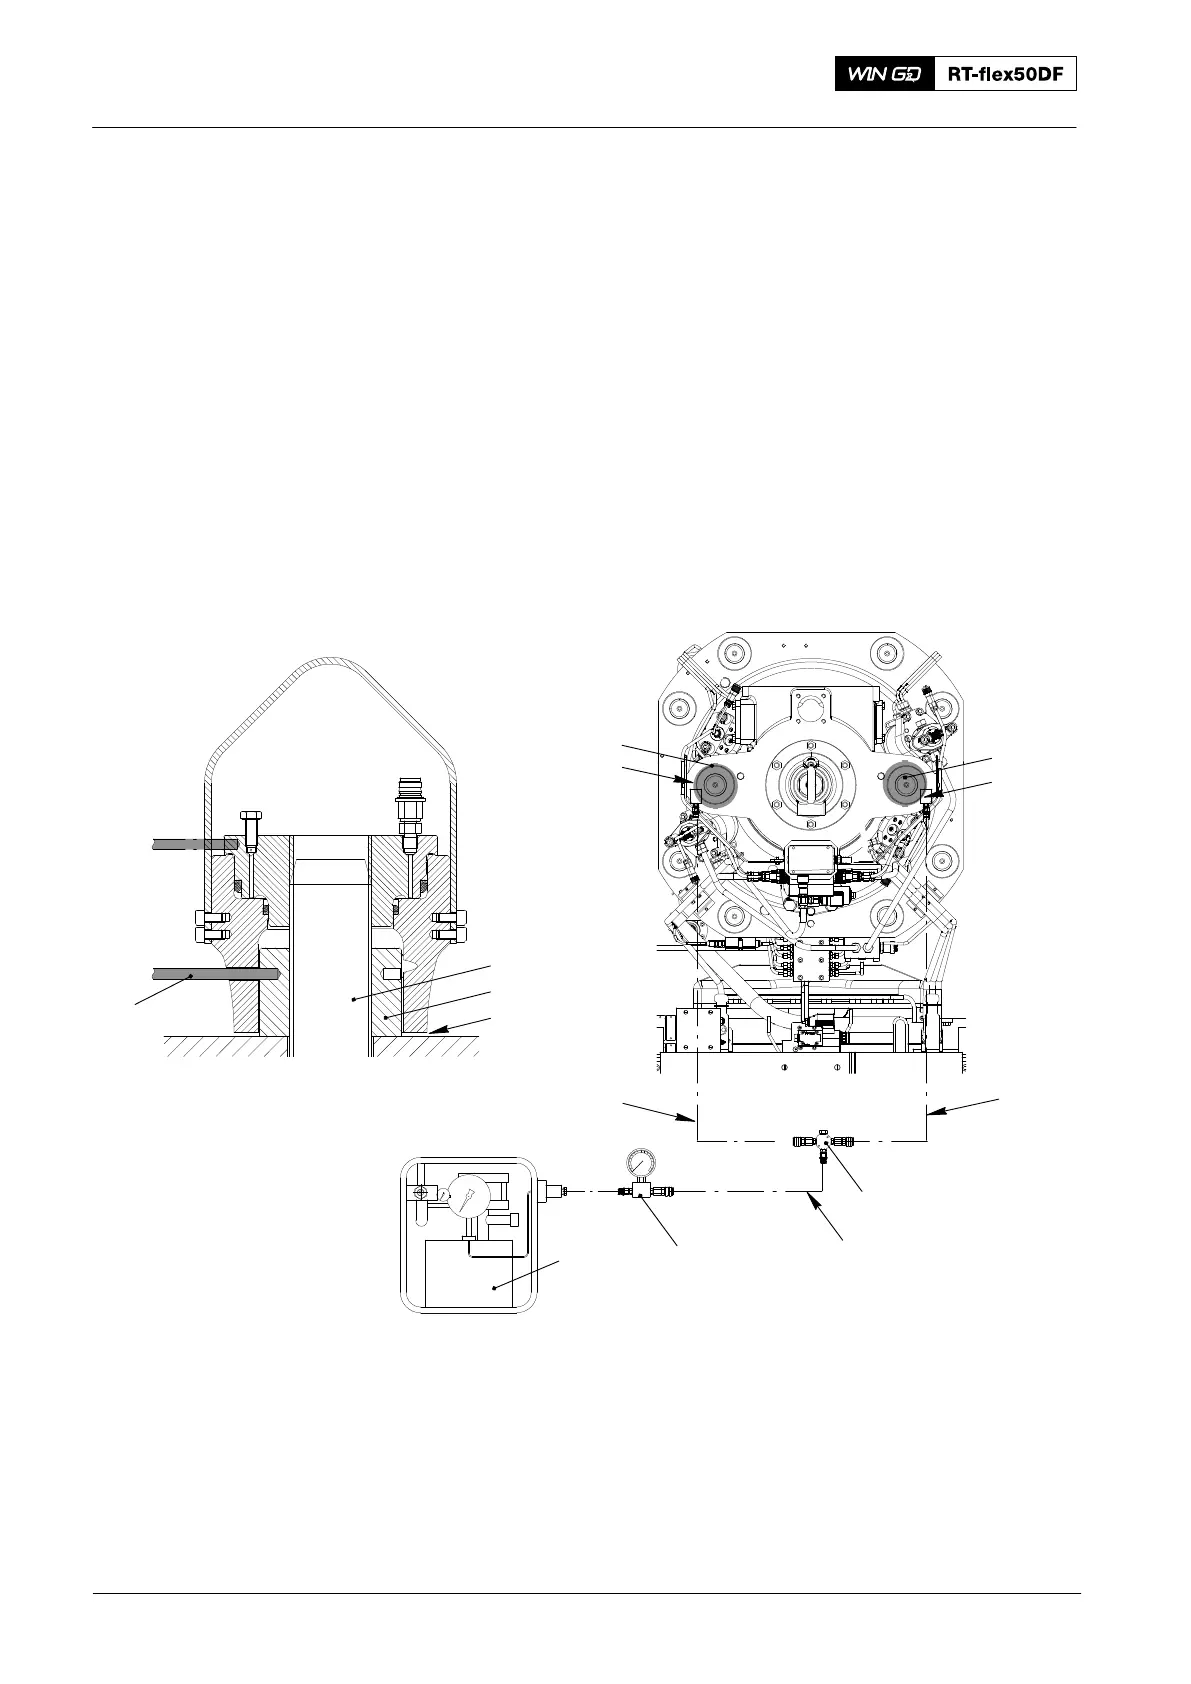
2. Removal Procedure
2.1 Round Nuts − Removal
1) Clean the threads of the elastic studs (1, Fig 2) and the area around the round
nuts (2).
2) Put the two pre-tensioning jacks (94252) in position on the applicable elastic
studs (1).
3) Connect the pre-tensioning jacks to the hydraulic unit (94942) as shown.
4) Use the round bar (4) to turn the round nuts (2) back one turn. Make sure that
there is a clearance (3).
5) Do the procedure given in 9403−4, paragraph 1 and paragraph 2 to apply tension
to the elastic studs (1).
6) Remove the round nuts (2).
009.701/02
1
2
94252
94934G
94252
94934G
94935
94935
94935
94934
013.622/05
94934A94942
WCH03193
Fig. 2
3
4
2016
Removal and Installation of Exhaust Valve, Replacement of Elastic Studs