Maintenance
2751−1/A1
Winterthur Gas & Diesel Ltd.
5/ 8
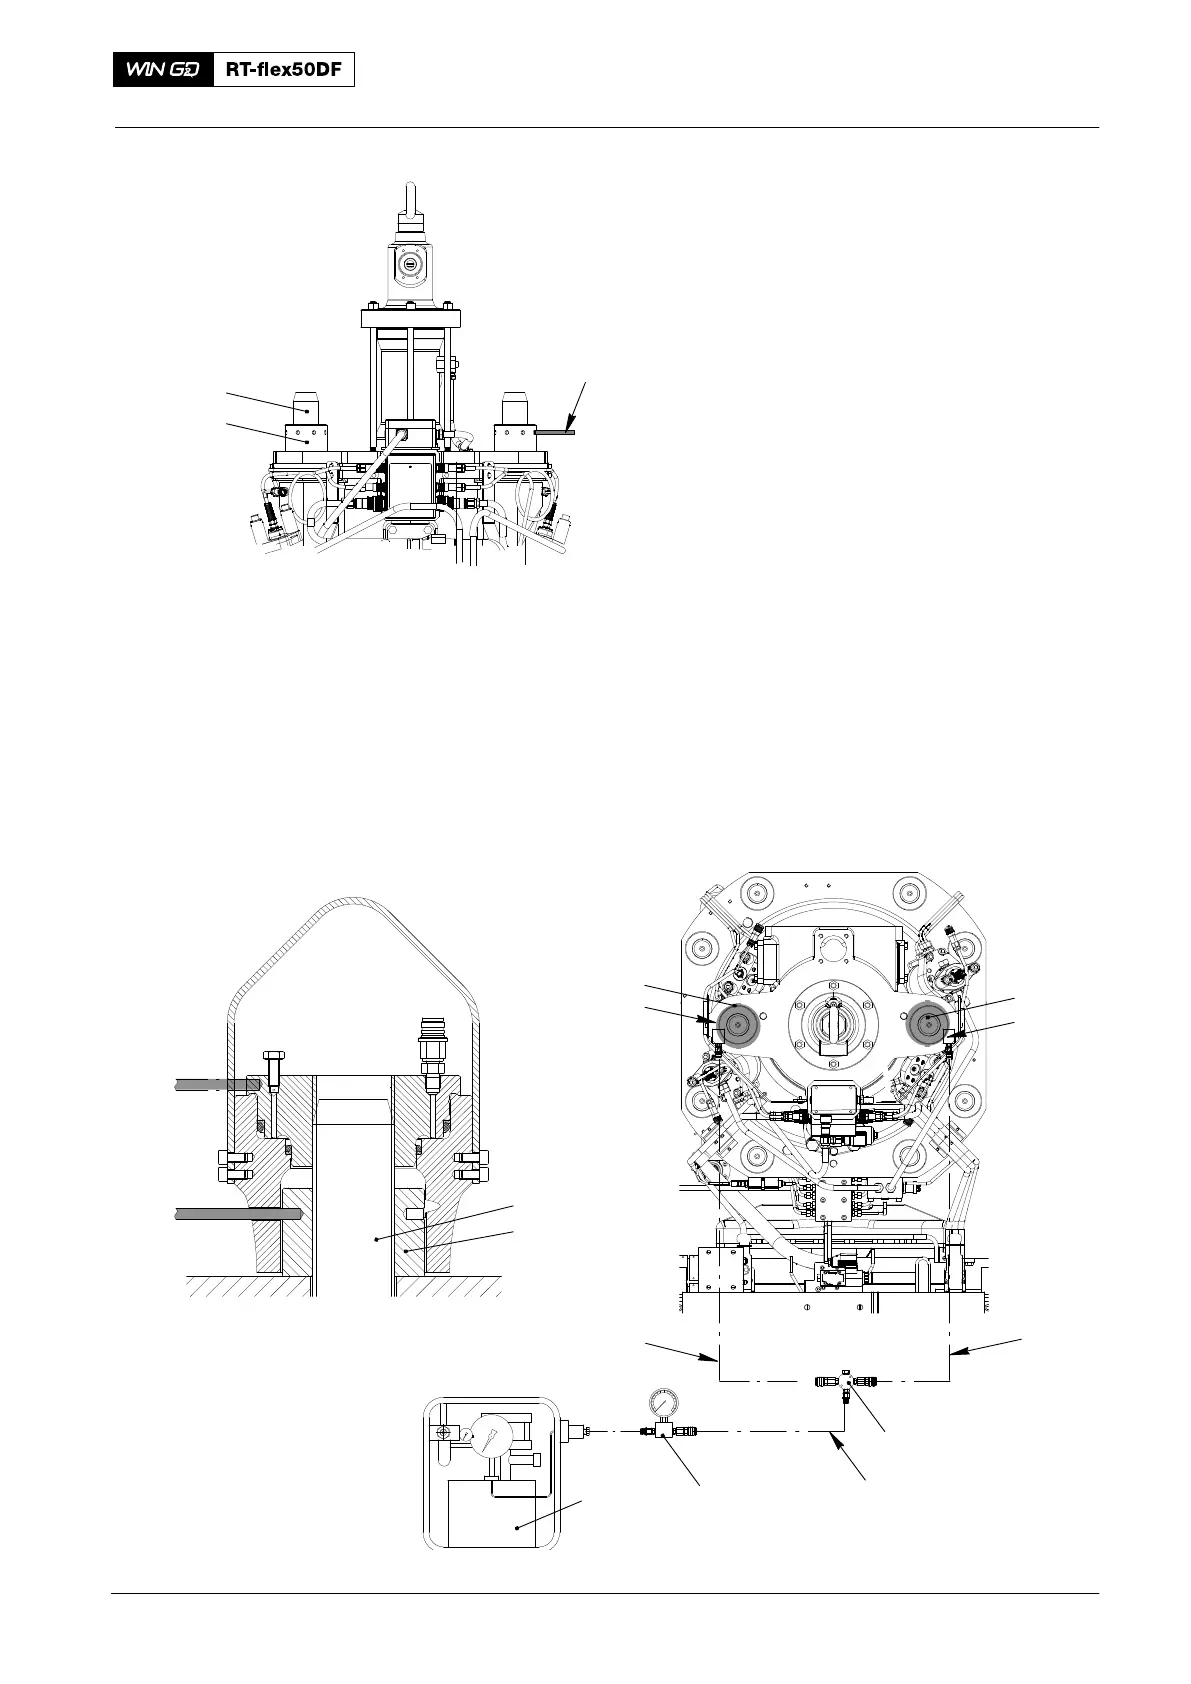
3.2 Round Nuts − Install
1) Clean all the sealing faces on the
exhaust valve and in the cylinder cover.
2) Apply a small quantity of oil to the
threads of the elastic studs (3, Fig. 8).
3) Attach the round nuts (2) to the elastic
studs (3). Tighten the round nuts with
the round bar (1).
4) Use a feeler gauge to do a check for
correct seating of the round nuts (2).
5) Use a felt-tip pen to make a mark on
the round nuts (2) and related marks on
the valve cage. This shows their initial
position.
6) Put the two pre-tensioning jacks (94252, Fig. 9) in position on the elastic
studs (1).
7) Connect the pre-tensioning jacks to the hydraulic unit (94942) as shown.
8) Do the procedure given in 9403−4, to apply tension to the elastic studs (1) and
tighten the round nuts (2).
9) Look at the marks made before to make sure that the round nuts (2) have turned
to the angle given in 0352−1.
009.701/02
1
2
94252
94934G
94252
94934G
94935
94935
94935
94934
013.622/05
94934A94942
WCH03193
Fig. 9
2
WCH03193
Fig. 8
3
1
2016
Removal and Installation of Exhaust Valve, Replacement of Elastic Studs