Maintenance
3140−1/A1
Winterthur Gas & Diesel Ltd.
5/ 6
3. Assemble
1) Apply clean engine oil to the gaskets (2, 5).
2) Attach the new gaskets (2, 5) to the axial detuner.
3) Make sure that the new gaskets (2, 5) can move freely around the axial detuner.
4) Put the tension springs (3, 4) around the 2-part gaskets (2, 5).
5) Operate the manual ratchets (94016−001 and 94016−002, Fig. 4) to lift and move
the top cylinder half into position above the bottom cylinder half.
6) Carefully lower the top cylinder half on to the bottom half of the cylinder. Make
sure that you do not cause damage to the and the tension springs.
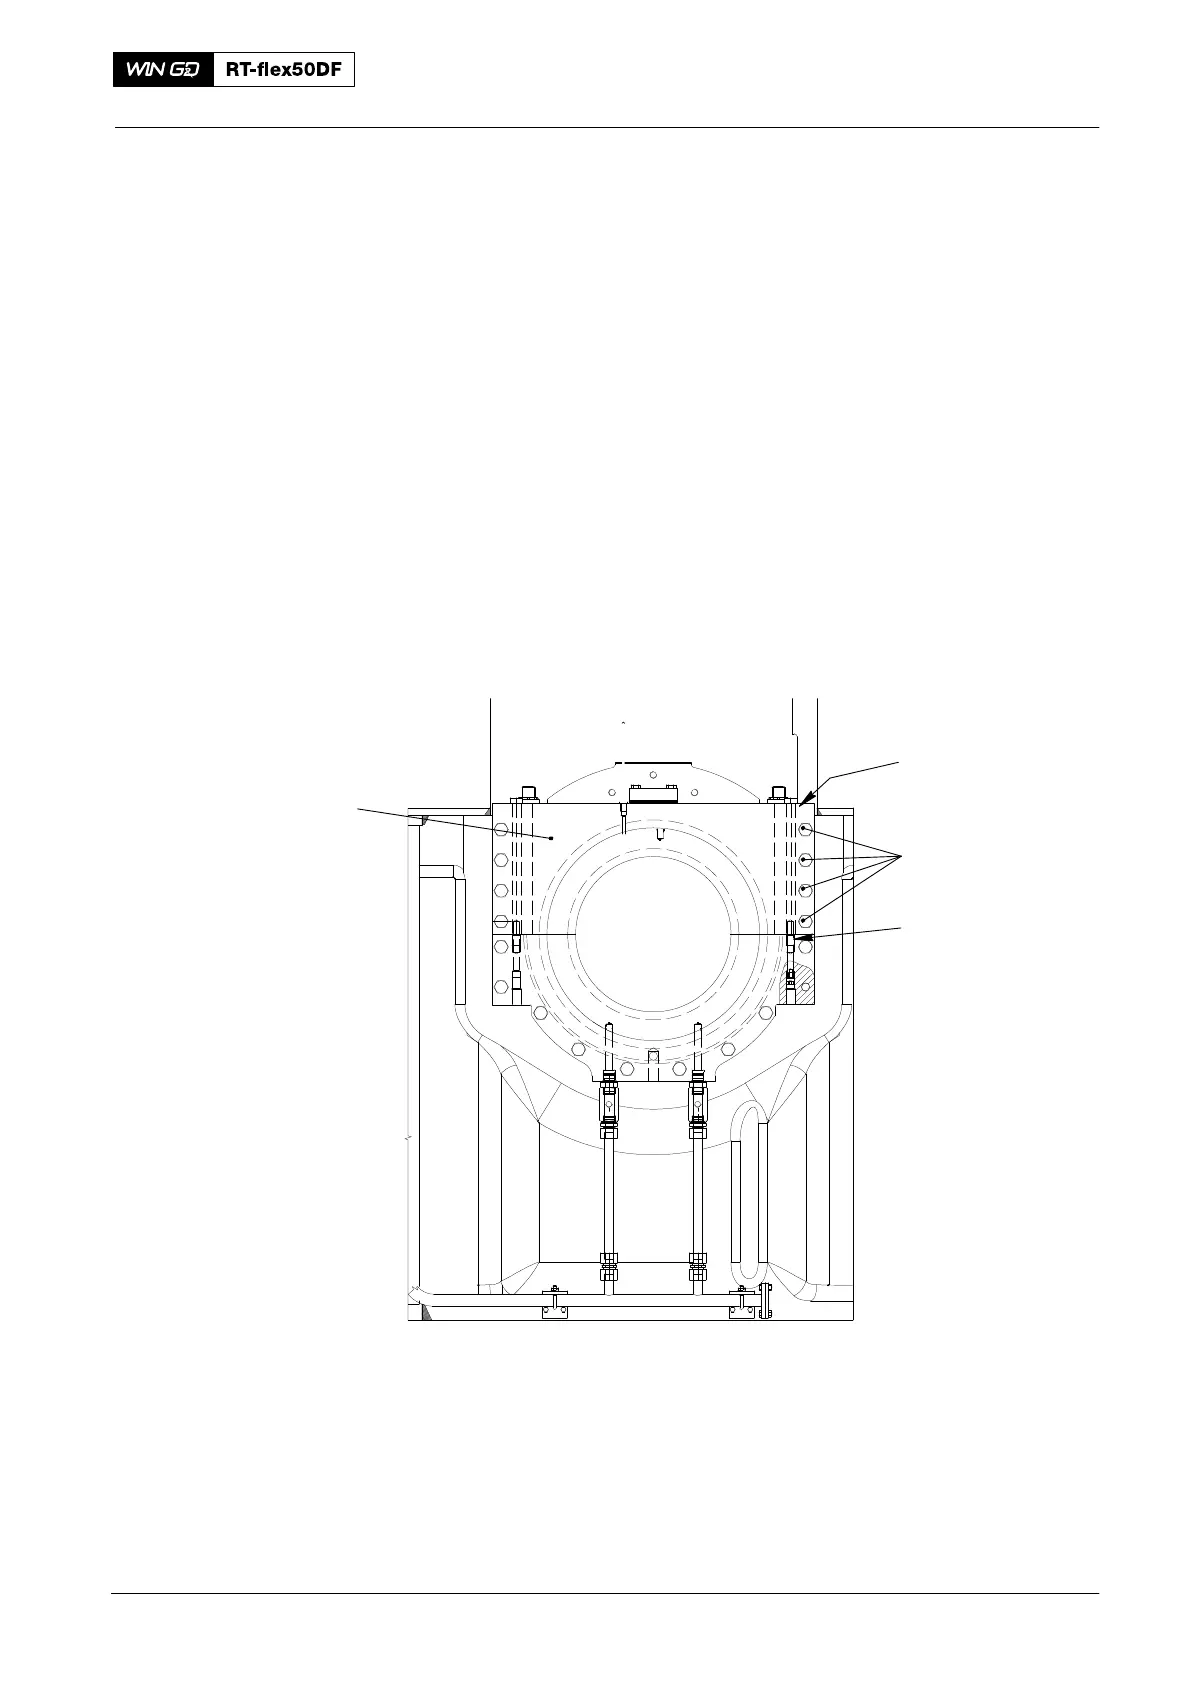
Note: Use the two taper pins (3, Fig. 5) to help you to get the top cylinder in the
correct position.
7) Install the four M24 screws (1) to the top cylinder half (4). Refer to 0352−2,
paragraph 1 for the applicable torque value.
8) Install the eight screws M24x190 (2) to the top cylinder half (4). Refer to 0352−1
for the applicable torque value.
4
Fig. 5
2
1
3
Axial Detuner: Disassemble and Assemble
2016