Maintenance6606−2/A1
Winterthur Gas & Diesel Ltd.
2/ 9
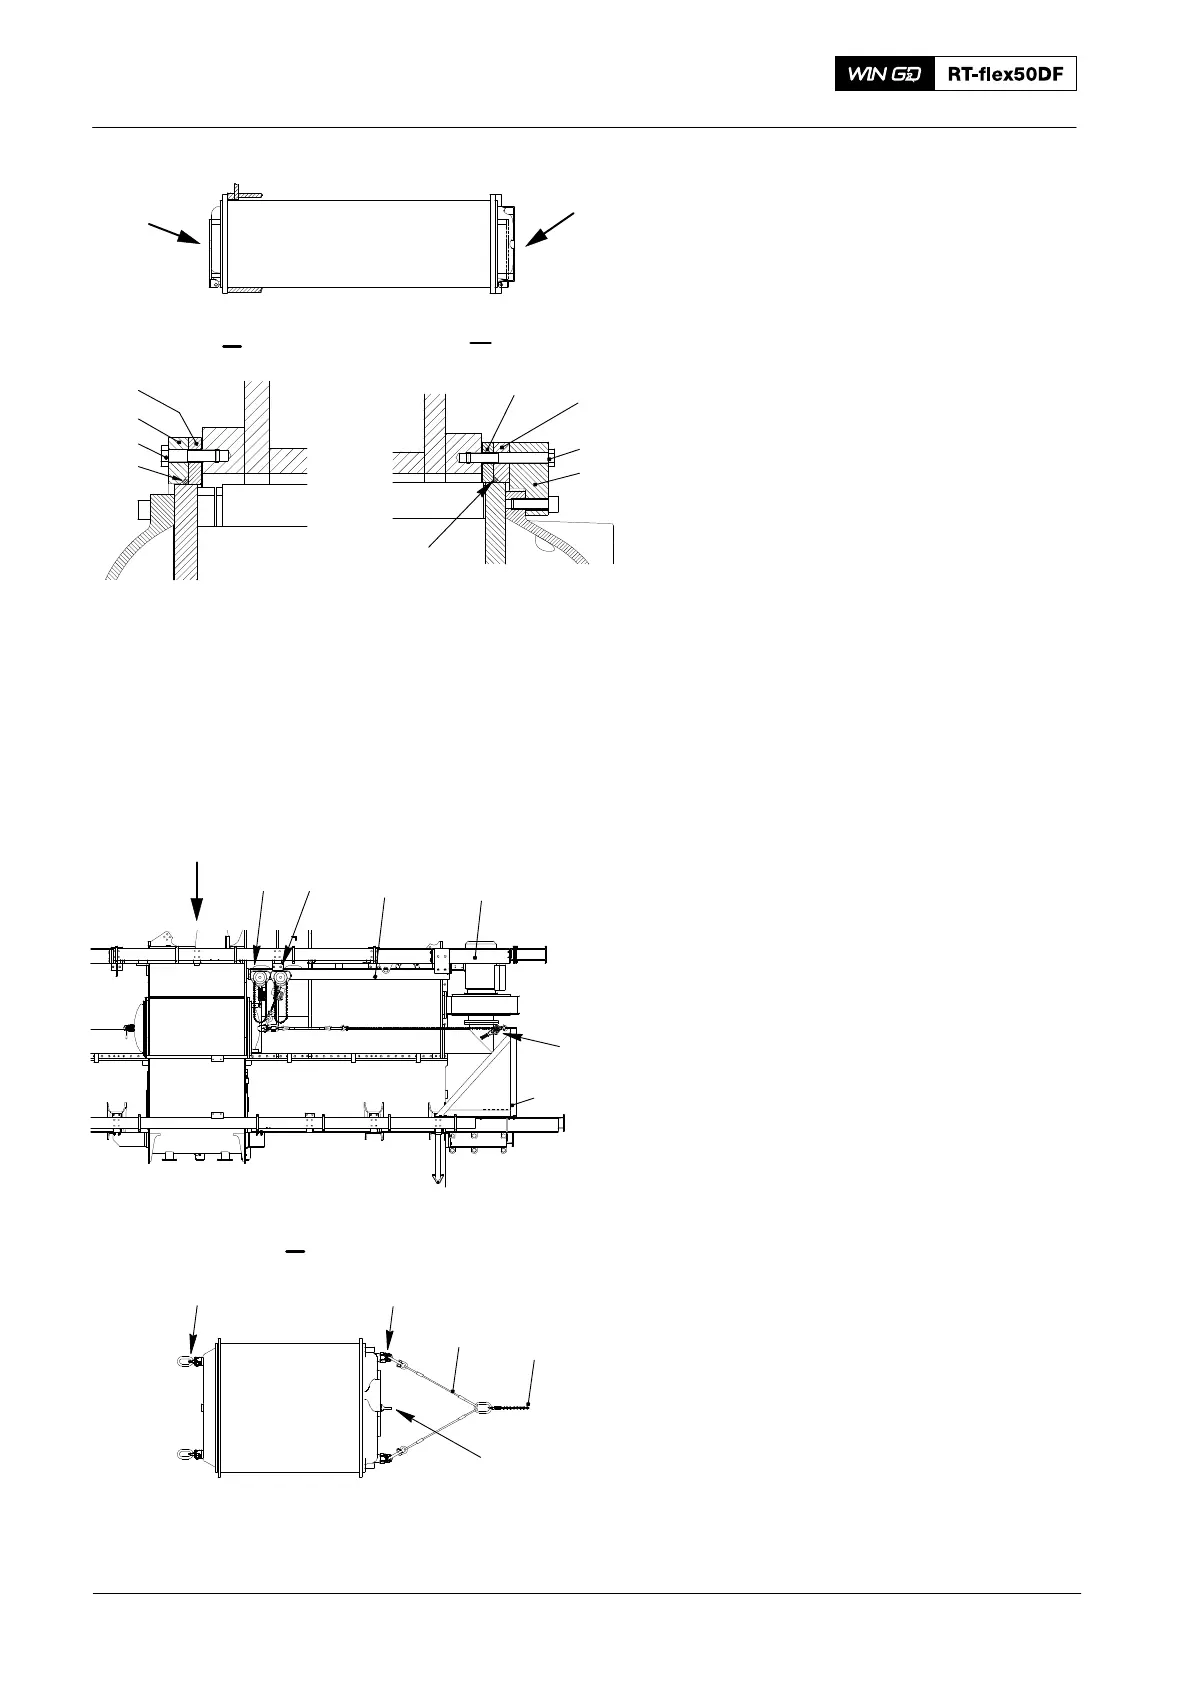
2. Removal
1) Remove the screws (7, Fig. 2).
2) Remove the flange (8).
3) Remove the collar (9).
4) Remove and discard the O-ring (6).
5) Remove the screws (3) and the four
clamps (4).
6) Remove the collar (2).
7) Remove the flange (1).
8) Remove and discard the O-ring (5).
9) Put the two chain blocks (H2 and H3,
Fig. 3) in position on the rail (1).
10) At the free end:
a) Attach the two swivel lugs
(94048−M30) to the front of the
SAC.
b) Attach the eye bolt (94040-M30)
to the center of the SAC.
c) Attach the support (94661-IL) to
the gallery beam with its screws.
11) At the driving end:
a) Attach the two swivel lugs
(94048−M30) to the front of the
SAC.
b) Attach the wire rope sling (94666)
to the two outer swivel lugs
(94048-M30).
12) Attach the manual ratchet (H1) to the
hole in the support (94661-IL).
13) Attach the wire rope sling (94666) to
the manual ratchet (H1).
14) Operate the manual ratchet (H1) to get
sufficient tension to hold the mass of
the SAC.
15) Attach the chain block (H3) to the eye
bolt (94040-M30).
16) Operate the chain block (H3) to get
sufficient tension.
2016
Scavenge Air Cooler: Removal and Installation 7 Cyl.
Fig. 2
I
DRIVING END
II
FREE END
I
WCH03311
8
7
9
6
II
1
4
2
3
5
Fig. 3
H2
94661−IL
H1
I
WCH00115
FREE
END
1
2
94048−M30
I
94048−M30
94666
94040−M30
94016−013
H3