Maintenance
6708−1/A1
Winterthur Gas & Diesel Ltd.
7/ 10
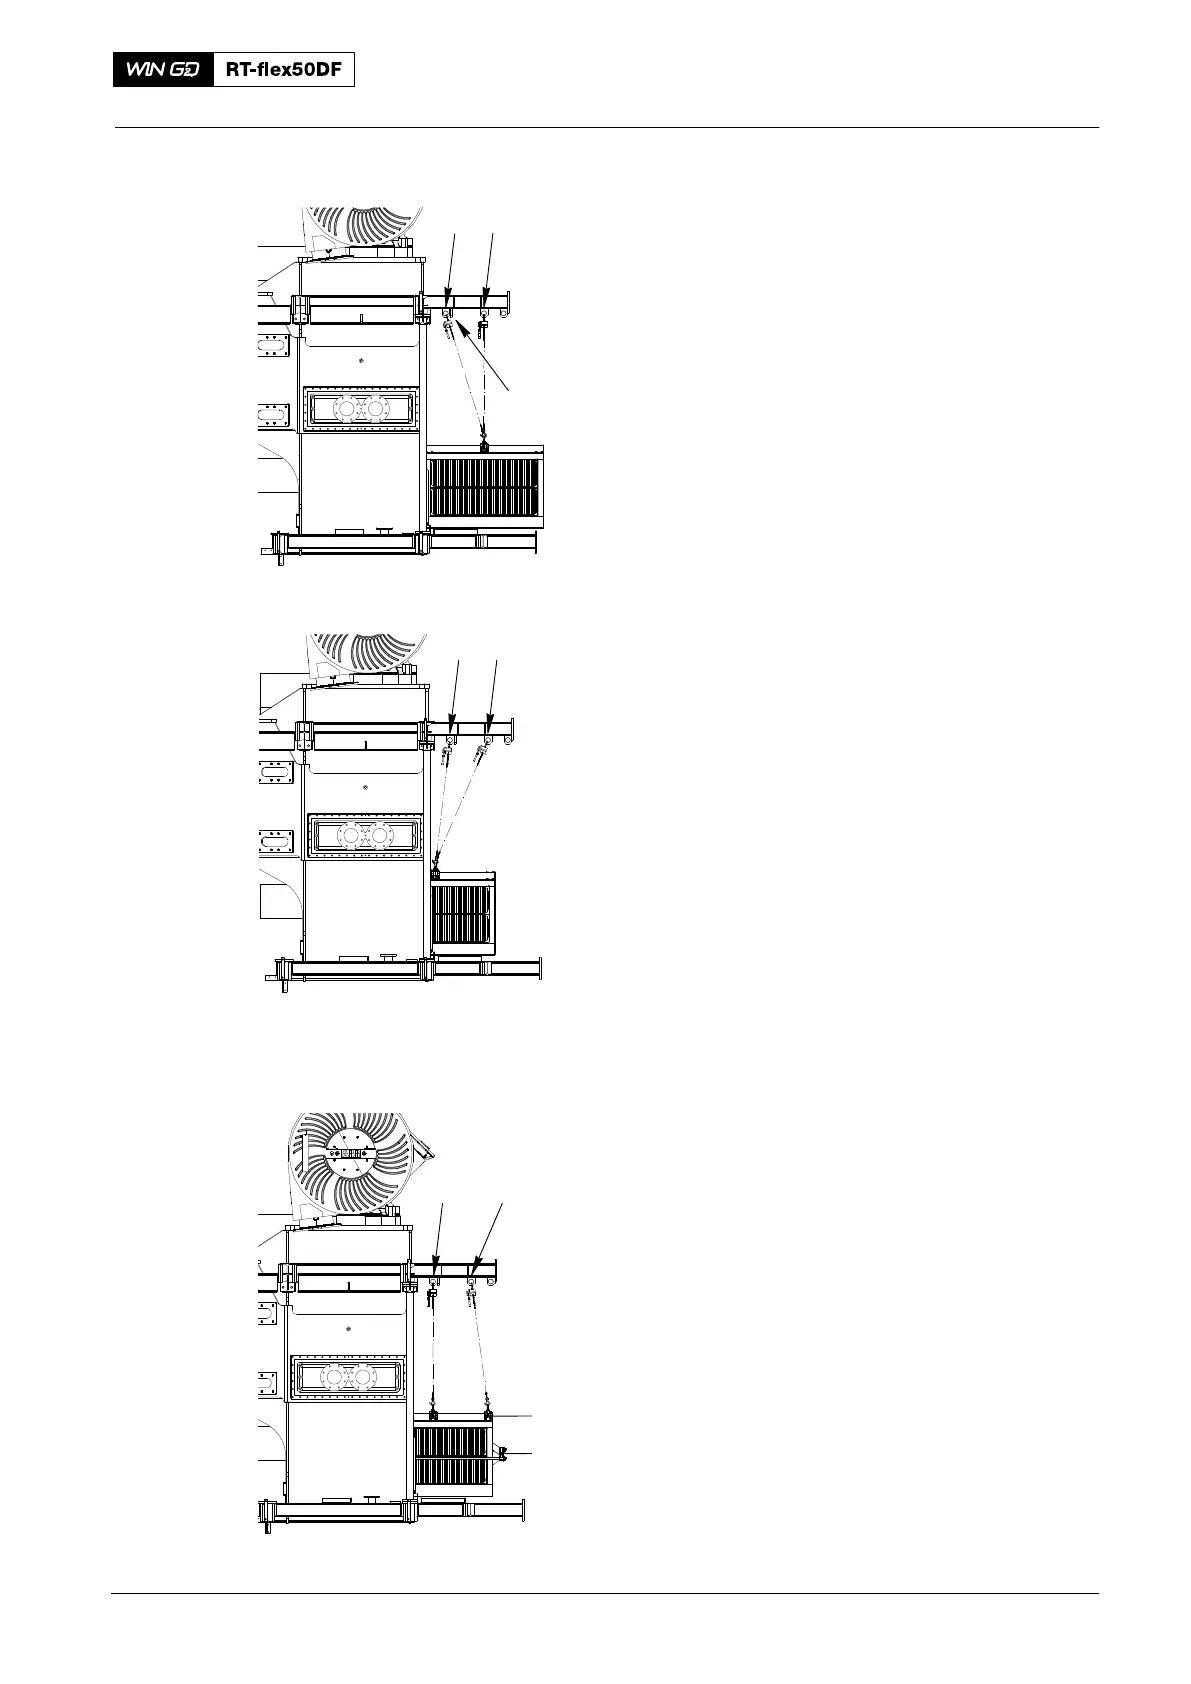
14) Remove the manual ratchet (H1,
Fig. 10) from the end attachment
point (1).
15) Attach the manual ratchet to the
attachment point (2).
16) Operate the manual ratchets (H1 and
H2, Fig 11) to move the water
separator into the frame as shown.
17) Attach the plate (94667A, Fig. 12) to
the water separator.
18) Attach the shackle (S2) to the plate
(94667A).
19) Attach the support (94667D) to the side
of the water separator.
20) Make sure that the manual ratchet (H1)
has the weight of the water separator.
2016
Water Separator: Removal and Installation
H1
H2
H1
H2
2
Fig. 10
Fig. 11
Fig. 12
9466794667A
S2
94667D
H1 H2
WCH00709