Maintenance6708−2/A1
Winterthur Gas & Diesel Ltd.
4/ 8
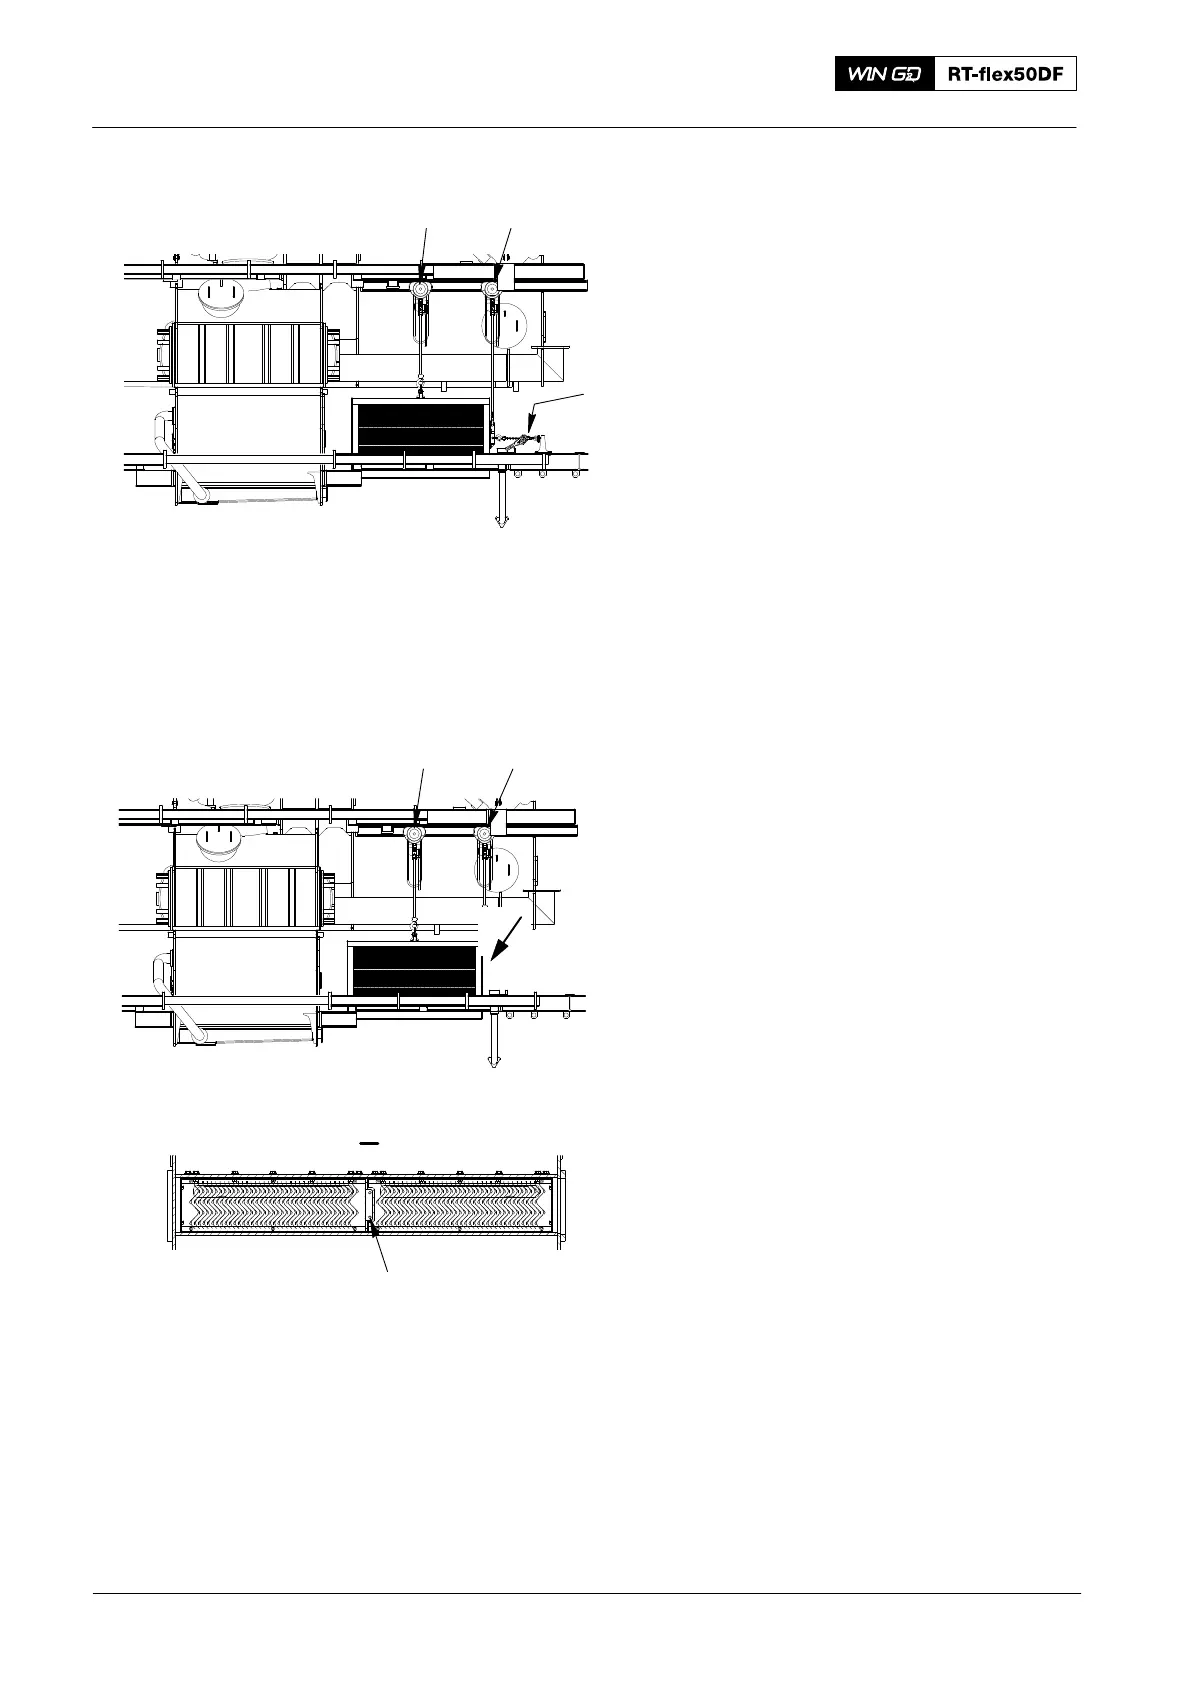
17) Operate the manual ratchet (H3, Fig. 5)
to fully remove the water separator. At
the same time, operate the chain
blocks (H1, H2) to keep the height of
the water separator constant.
18) Remove the manual ratchet (H3), the
lifting tool 94667G) and the holder
(94667I)
19) Make sure that the chain block (H1,
Fig. 6) has the full weight of the water
separator.
20) Remove the chain block (H2).
21) Use the chain block (H1) to move the
water separator to an applicable area.
22) Operate the chain block (H1) to lower
the water separator on to the platform.
23) Remove the chain block (H1) and the
lifting tool (94667G).
24) If it is necessary to divide the water
separator, do step a) and step b):
a) Remove the two screws (1).
b) Divide the water separator into its
two parts.
3. Installation
1) If the water separator was divided, do
step a) and step b):
a) Push the two parts of the water
separator together.
b) Attach the two parts of the water
separator together with the two
screws (1).
2016
Water Separator: Removal and Installation 7 Cyl.
Fig. 5
WCH03564
H1 H2
H3
H1 H2
WCH03564
I
1
I
Fig. 6