Dialing Options
ColorQube™ 9301/9302/9303
Server Fax
82
• Group Dial [\] use to add another fax number to the entry if the fax is being transmitted to
multiple recipients.
• Pulse to Tone [:] use to switch between pulse and tone dialing.
• Password Check [S] use for remote terminal identification. This character verifies that the
correct number has been dialled.
• Wait for Network Tone [W] suspends dialing until an expected network tone is detected. It
can also be used to detect a specific tone when accessing an outside line or other service.
• Optional Readability Character [+] this is used for readability purposes and does not affect
the number entered. For example, if you wish to identify the area code of a fax number, use
the Readability Character 01234+567890.
If an incorrect entry is made, use the left/right arrows to navigate through the number and use
the C button to delete a character. Use Clear Text to delete all the characters.
3. When you have entered the fax number and dialing characters required, select Add to add the
number to the recipient list.
4. Select Close to return to the fax options.
Fax Directory
The Fax Directory is used to store individual fax numbers which are used frequently. The Fax Directory
can be accessed from all screens where a fax number requires entering. Up to 29 entries can be added.
Using the Fax Directory
If numbers have been entered into the Fax Directory they can be accessed via the Fax Directory
button.
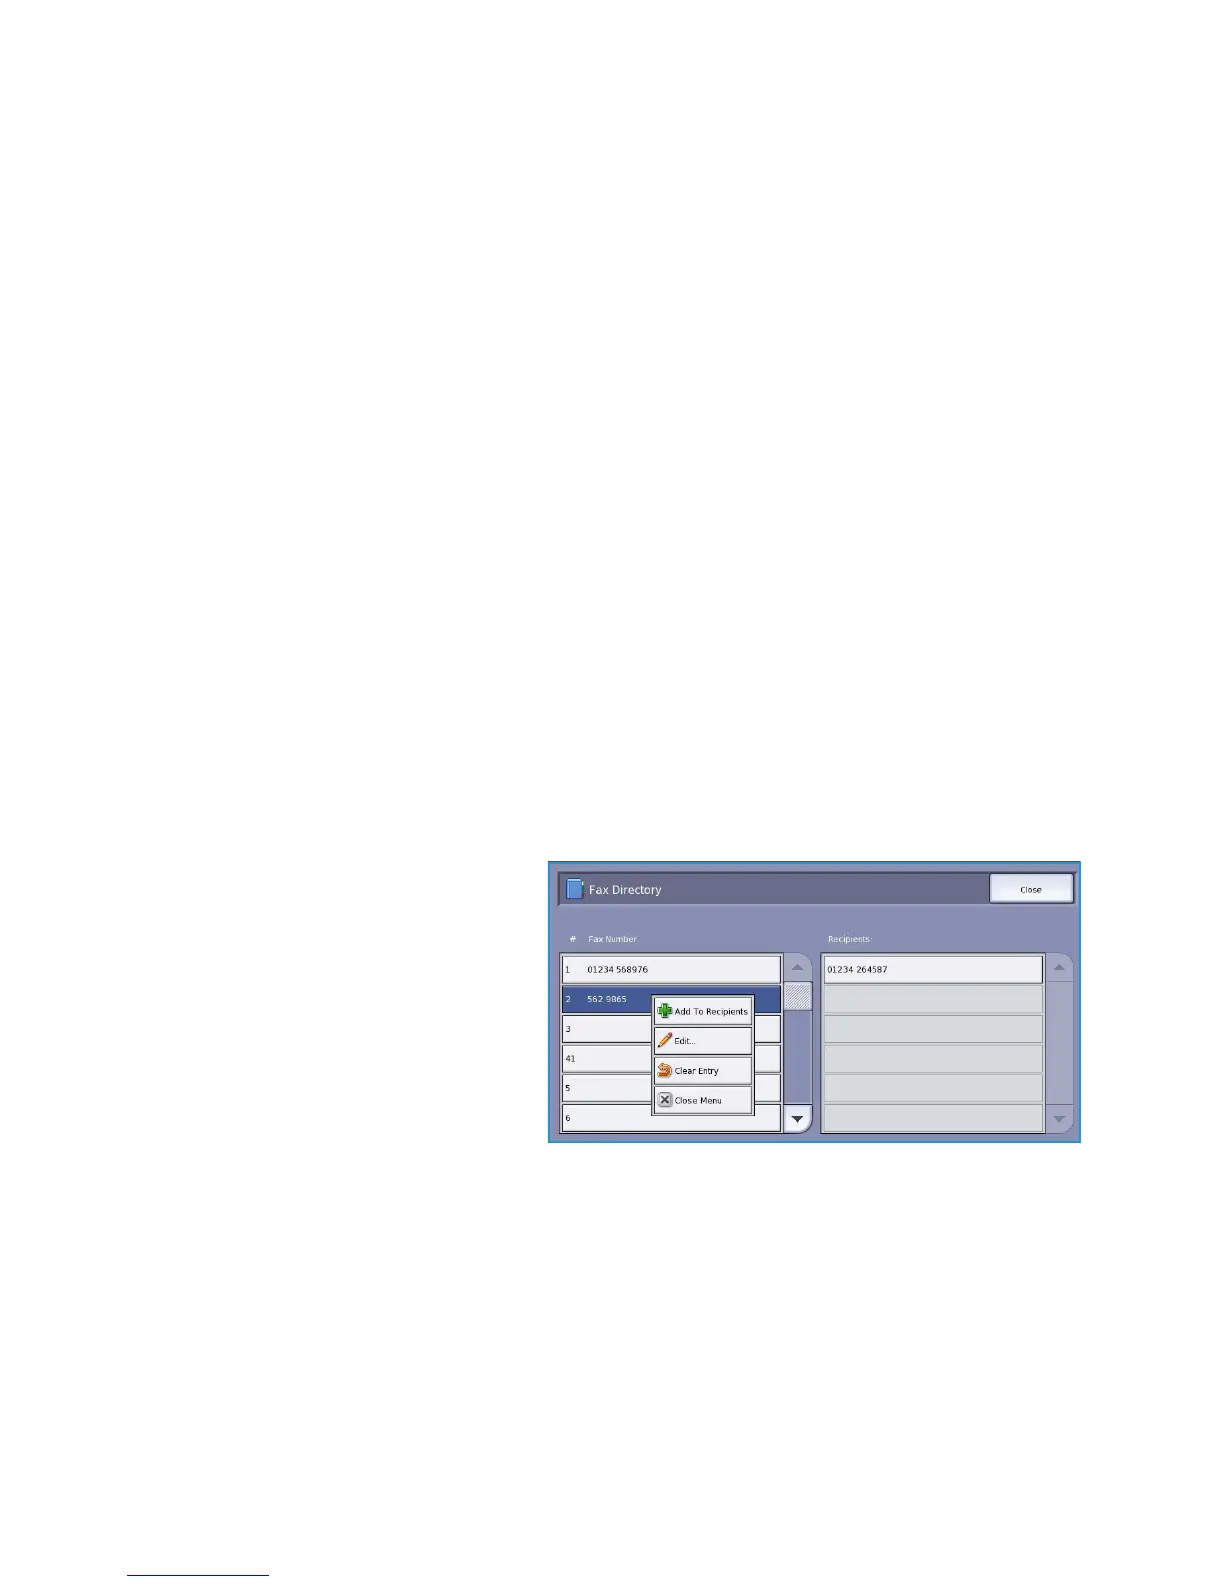
1. Select the Fax Directory button.
A list of fax numbers entered in the
Fax Directory is displayed.
2. Select the required number and select
Add to Recipients from the drop-
down menu. The number is added to
the Recipients list.
Continue adding recipients as
required.
3. To edit an entry, select it in the list
and select the Edit button.
Edit the entry as required and select Save.
4. To clear an entry from the list, select the entry requiring deletion and select Clear Entry from the
drop-down menu. A confirmation screen is displayed, select Clear Entry or Cancel.
5. Select Close to return to the fax options.
The fax will be sent to all the numbers in the recipient list.

 Loading...