5 Adjustments
5.5.2 One-parameter Tuning Procedure
5-36
6
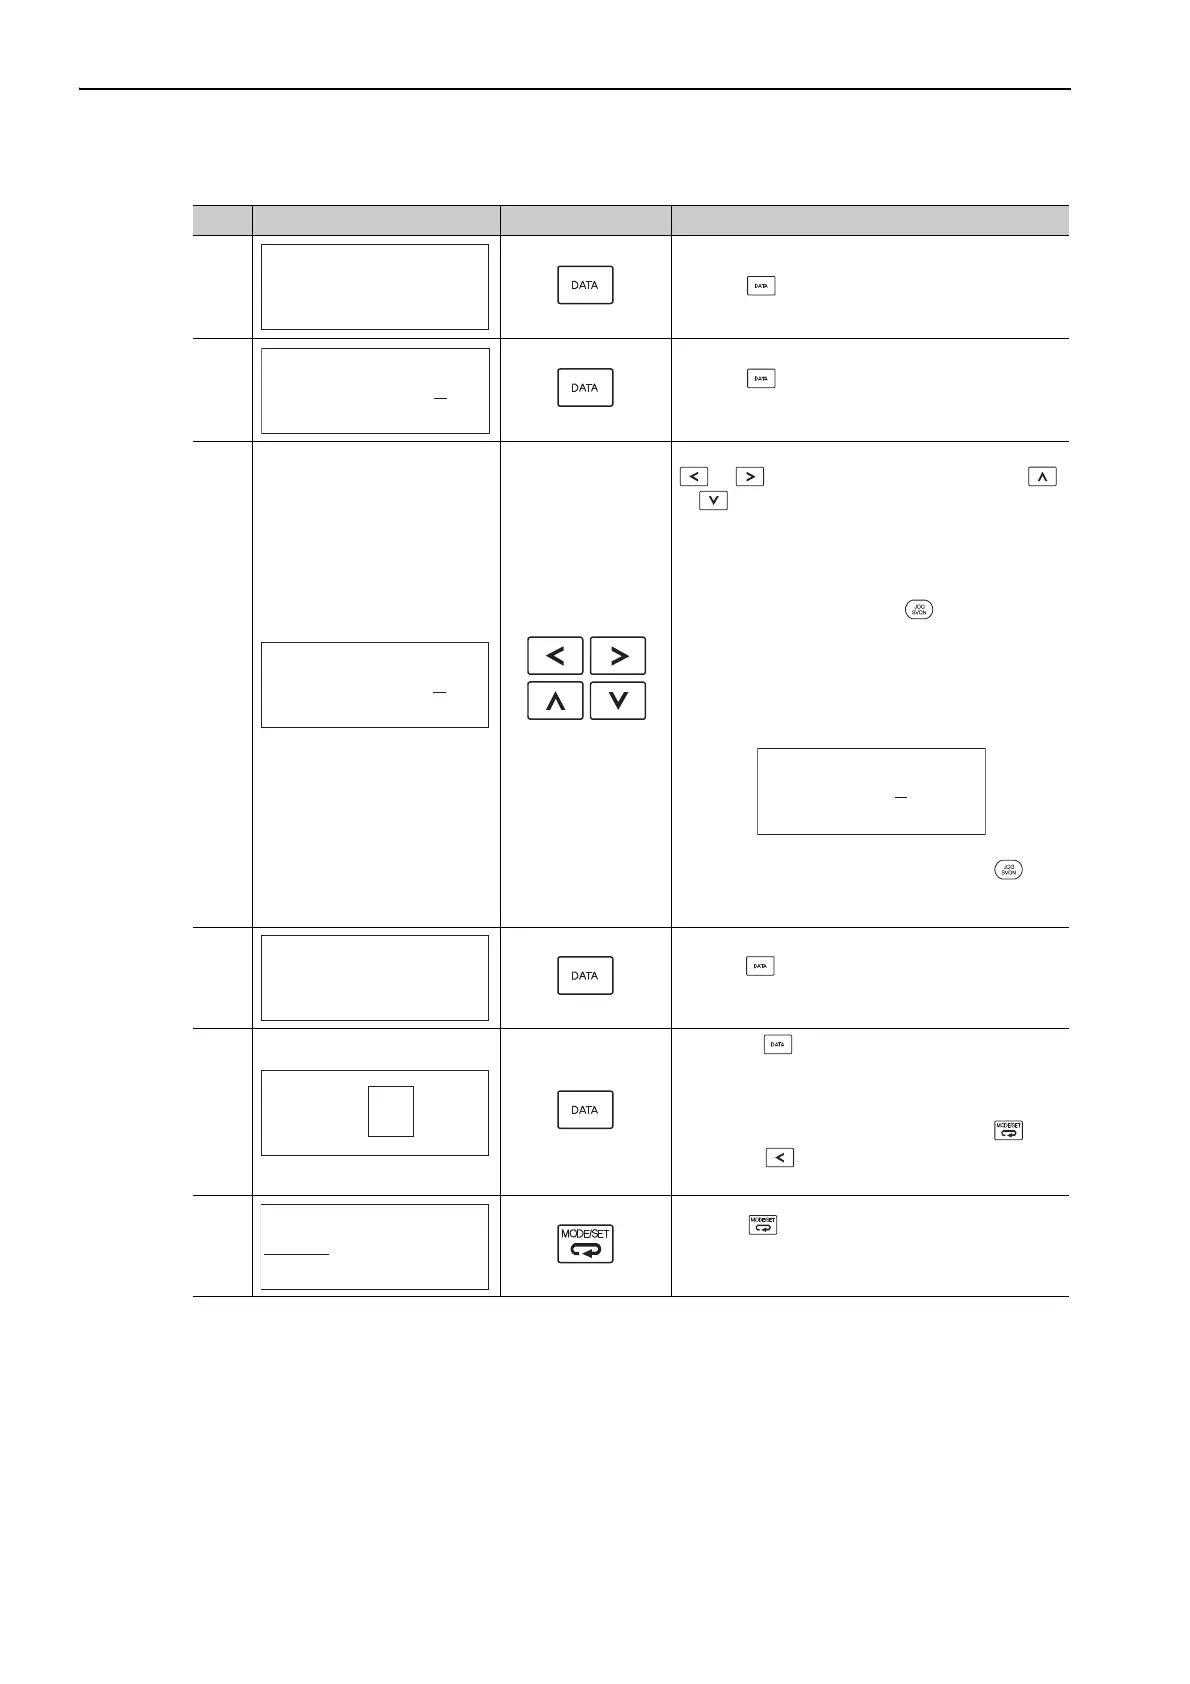
Press the Key to display the set value.
7
Press the Key again to display the LEVEL set-
ting screen.
8
If readjustment is required, select the digit with the
or Key or change the LEVEL with the
or Key. Check the response.
If readjustment is not required, go to step 9.
Note: The higher the level, the greater the respon-
siveness will be. If the value is too large, how-
ever, vibration will occur.
• If vibration occurs, press the Key. The SER-
VOPACK will automatically detect the vibration
frequencies and make notch filter or an anti-reso-
nance control settings. When the notch filter is set,
"NF1" or "NF2" will be displayed on the bottom
row. When the anti-resonance control is set,
"ARES" will be displayed in the lower right corner.
• If the vibration is great, the vibration frequency
will be detected automatically even if the Key
is not pressed and a notch filter or an anti-reso-
nance control will be set.
9
Press the Key. A confirmation screen will be dis-
played after LEVEL adjustment.
10
• Press the Key to save the adjusted values.
After the data is saved, “DONE” will flash for
approximately two seconds and then “RUN” will
be displayed.
• To return to the previous value, press the Key.
• Press the Key to readjust the level without
saving the values.
11
Press the Key to complete the one-parameter
tuning operation. The screen in step 1 will appear
again.
Note: The status display will always be RUN when the servomotor power is ON.
(cont’d)
Step Display after Operation Keys Operation
㧾㨁㧺㧻㨚㨑㧼㨞㨙㨀㨡㨚
㧼㨚㧝㧜㧜㧩㧜㧜㧠㧜㧜
㧼㨚㧝㧜㧝㧩㧜㧜㧞㧜㧜㧜
㧼㨚㧝㧜㧞㧩㧜㧜㧠㧜㧜
㧾㨁㧺㧻㨚㨑㧼㨞㨙㨀㨡㨚
㧸㧱㨂㧱㧸㧩㧜㧜㧡㧜
ޓ㧺㧲㧝ޓ㧺㧲㧞
㧭㧾㧱㧿
㧾㨁㧺㧻㨚㨑㧼㨞㨙㨀㨡㨚
㧸㧱㨂㧱㧸㧩㧜㧜㧡㧜
ޓ㧺㧲㧝ޓ㧺㧲㧞
㧭㧾㧱㧿
㧾㨁㧺㧻㨚㨑㧼㨞㨙㨀㨡㨚
ޓޓޓ㧸㧱㨂㧱㧸㧩㧜㧜㧣㧜
ޓ㧺㧲㧝ޓޓޓޓޓޓޓ㧭㧾㧱㧿
㧺㧲㧞
㧾㨁㧺㧻㨚㨑㧼㨞㨙㨀㨡㨚
㧼㨚㧝㧜㧜㧩㧜㧜㧡㧜㧜
㧼㨚㧝㧜㧝㧩㧜㧜㧝㧢㧜
㧼㨚㧝㧜㧞㧩㧜㧜㧡㧜㧜
㧾㨁㧺 㧻㨚㨑㧼㨞㨙㨀㨡㨚
㧼㨚㧝㧜㧜㧩㧜㧜㧡㧜㧜
㧼㨚㧝㧜㧝㧩㧜㧜㧝㧢㧜
㧼㨚㧝㧜㧞㧩㧜㧜㧡㧜㧜
㧾㨁㧺㧲㨁㧺㧯㨀㧵㧻㧺
㧲㨚㧞㧜㧞㧦㧾㨑㨒㧭㧭㨀
㧲㨚㧞㧜㧟㧦㧻㨚㨑㧼㨞㨙㨀㨡㨚
㧲㨚㧞㧜㧠㧦㧭㨂㨕㨎ޓ㧿㨡㨜
㧲㨚㧞㧜㧡㧦㨂㨕㨎ޓ㧿㨡㨜

 Loading...