13185L-002 Rev. A 1/24/06 110XiIIIPlus Maintenance Manual Page 4-99
Maintenance Section 4
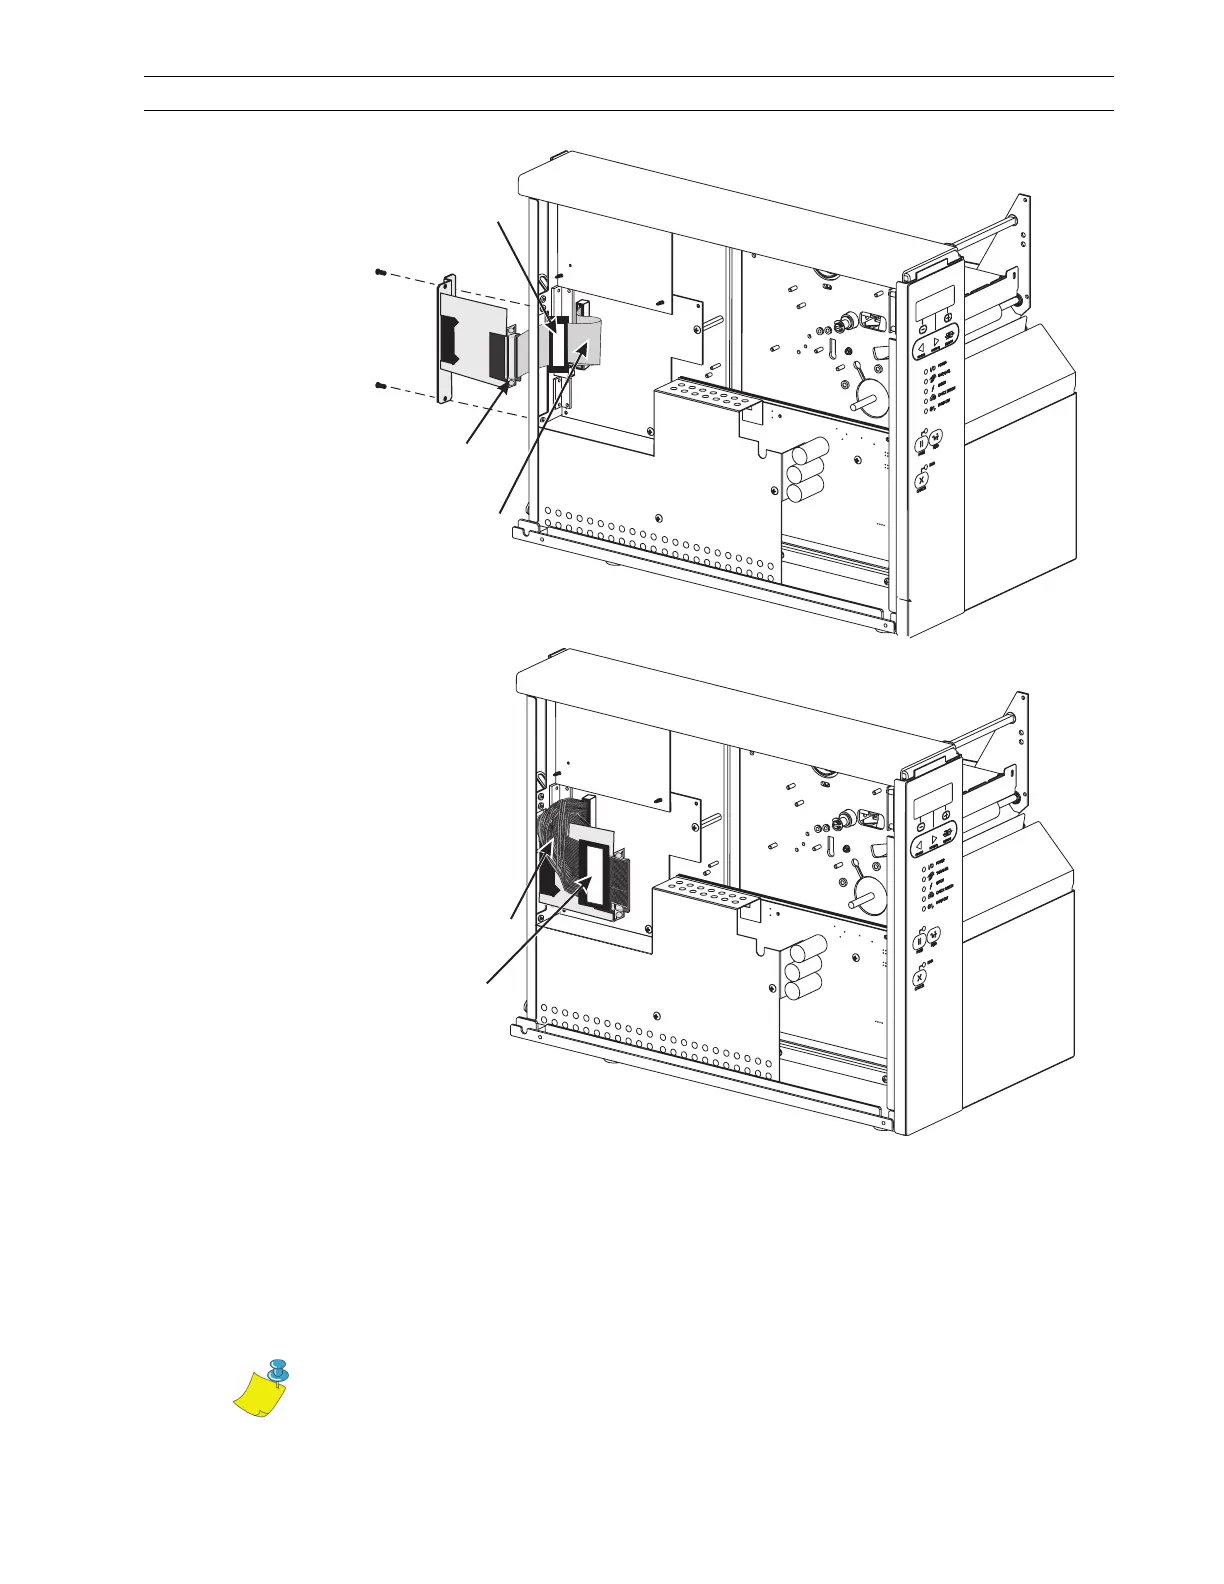
Figure 4-68. Internal PrintServer II Board Installation
6. Secure the PrintServer II interface board in place with the cover plate screws.
7. Check all connectors for firm connections. Reinstall the electronics cover.
8. This kit includes a label printed with the Ethernet MAC hardware address for the
PrintServer II. Remove the liner from the label and affix it to the back of the printer.
9. Reconnect the AC power cord and turn the printer On (l).
Ferrite
Bead
Ribbon Cable
Ferrite
Bead
Data Cable
Connector
Ribbon Cable
Note • Consult your system administrator before configuring the PrintServer II
for your network!
 Loading...