Axio Imager 2 OPERATION ZEISS
Operating the motorized microscope via the touchscreen of the TFT display
01/2016 430000-7544-001 131
• If a lamp-switching mirror is employed in the
reflected-light path, the Lamp port to be used
needs to be allocated to that mirror in the last
configuration step.
• Press the Save button to acknowledge the
selection made.
If the contrast manager is activated,
the relevant Colibri LEDs will then be
switched on when this reflector
position is selected.
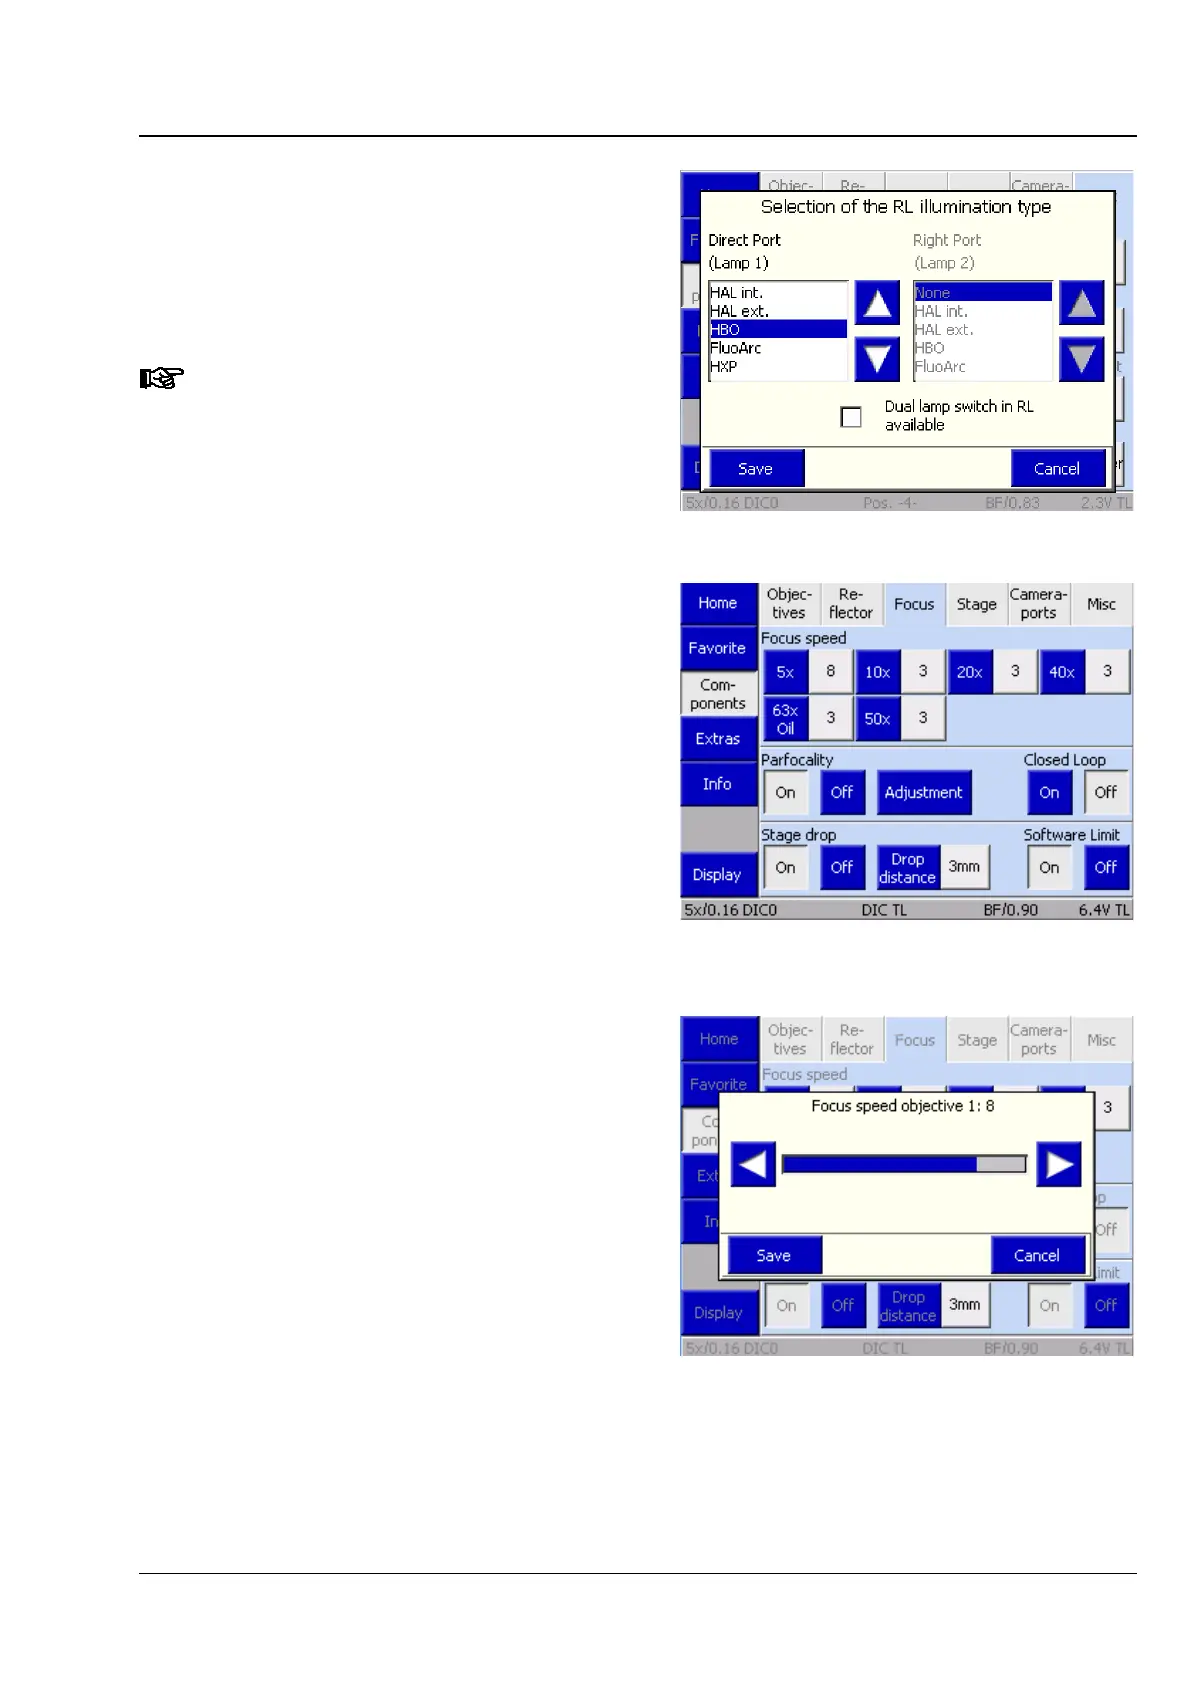
(3) Focus tab
On this tab, you can enter the firmware settings
for the focusing drive. The speed of the focusing
drive can be individually adjusted for every
objective.
Furthermore, parfocality, linear sensor focus,
stage lowering and electronic limit switches
can also be set on this tab.
Focus Speed
The tab contains up to seven buttons, depending
on the actual number of objective mounts on the
nosepiece. The number of turret positions is
detected by the system during initialization (and on
activation of the Settings-Components page).
Before any objectives have been configured, the
buttons are labeled only with the numbers of the
nosepiece positions.
After an objective is assigned to a specific button,
the magnification appears on the left (blue) half of
the button. The right (gray) half of the button
contains the focusing speed.
• To change the focusing speed for an objective,
press the respective gray part of the button.
• Set the desired speed in the Focus Speed for
Objective # popup window using the ◄►
buttons. The higher the numerical value, the
higher the focus speed in the selected
magnification.
• Press the Save button.
Fig. 136 Allocating the lamp port
Fig. 137 Microscope -> Config ->
Components -> Focus
Fig. 138 Setting the focusing speed