8 Operation Instructions for Use
2660021169042 Rev. A 2018-038.5 Acquire Data (Scan)
90 / 246 2660021169042 Rev. A 2018-03
ð The fixation target (green crosshair) moves to the location
selected.
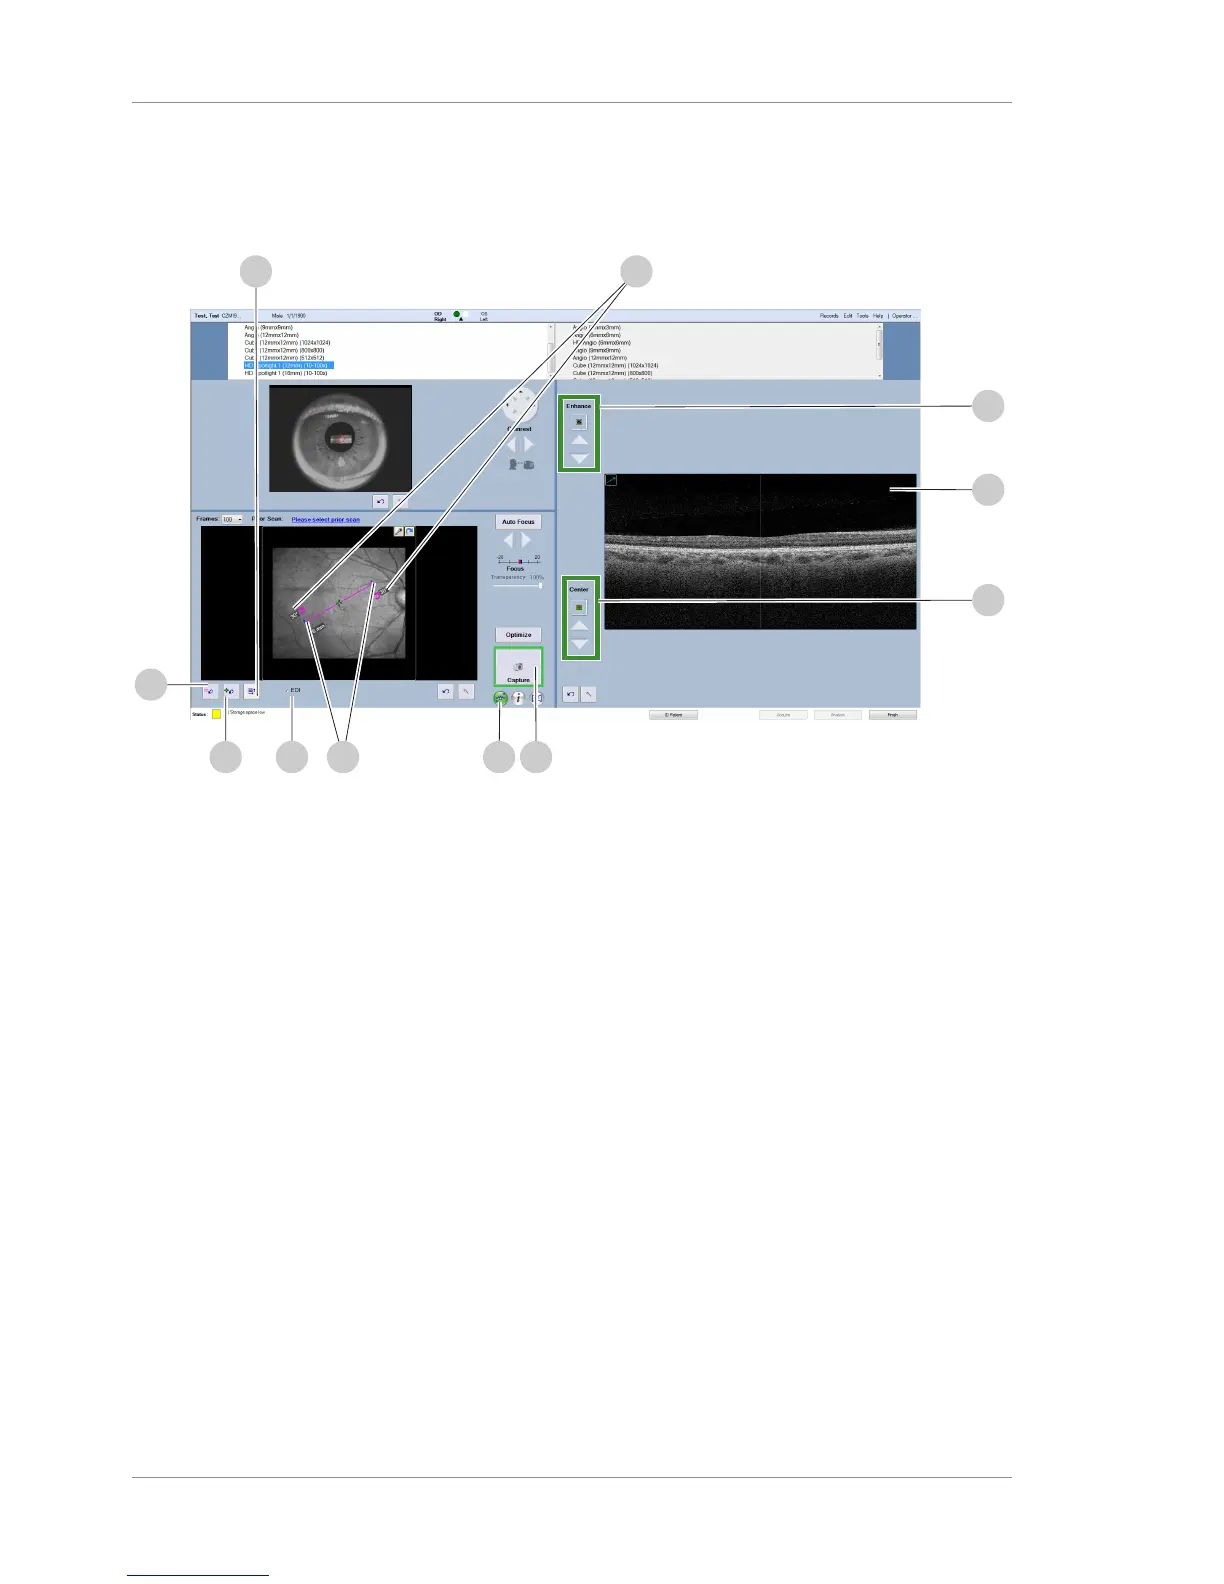
7. Click Optimize (7).
8. To adjust image brightness or make other fine adjustments for
any viewport, click the corresponding Fine Adjustment (8)
tool and make adjustments. (B-Scan viewport indicated.)
9. Click the slice tool (9).
ð Slice angle and length settings are enabled.
10. Drag the ends of the line to adjust the slice length (10) to
spotlight in HD.
11. Turn the rotation icons to adjust the slice angle (11) to
spotlight in HD.
12. To adjust B-scan (12) image quality, fine-tune Enhance (13)
(polarization) settings.
13. To adjust B-scan (12) image centering, fine-tune Center (14)
(Z-offset) settings.
14. To turn on FastTrac, click the FastTrac icon (15).
NOTE!If the capture button is outlined in red, Capture is
disabled. If Capture is disabled, turn off FastTrac and
ensure that the Capture is enabled (outlined in green).
ð The FastTrac icon turns green to indicate that it's on.
15. To disable EDI, uncheck EDI (16).
16. To reset the scan pattern, click Reset (17).
17. To recenter the fixation target, click Recenter (18).
 Loading...