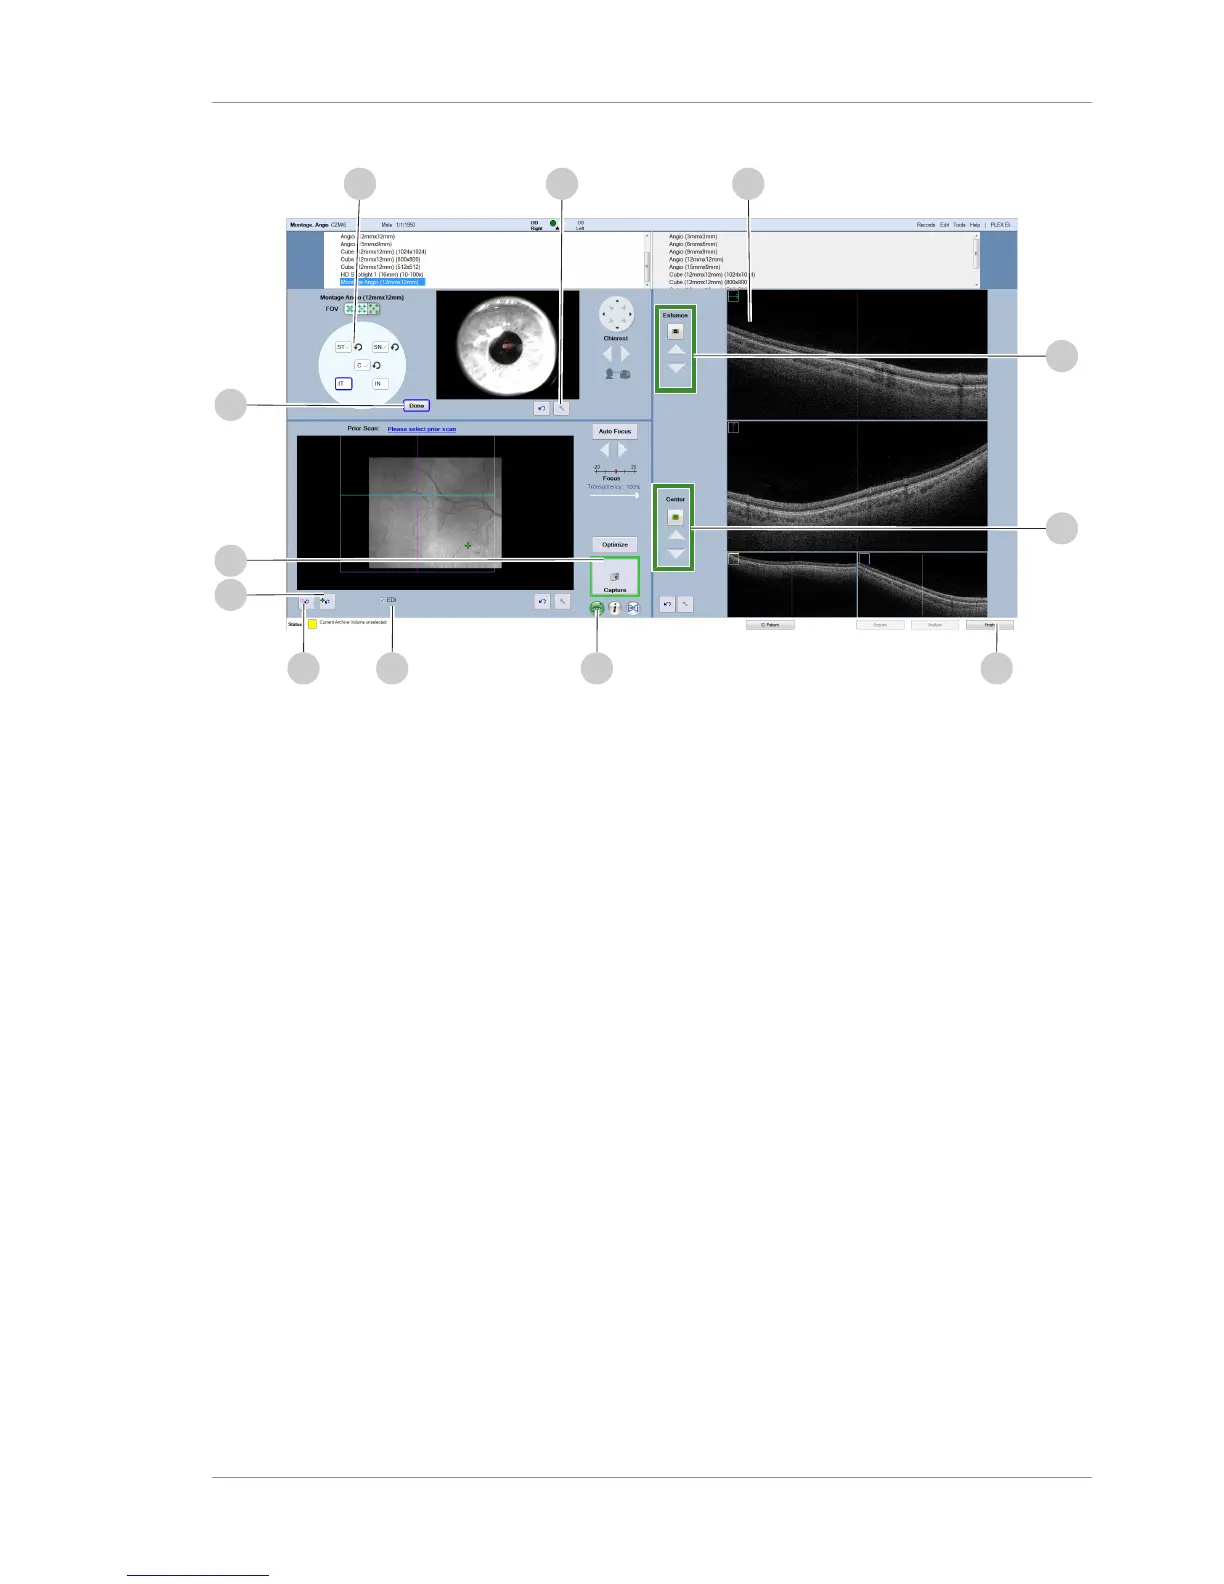
8. To adjust image brightness or make other fine adjustments for
any viewport, click the corresponding Fine Adjustment (8)
tool and make adjustments. (B-Scan viewport indicated.)
9. To adjust B-scan (9) image quality, fine-tune Enhance (10)
(polarization) settings.
10. To adjust B-scan (9) image centering, fine-tune Center (11) (Z-
offset) settings.
11. To turn on FastTrac, click FastTrac (12).
NOTE!If the capture button is outlined in red, Capture is
disabled. If Capture is disabled, turn off FastTrac and
ensure that the Capture is enabled (outlined in green).
ð The FastTrac icon turns green to indicate that it's on.
12. To disable EDI, uncheck EDI (13).
13. To reset the scan pattern, click Reset (14).
14. To recenter the fixation target, click Recenter (15).
15. Click Capture (16).
ð The instrument acquires the first component scan in the
series.
ð A checkmark and retake icon (17) appear next to the
scan letter.
ð The instrument moves into place for the next scan.
ð The fixation target moves to the next component scan's
position.
16. Repeat the adjustments steps described above for each
component scan in the montage series.