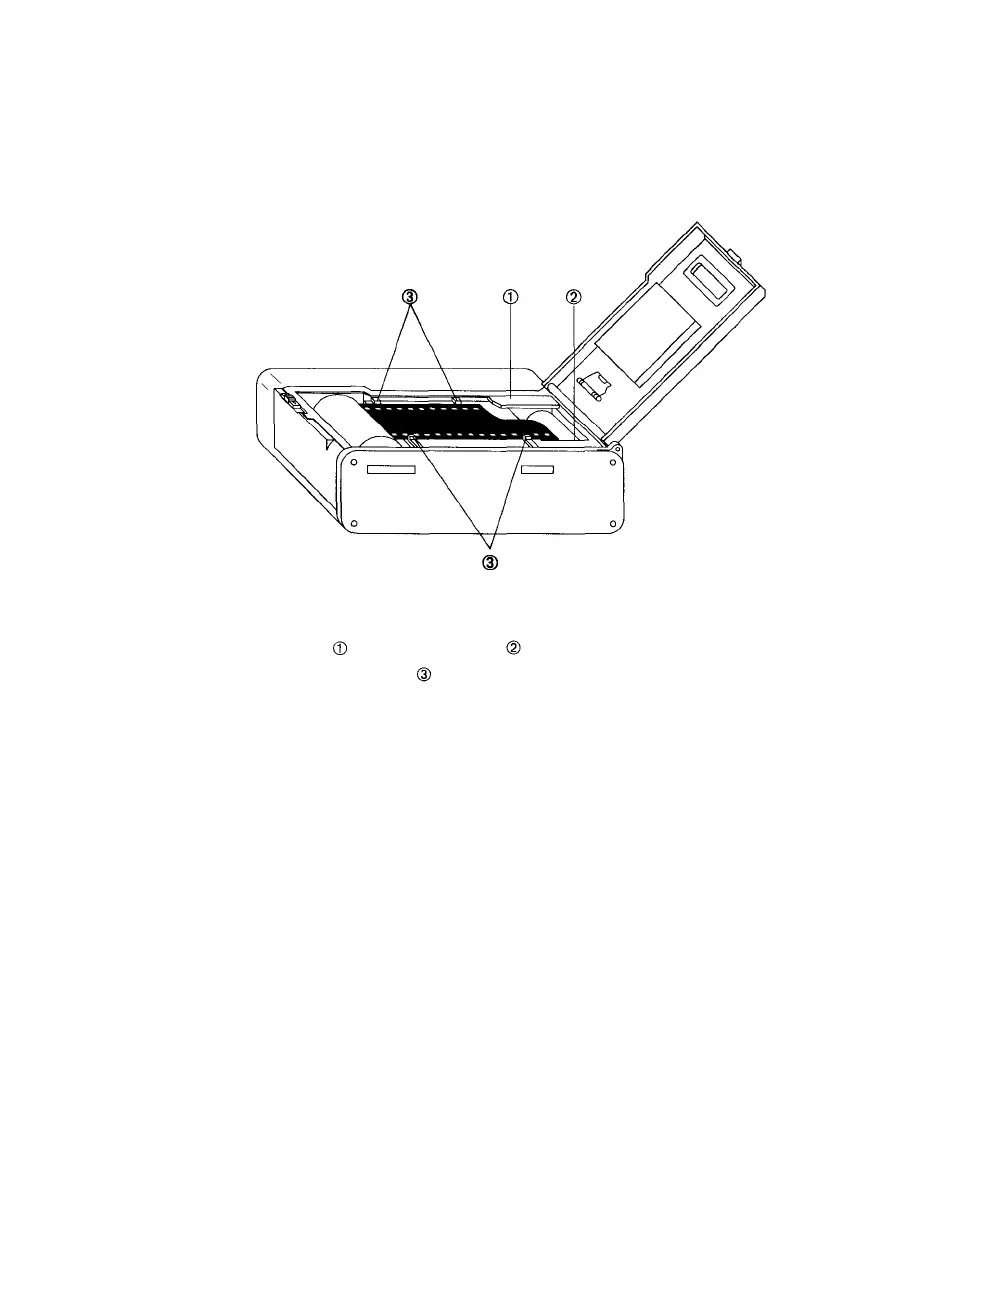
Step 5: Insert the film cartridge into the chamber and pull the film
across,
so
that
the top
edge
passes
under
the
film
leader
guide as shown in Figure 4.
Figure 4. Loading film.
-Film leader guide. -Film leader mark.
-Film edge guides.
Step 6: Align the end of the film with the film leader mark. Position
the film flat between the film edge guides.
Step
7:
Close
the
camera
back
until
it
clicks
shut.
If the
film
is
loaded properly, the camera will automatically wind the film
to the end of the roll to prepare for the first exposure.
Note: After you close the camera back, the film is
wound to the end of the roll. After each exposure,
the film is advanced to the next frame by winding
it
back
into
its
cartridge.
After
the
last
frame
is ex-
posed, the film is ready to be removed from the
camera. If an automatic slide mounter is used, it
should be set for reverse numbering.
PCR II Plus 35mm Camera Module • 5