Powering On the PCR II Plus
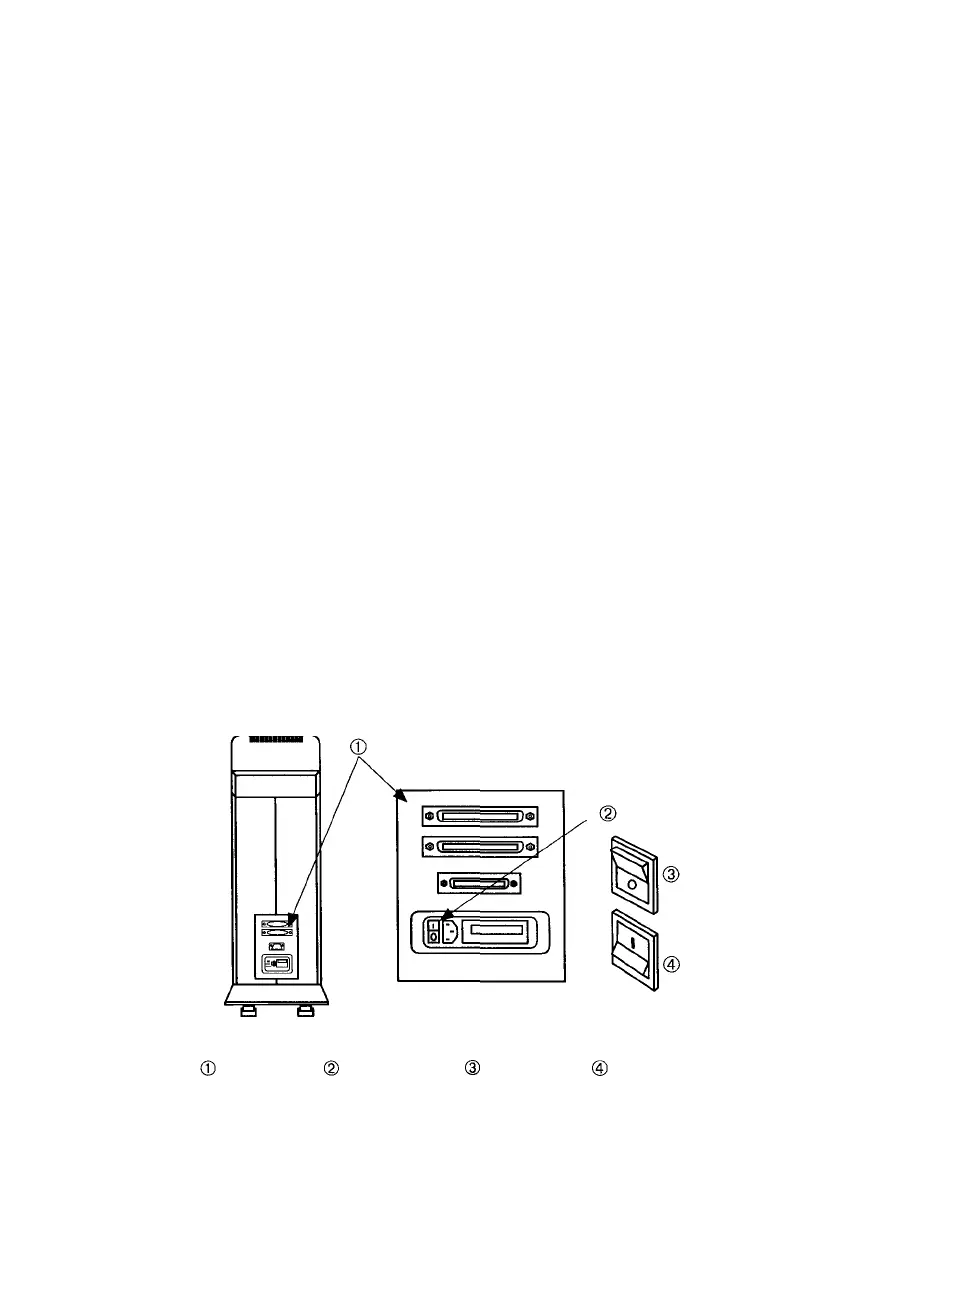
Step 1: Find the power switch on the rear panel.
Step 2: Press the side of the switch labeled I to turn on the PCR II
Plus. The green power indicator on the film recorder front
panel lights up when the device is on.
Step 3: After you turn on the PCR II Plus, the message window dis-
plays a series of messages as it runs:
• A diagnostic test to check its internal circuits. This takes
a few seconds.
• A warm up routine. This takes about two minutes.
• A calibration sequence to evaluate and adjust the CRT
brightness levels. This takes about thirty seconds;
Step 4: Let the PCR II Plus warm up for 30 minutes before you image
a job. See the section Warm-Up Period on page 3-3 for more
information.
Note: The PCR II Plus periodically calibrates on its
own. This is a normal operation that ensures the
proper functioning of the unit and does not inter-
fere with the imaging process.
Figure 3.1. Location of the power switch.
-Rear panel. -Power switch. -Off position. -On position.
3-2 • PCR II Plus User Guide