19 of 30
Jun 2001
Inlets
Agilent 6890 Gas Chromatograph Service Manual
Split/Splitless Inlet 210
Leak testing—EPC and manual inlets
Leak testing—EPC and manual inlets
Preparation
1. Cool the column to ambient, and cool inlets to below 75°C to avoid
damage to deactivated glass liners.
2. Remove the column from the inlet fitting on the inside of the oven.
3. If the quality of the septum, the O-ring on the glass liner and the lower
inlet seal are unknown, replace them now.
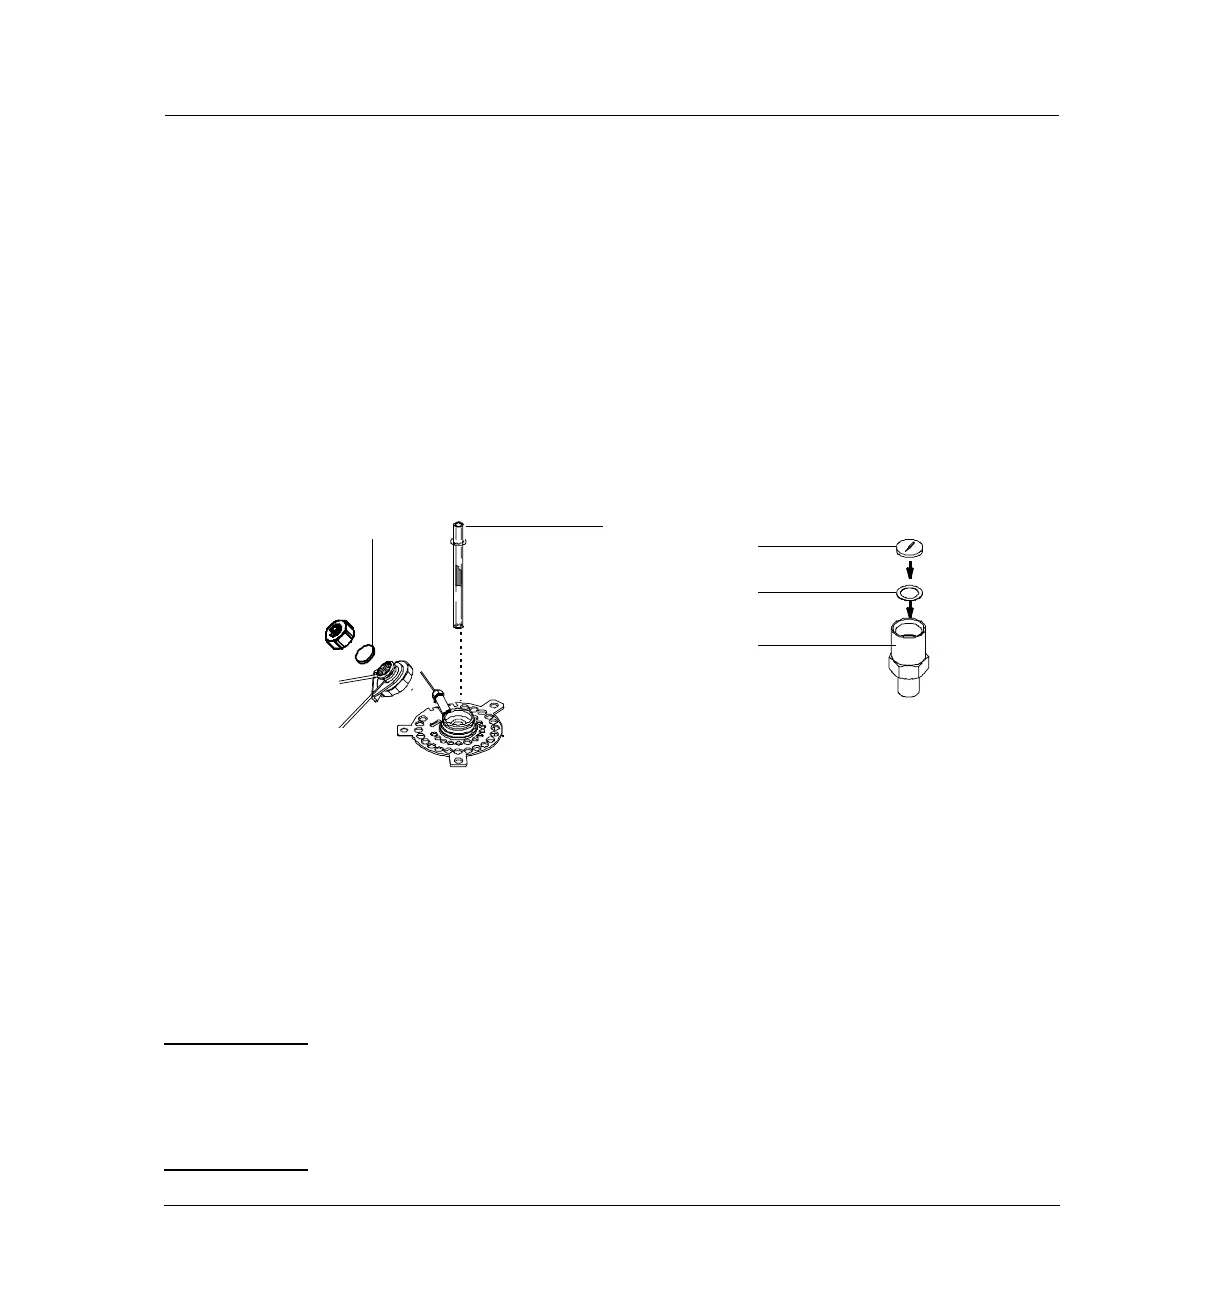
Figure 210-13 Location of septum, liner, O-ring, and lower inlet seal
4. Cap the septum purge vent and the inlet’s column fitting. Use solid (no
hole) Vespel type ferrules 1/8-inch (part no. 0100-1372) and 1/16-inch
(part no. 5181-7458) with a 1/8-inch Swagelok nut (part no. 5180-4103)
and a capillary column nut.
Note As alternate capping devices, a 1/8-inch Swagelok cap can be used for the
septum purge vent. A capillary column nut with a solid piece of wire the size
of a paper clip and a 0.5 mm ID graphite ferrule may be used for the inlet
column fitting.
Lower inlet seal
Washer
Reducing nut
0-ring
(2-3 mm from top)
Septum
Inlet liner

 Loading...