126 Agilent 7100 Capillary Electrophoresis System User Manual
5 Using the Agilent 7100 Capillary Electrophoresis System
Capillary Electrophoresis, CE
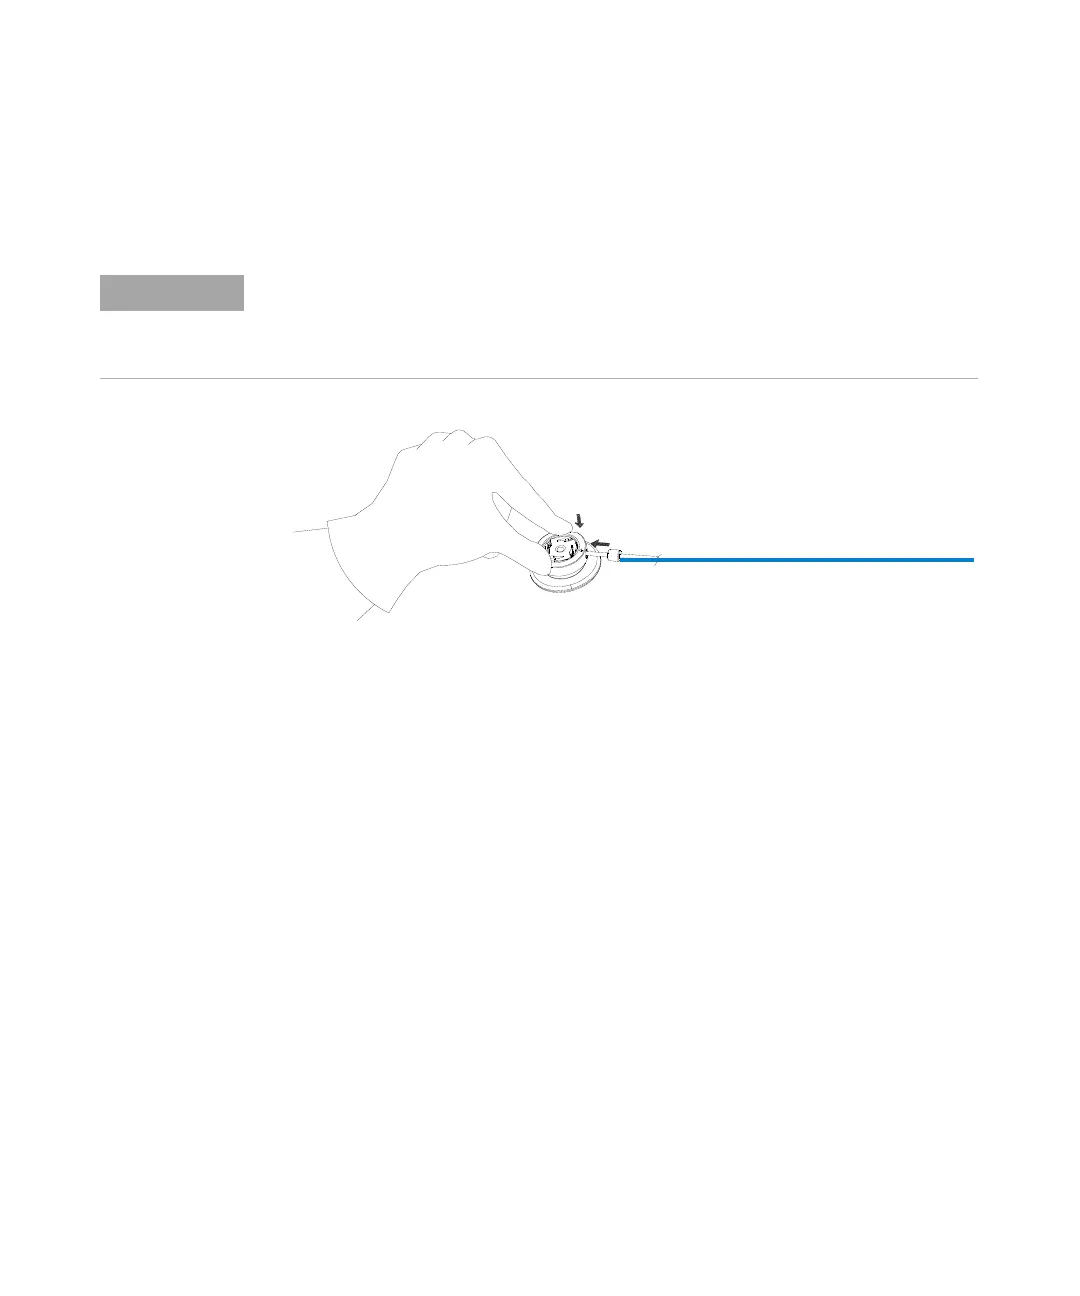
3 Put the alignment interface on the insertion tool and press down firmly.
Press only on the outer ring to release the spring that secures the capillary
in the alignment interface.
Figure 29 Alignment interface and insertion tool
4 Slide the capillary through the opening in the direction of the arrow printed
on the interface.
5 The capillary has a plastic stop fitted. Pull the capillary through the
alignment interface until the stop is reached.
6 While still slightly pulling the capillary, stop against the alignment
interface, and release the alignment interface from the installation tool to
secure the capillary in the alignment interface.
The detection window or the extended light path of the capillary must be
visible through the detection interface. If aligned correctly, you can see the
slit of the interface behind the detection window. See Figure 30 on
page 127.
Four plastic pins in the alignment interface belong to a feather-driven mechanism to fix the
capillary tight in an optimal position for the light path. Press these pins with the alignment
tool when inserting a capillary. Insertion attempts of capillaries without this can damage
capillary ends and may lead to dissatisfying results.
 Loading...


