208 Agilent 7100 Capillary Electrophoresis System User Manual
8Maintenance
Cleaning the Electrodes, Pre-punchers and Insulation Plate
Reinstalling the Pre-punchers
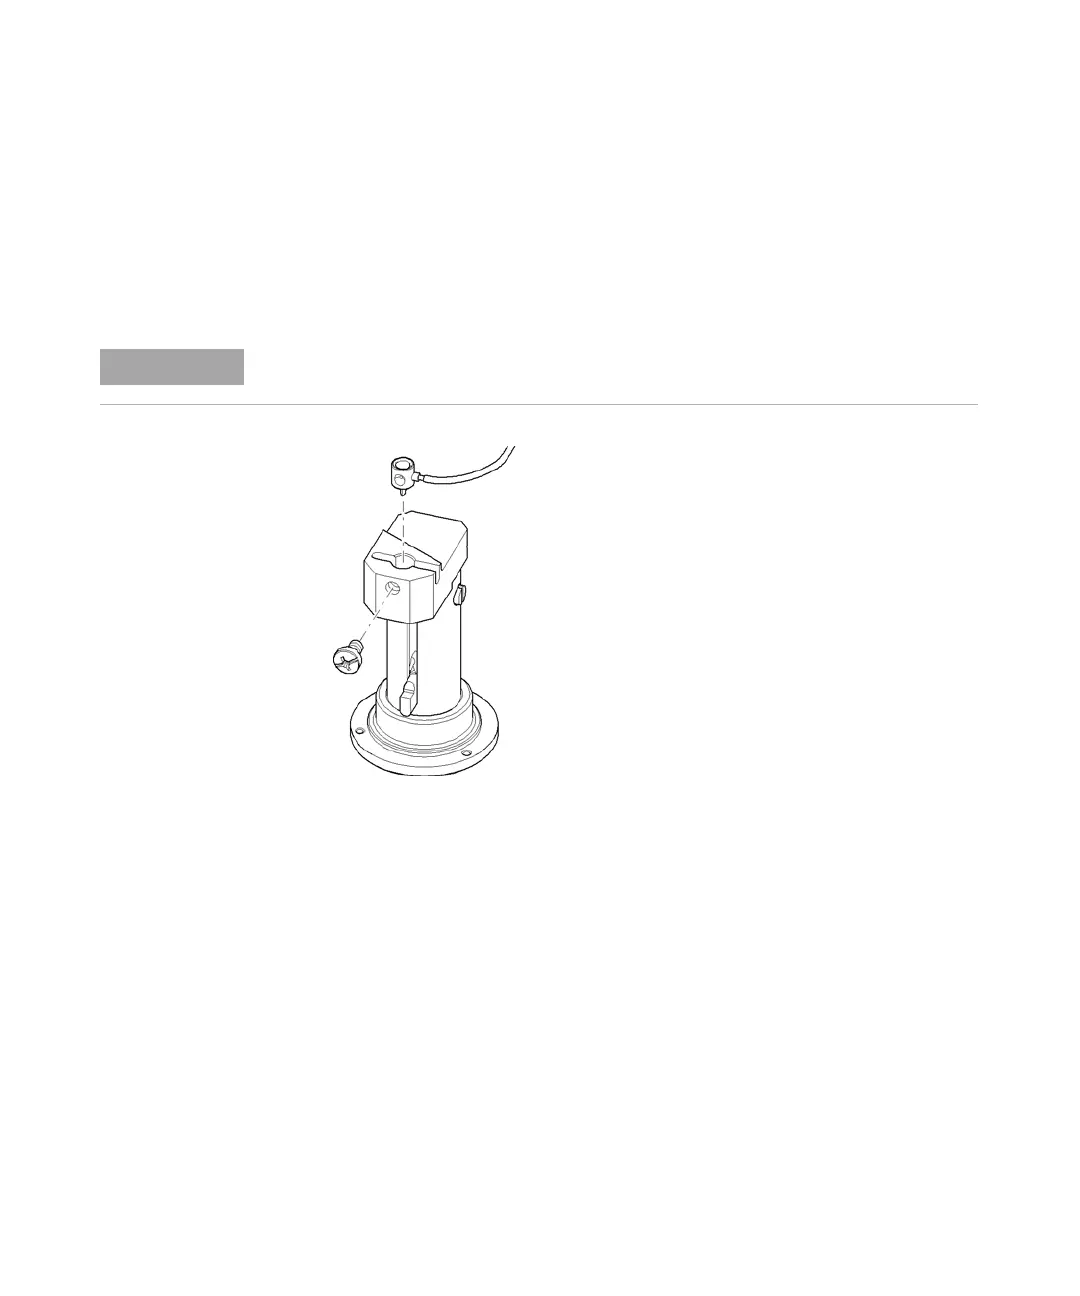
1 Carefully insert the pre-puncher (labeled 8) in the outlet lift. Connect the
tube to its connector (labeled 8) if you run applications in the CE+p and
CEC mode. The fitting of the outlet pre-puncher must be tight. Otherwise,
problems may occur during CEC mode.
Figure 66 Inserting the pre-puncher
2 Carefully insert and tighten the plastic screw to secure the pre-puncher.
The pre-puncher will assume the correct position as the screw is tightened.
3 Carefully insert the inlet pre-puncher with the air pressure tube (labeled 7)
connected in the inlet lift. Connect the tube to its connector (labeled 7).
The fitting of the inlet pre-puncher must be tight. Otherwise, pressure or
injection problems may result.
4 Carefully insert and tighten the plastic screw to secure the pre-puncher.
The pre-puncher will assume the correct position as the screw is tightened.
If you do not run applications in CE+p and CEC mode, keep the tube disconnected and fix
the tubing in such way that it does not disturb the movement of the inlet lifter.