167
A Accessories and platepads
Installing and configuring the Peltier Thermal Station
Bravo Platform User Guide
Before you start
Ensure that the connector end of the cable on the Peltier Thermal Station does not
knock against the metallic table top or other areas as it could get permanently
damaged. Handle the Peltier Thermal Station cable with care during all stages of
installation.
Ensure you have the following:
• Bravo Platform with risers installed
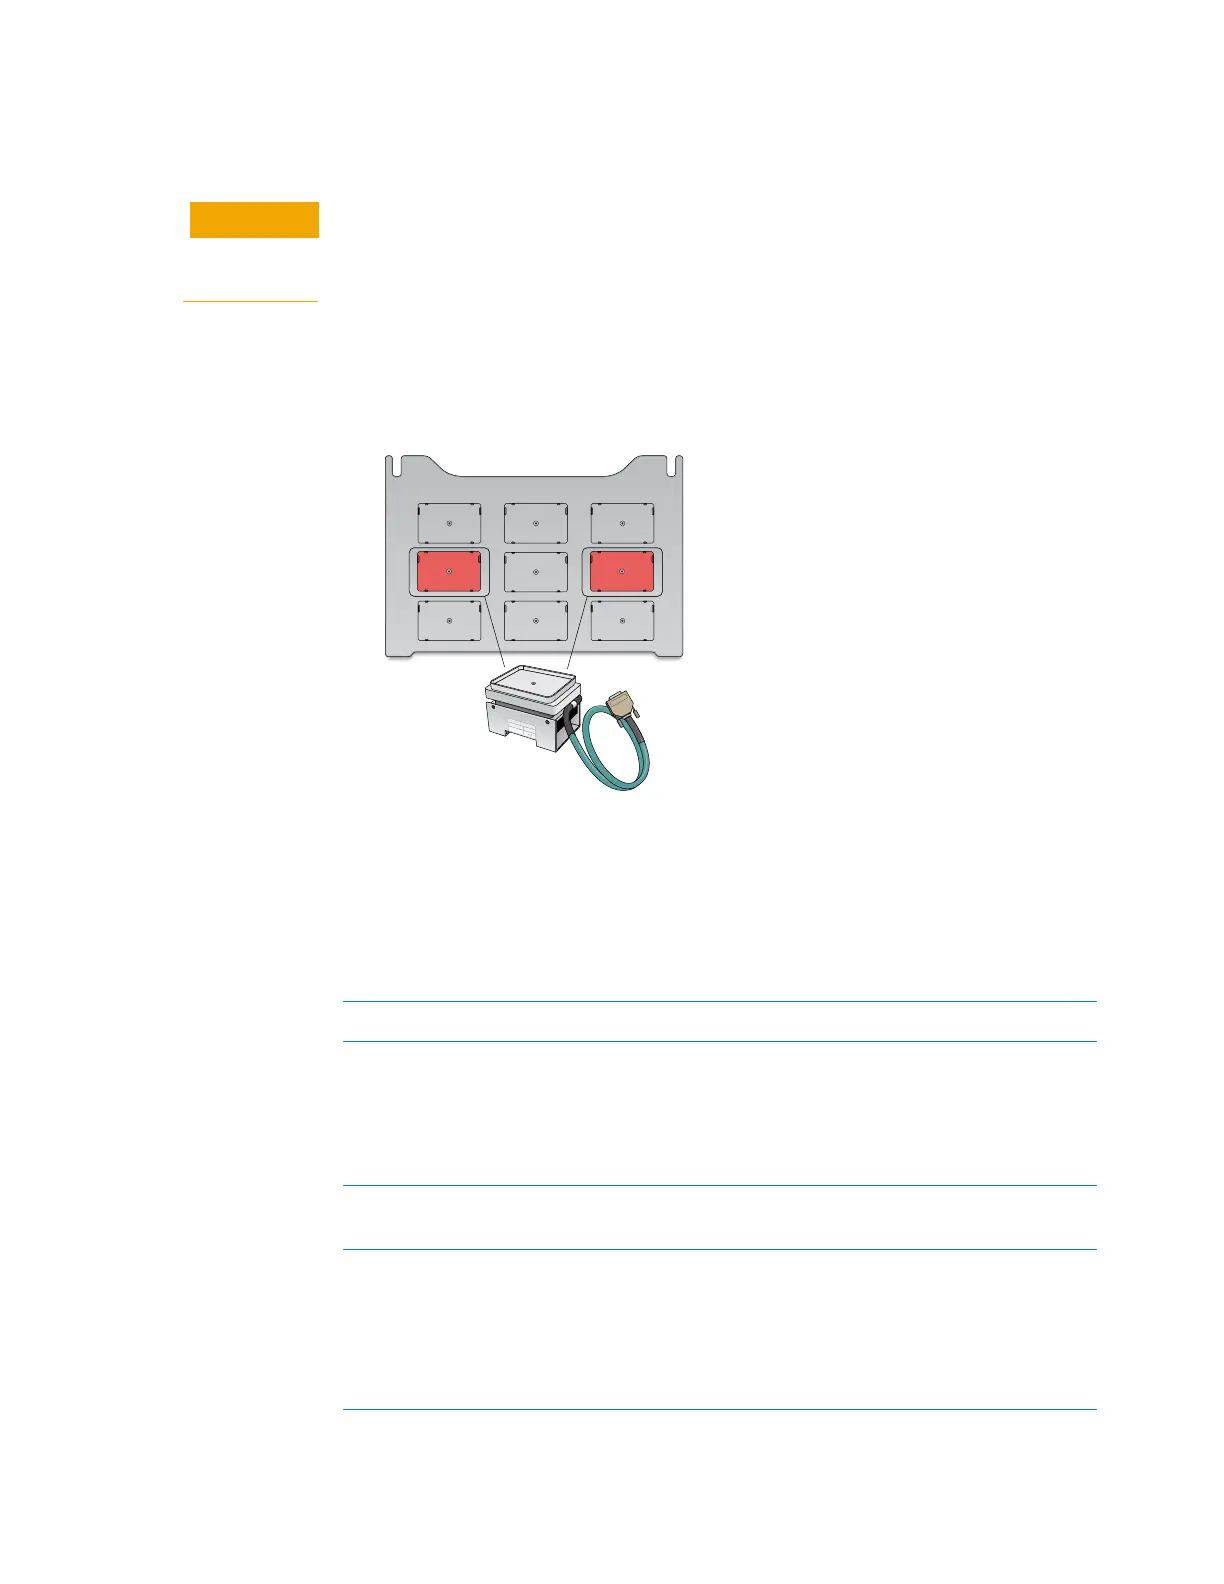
The Peltier Thermal Station is too tall to sit at deck level and must be installed in a
deck cutout at deck location 4 or 6, as the following figure shows.
• Peltier Thermal Station assembly, including four M3 bolts, four M4 bolts, and one
M3 flathead cap screw
• Hex drivers for M6 and M3 screws
• Inheco STC or MTC Controller with PCA installed for Peltier Thermal Station, power
and communication cables, and Inheco user documentation
Use the following workflow.
Step For this task... See...
1 Set up the Inheco MTC or STC
Controller.
For guidance, contact Agilent
Automation Solutions Technical
Support.
Manufacturer documentation
2 Install the Peltier Thermal Station on
the Bravo deck.
“Installing the Peltier Thermal
Station” on page 168
3 Set up the station in the software:
a Configure the station in the
Bravo profile.
b Test the station functioning.
c Set the teachpoint.
“Setting up thermal and shaking
stations (Inheco controller)” on
page 159
123
456
789
46
inheco