UG-1828 Preliminary Technical Data
Rev. PrC | Page 324 of 338
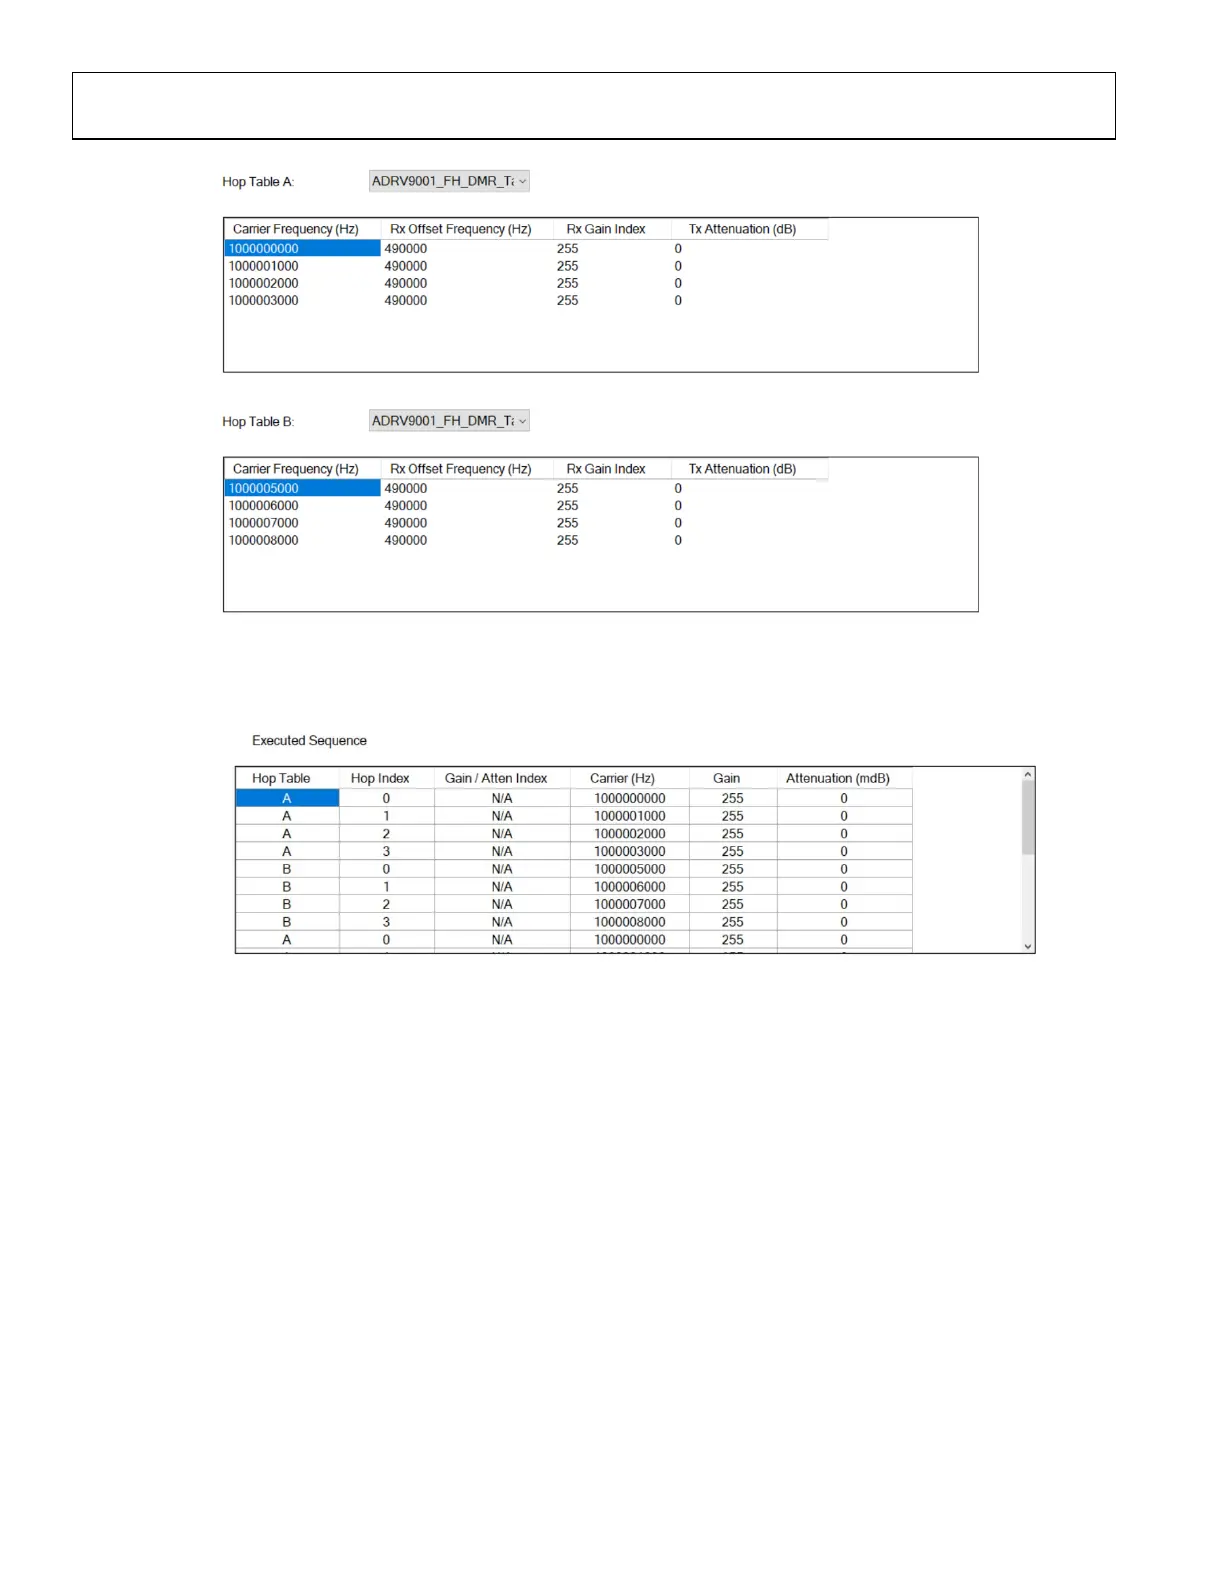
Figure 310. Frequency Hopping Tables
8. The Executed Sequence is displayed in the table at the bottom of the tab. Any changes made to the frequency hopping setting
will automatically populate this table to show the sequence that will be programmed.
Figure 311. Frequency Hopping Executed Sequence
9. Click Program.
10. Upon successful programming, go to Transmit tab and click play, a window should pop up and indicates to the user frequency
hopping is working in manual mode.
a. Commit Frame-After-Next to Rx/Tx and Perform Hop button will “commit” the “Frame-after-Next” to Rx/Tx. Notice
this is not the same as next frame, it’s the one after.
b. Scroll to Current Frame button will locate the current frame to show to the user. This is very useful if the user has a
large set of frequencies in the frequency table.
c. Each rectangle box under it shows a frequency entry in a frequency table. This includes:
i. Table being used (table A or table B)
ii. Carrier frequency
iii. Rx Gain index
iv. Rx offset frequency
v. Tx attenuation
Frequency, gain and attenuation values should match those in the tables loaded.
 Loading...