Manual, Air Module, AH2
Document #9620-20-D-AH2-09
Pinnacle Park • 1031 Goodworth Drive • Apex, NC 27539 • Tel: 919.772.0115 • Fax: 919.772.8259 • www.ati-ia.com • Email: info@ati-ia.com
D-10
12. If replacing the O-rings, lubricate both new O-rings with Magnalube G (Teon/Petroleum based
grease).
13. Install the O-rings on the plug assembly and the valve assembly.
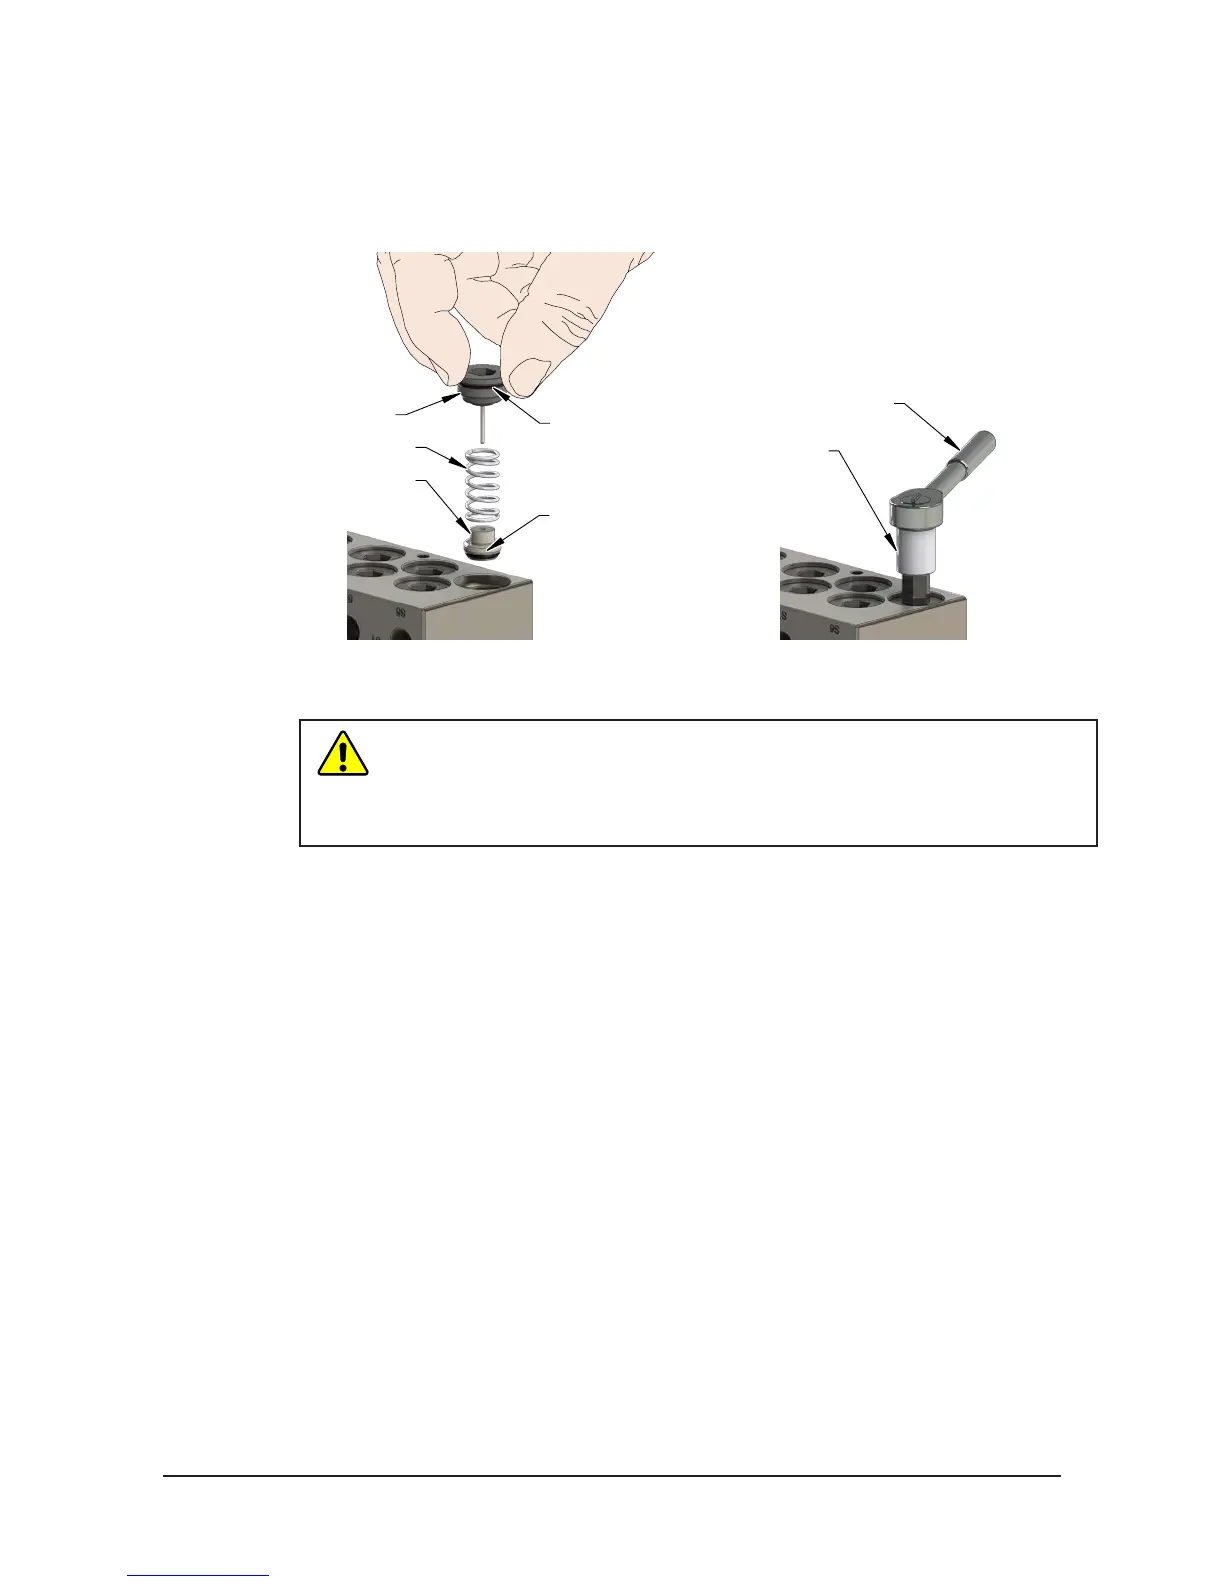
Figure 5.4—Tool Self-Sealing Valve (Assembly)
Plug Assembly
O-Ring
Spring
Valve Assembly
O-Ring
Torque Wrench
10 mm Allen Wrench
14. Install the check valve piston, make sure it is seated properly in the housing.
15. Install the spring into the housing, make sure it is installed over the step on the check valve.
CAUTION: Do not use excess force when installing the plug assembly into the
housing. Using excessive force can damage the O-ring and strip the threads
on the plug assembly. Thread the plug assembly into the Tool housing by hand,
until several threads are engaged into the housing. Then use a 10 mm Allen
wrench to complete the installation. Torque the plug to 30 in-lbs (3.39 Nm).
16. Carefully install the plug assembly aligning the dowel pin into the check valve piston. Thread
the plug assembly into the housing by hand until several threads are engaged in the housing.
17. Tighten the plug assembly using a 10 mm Allen wrench to 30 in-lbs. (3.39 Nm).
18. Verify the check valve piston is seated properly in the housing.
19. After the procedure is complete, resume normal operation.
 Loading...
