Manual, Control and Signal Module, SA2 SA3
Document #9620-20-C-SA2 SA3-04
Pinnacle Park • 1031 Goodworth Drive • Apex, NC 27539 • Tel: 919.772.0115 • Fax: 919.772.8259 • www.ati-ia.com • Email: info@ati-ia.com
C-16
Table 5.1—Troubleshooting Procedures
Symptom Possible Cause Correction
Loss of
Communication
Damaged signal cabling
Check/Replace signal cabling upstream and
downstream of Tool Changer modules.
Worn or damaged contact pins
Inspect module contact pins for debris/wear/
damage. Refer to
Section 4.1—Pin Block
Inspection and Cleaning. V-ring seal damaged
and allowing debris in the contact pins. Replace
V-ring seal, refer to
Section 5.2.1—Seal
Replacement.
Product upstream and downstream of
Tool Changer failed or damaged
Check product upstream and downstream of Tool
Changer for failure. This failure can “appear” to
be caused by the Tool Changer or affect Tool
Changer performance.
5.2 Service Procedures
The following service procedures provide instructions for component replacement and adjustment.
5.2.1 Seal Replacement
Parts Required: Referto Section8—Drawings.
The seal protects the electrical connection between the Master and Tool module. If the seal
becomes worn or damaged it needs to be replaced.
1. For a Tool Changer, place the Tool safely in the tool stand. Uncouple the Tool Changer or
Utility Coupler to allow clear access to the Master and Tool plates.
2. Turn off and de-energize all energized circuits (e.g. electrical, air, water, etc.).
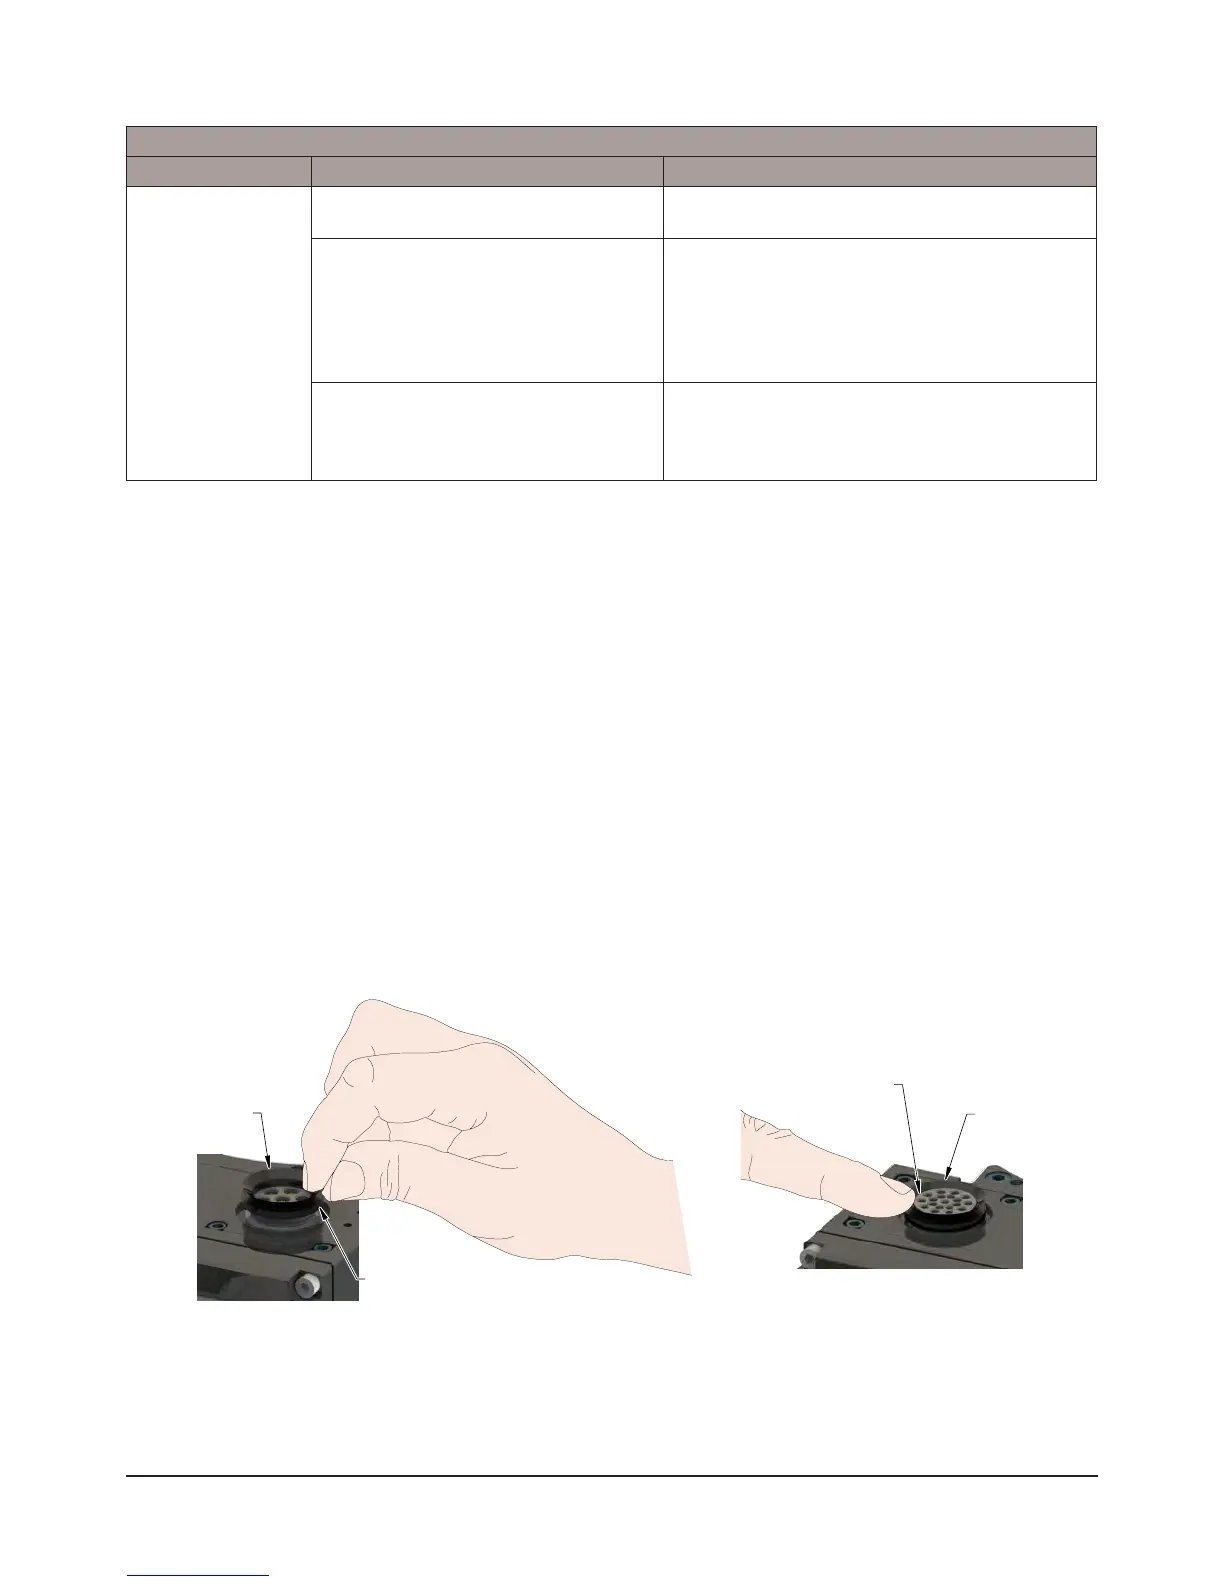
3. To remove the existing seal, pinch edge of seal with ngers and gently pull the seal away from
the pin block on the Master.
4. Pull the seal off the pin block.
5. To install a new seal, stretch the new seal over the shoulder of the pin block.
6. Push the seal’s hub down against the pin block using nger tip.
7. If repairs are complete, return circuits to normal operation.
Figure 5.1—V-ring Seal Replacement
V-ring Seal
Stretch seal over shoulder of pin block
and push seal hub down against
the pin block with finger tip
V-ring Seal
Pinch edge of seal with
fingers and gently pull
away from pin block