Manual, Control and Signal Module, SA2 SA3
Document #9620-20-C-SA2 SA3-04
Pinnacle Park • 1031 Goodworth Drive • Apex, NC 27539 • Tel: 919.772.0115 • Fax: 919.772.8259 • www.ati-ia.com • Email: info@ati-ia.com
C-14
4.1 Pin Block Inspection and Cleaning
Tools required: NylonBrush(ATIPartNumber3690-0000064-60)
1. For a Tool Changer, if the Tool Changer is installed place the Tool safely in the tool stand. Uncouple the
Tool Changer or Utility Coupler to allow clear access to the Master and Tool plates.
2. Turn off and de-energize all energized circuits (e.g. electrical, air, water, etc.).
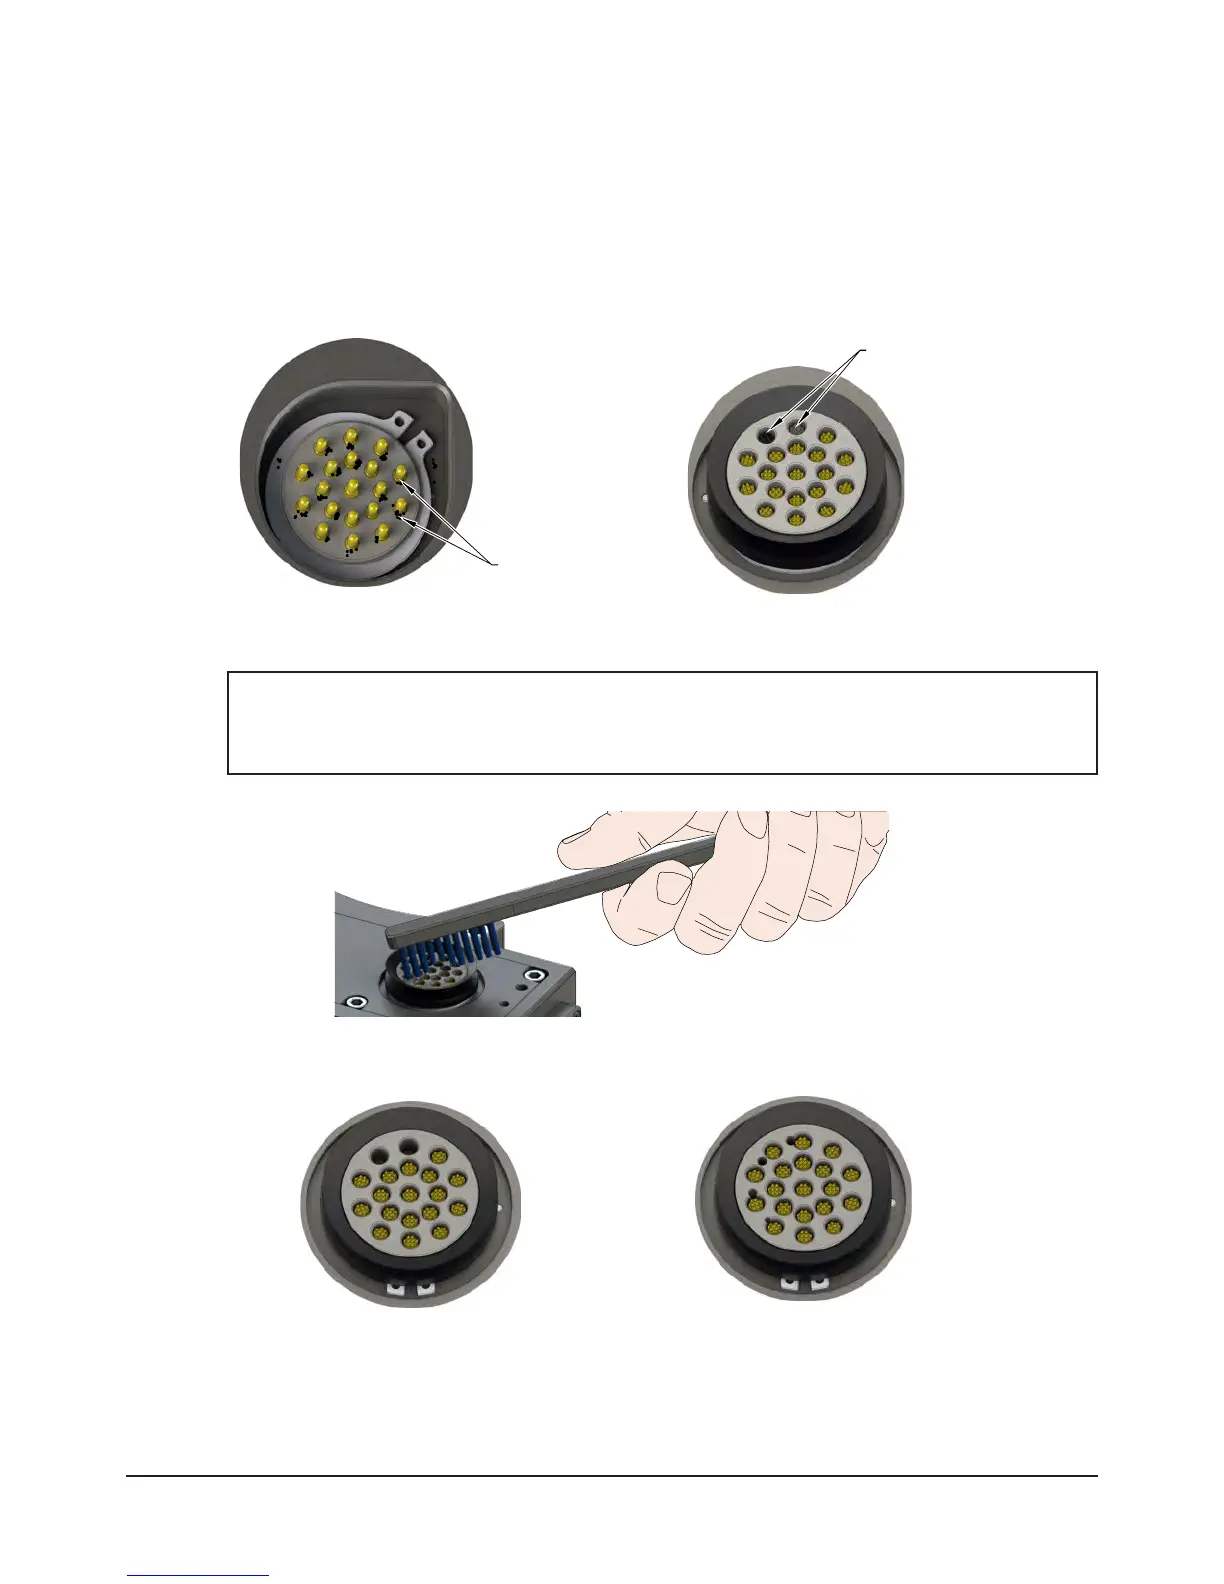
3. Inspect the Master and Tool pin blocks for any debris or darkened pins.
Figure 4.1—Inspect Master and Tool Pin Blocks
Tool Module Pin Block
Master Module Pin Block
Note: Pin blocks shown are for
illustration purposes only.
Weld Debris
Blackened Pins
4. If debris or darkened pins exist, remove debris using a vacuum, and clean using a nylon brush (ATI Part
Number 3690-0000064-60).
NOTICE: Do not use an abrasive media, cleaners, or solvents to clean the contact pins. Using
abrasive media, cleaners, or solvents will cause erosion to the contact surface or pins to stick.
Clean contact surfaces with a vacuum or non-abrasive media such as a nylon brush (ATI Part
Number 3690-0000064-60)
Figure 4.2—Clean Pin Blocks with a Nylon Brush
5. Inspect the Master and Tool pin blocks for stuck pins or severe pin block damage.
Figure 4.3—Stuck Pin and Pin Block Damage
Severe Pin Block Damage
Note: Pin blocks shown are for
illustration purposes only.
6. If stuck pins or severe pin block damage exists, contact ATI for possible pin replacement procedures or
module replacement.
7. If repairs are complete, return circuits to normal operation.